Cancel a Class Section (Before the Class is Taught)
Cancel a Class Section
Business Process: Cancel Class
Module: Student Records – Curriculum Management
Instructions:
This Job Aid will go over the process necessary to cancel class sections.
- Stop Further Enrollment/Cancel Class
- Email students
| Step | Action |
|---|---|
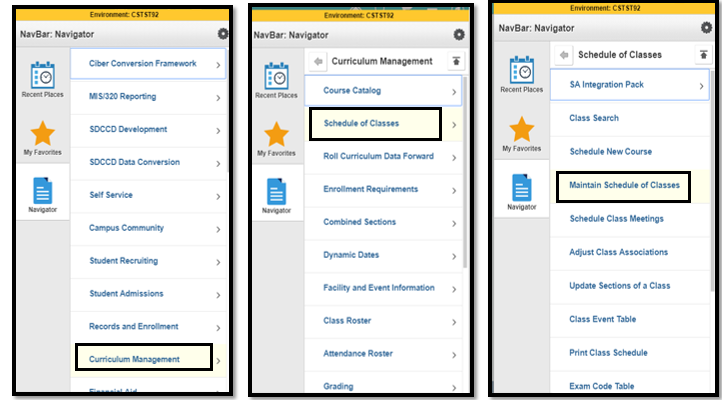
| 1. | Click on |


| Step | Action |
|---|---|
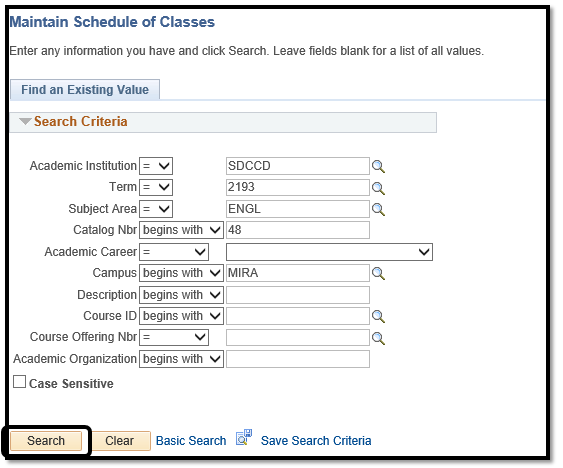
| 2. | Search for your class by adding Academic Institution, Term, Subject Area, and Catalog Nbr. Click Search. |
| Step | Action |
|---|---|
| 3. | Search results will the display below. Select your course. |

| Step | Action |
|---|---|
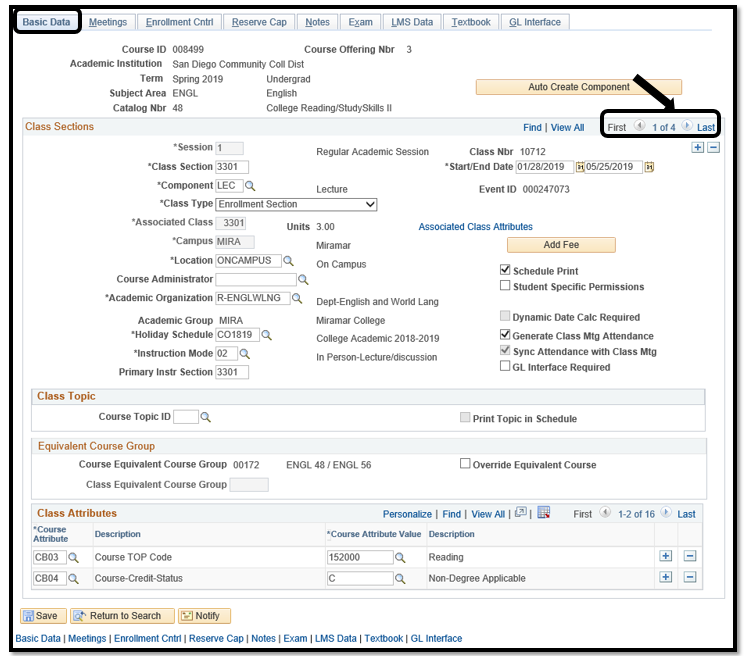
| 4. | Search for the Class Nbr that will be canceled by clicking on the left and right arrow in Class Sections. (Clicking on the arrows will display different class sections). |
| Step | Action |
|---|---|
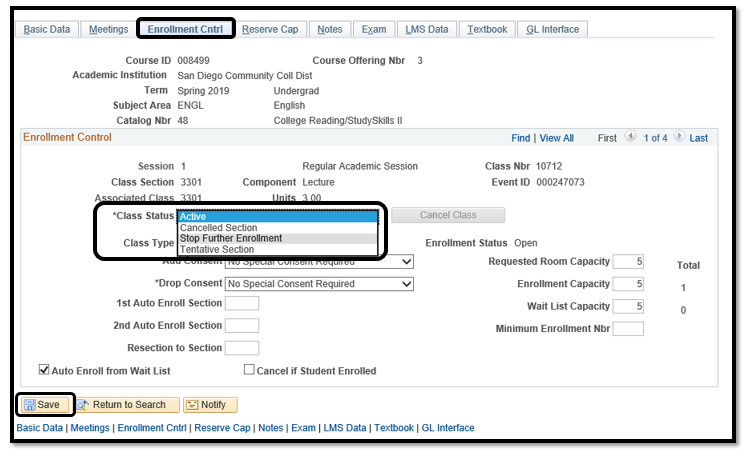
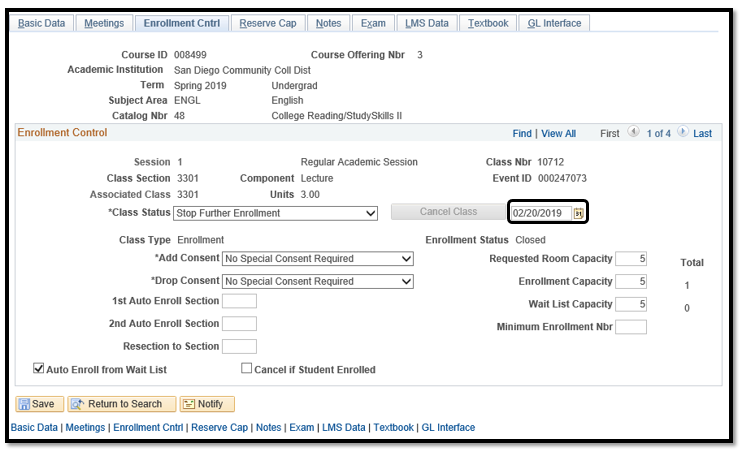
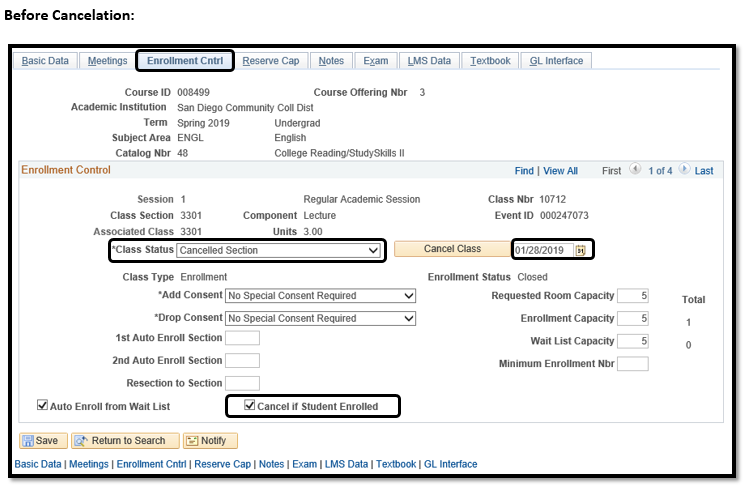
| 5. | Click on the Enrollment Cntrl tab, click on the drop down menu for *Class Status, select Stop Further Enrollment, and then Save. This step is necessary, so that more students cannot enroll into the class while you are preparing to cancel the class section. *Note: This notification for students (step 6-13) is not mandatory, since an automated cancelation email will be sent to students immediately following a canceled course. |
| Step | Action |
|---|---|
| 7. | Once you select Stop Further Enrollment, a date box will appear on the right side of Cancel Class. If date is different from today’s date, do not change the date until you are ready to cancel the class. This comes later. |
| Step | Action |
|---|---|
| 8. | To inform students, click on New Window hyperlink on the top right hand corner. |

| Step | Action |
|---|---|
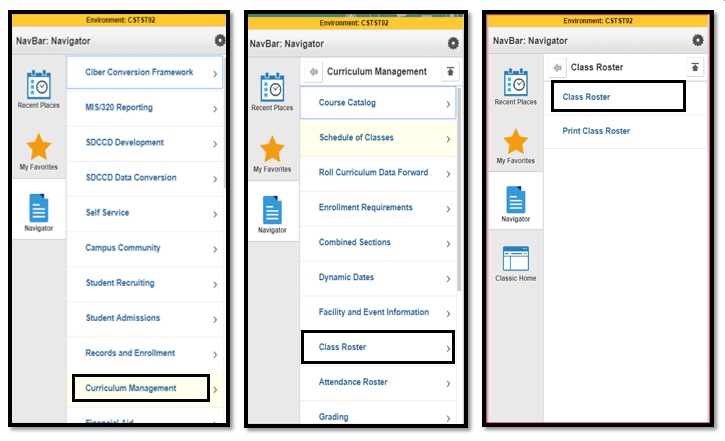
| 9. | To inform students of the class cancellation, Navigate to Curriculum Management → Class Roster → Class Roster (Having class information will be helpful: Term, Subject, Catalog Nbr, and Class Number) |
| Step | Action |
|---|---|
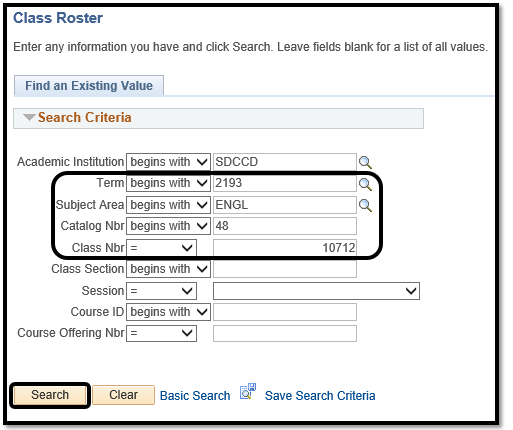
| 10. | Enter in class information: Term, Subject, Catalog Nbr, and Class Nbr. Click Search. You will be taken to the Class Roster Page upon clicking the Search button. |

| Step | Action |
|---|---|
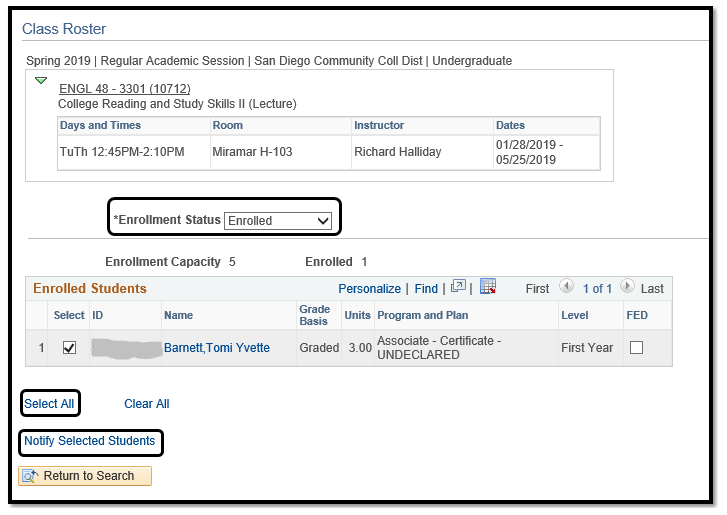
| 11. | From the Enrollment Status dropdown menu, select All (change from Enrolled to All) if the option is available. By selecting All, ALL students, including waitlisted students will receive a notification -or- Click on the Select All link below to select all students. |
| 12. | Click on Notify Selected Students. |
| Step | Action |
|---|---|
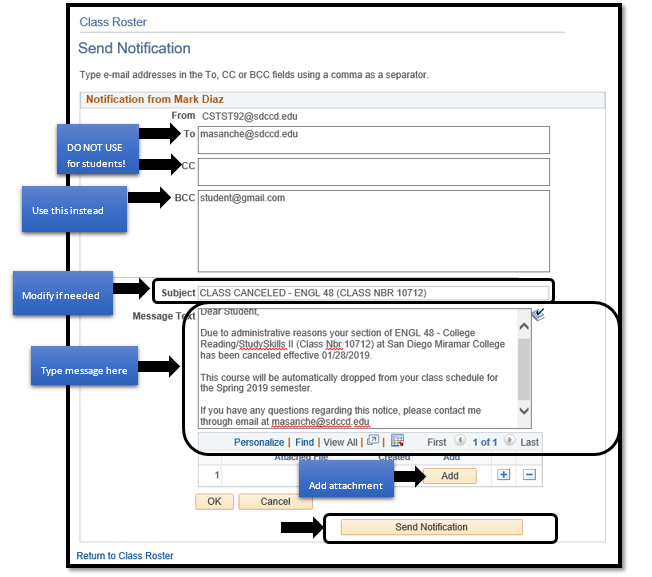
| 13. | Cut any student emails in the To field and paste them in the BCC field. Input email for Department Chairs and Instructors in the BCC field; update Subject field if necessary and add your message in the Message Text box. You are able to add attachments if necessary then click on Send Notification. |
| Step | Action |
|---|---|
| 14. | Return to Maintain Schedule of Classes to continue to cancel the class section.
|

| Step | Action |
|---|---|
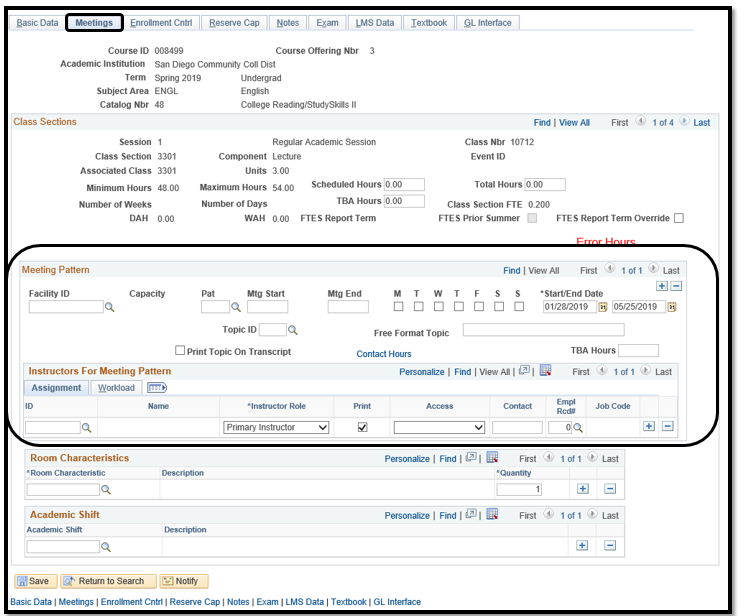
| 15. | Notice cancellation removes all data from Meetings tab, including Meeting Pattern and Instructors for Meeting Pattern. |
| Step | Action |
|---|---|
| 16. | End of job aid. |