Scheduling An Open Entry/ Exit Class
Scheduling An Open Entry/ Exit Class
Business Process: Scheduling An Open Entry/ Exit Class
Module: Curriculum Management
Prerequisites:
Reference Create a New Class Section Job Aid and Special Designator Job Aid
Instructions:
This Job Aid will go over the process of scheduling a class with special designator of open entry/exit class.
| Step | Action |
|---|---|
| 1. | Navigate to Curriculum Management -> Schedule of Classes -> Schedule New Course. |
| 2. | On the Basic Data tab, navigate to the bottom to page under Class Attributes, and click Last hyperlink on the right hand side. Then click the plus icon |


| Step | Action |
|---|---|
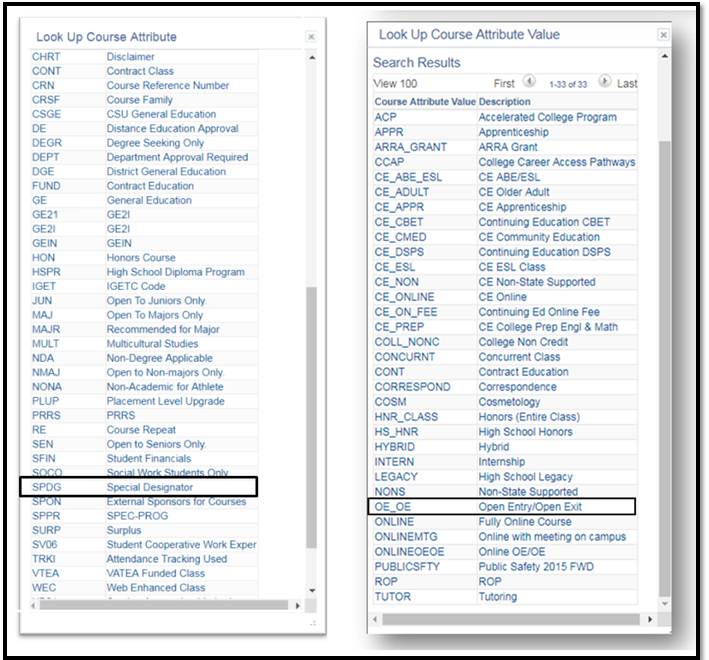
| 3. | On the new row, under Course Attribute, enter “SPDG” for Special Designator and tab out or click on the magnifying glass icon |
| 4. | Click on the magnifying glass icon |


| Step | Action |
|---|---|
| 5. | If course requires tracking, tracking courses attribute need to be added. Under the Special Designator course attribute line, click the icon to add new row. A blank row will appear below. |

| Step | Action |
|---|---|
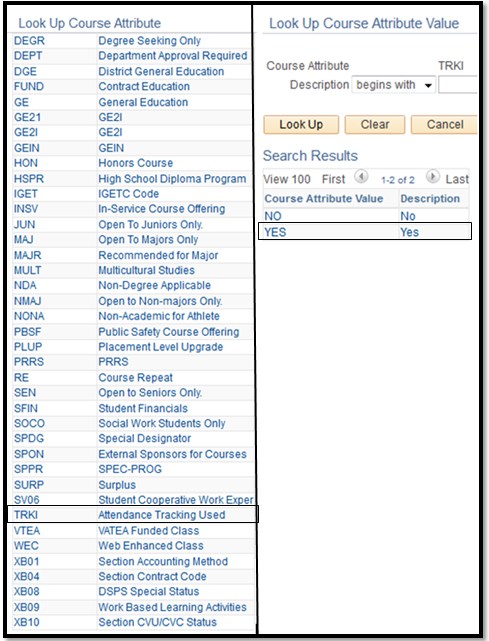
| 6. | On the new row, under Course Attribute, enter “TRKI” for “Attendance Tracking Used” and tab out or click on the magnifying glass icon |
| 7. | Click on the magnifying glass icon |

| Step | Action |
|---|---|
| 8. | On the Meetings Tab, scheduler must double the Maximum Hours in the TBA Hours section. Click Save below. Notice there will be an Error Hours that shows; that is okay. |

| Step | Action |
|---|---|
| 9. | End of job aid. |