Scheduling Learning Community Sections
Scheduling Learning Community Sections
Business Process: Scheduling learning community sections
Module: Curriculum Management
Instructions:
This Job Aid will go over the process necessary to create Learning Community sections: LCOM shell and individual sections.
| Step | Action |
|---|---|
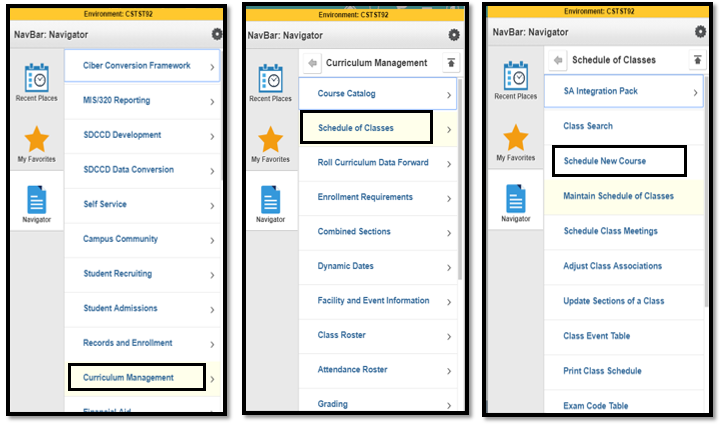
| 1. | Click on |


| Step | Action |
|---|---|
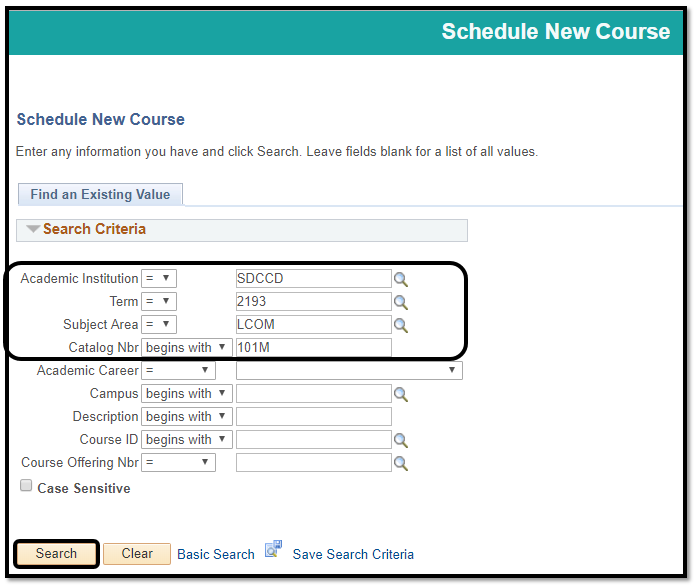
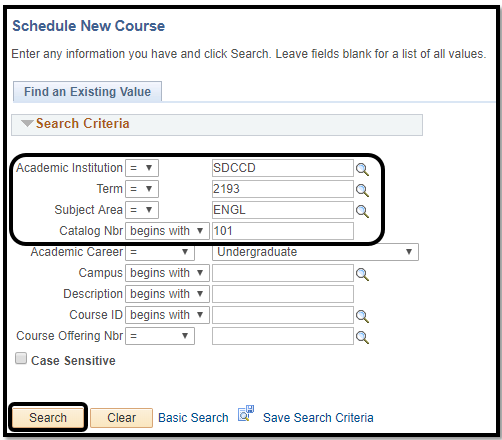
| 2. | On Schedule New Course page input the Term, Subject and Catalog Number. Click Search. |
| Step | Action |
|---|---|
| 3. | The Search Results will generate the courses based on the criteria input. Select the appropriate course and campus by clicking it. |

| Step | Action |
|---|---|
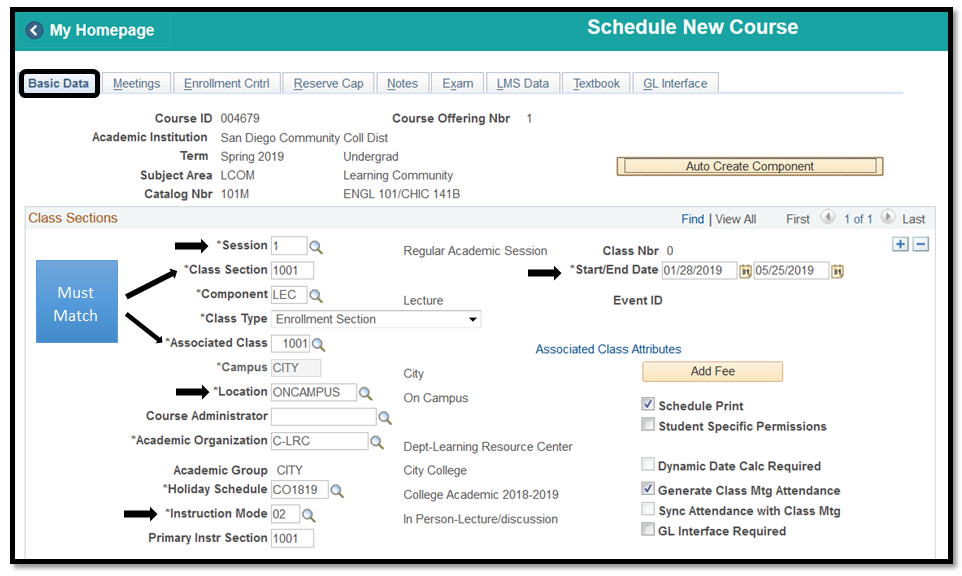
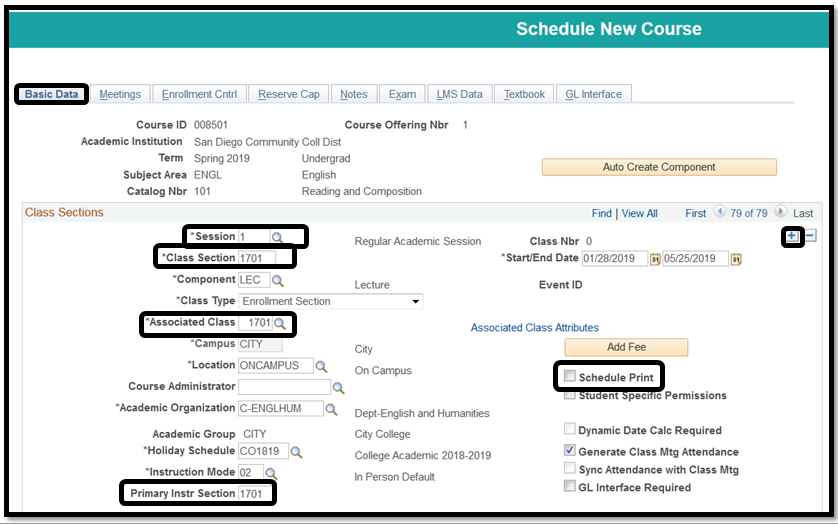
| 4. | The page below displays after selecting the offering campus. Fill in class information on the Basic Data tab (*Session, *Class Section, *Associated Class, *Instruction Mode). |
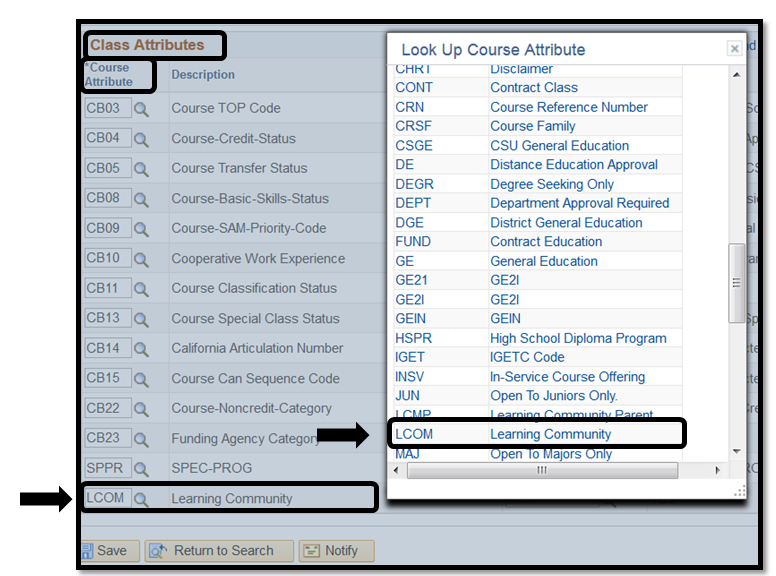
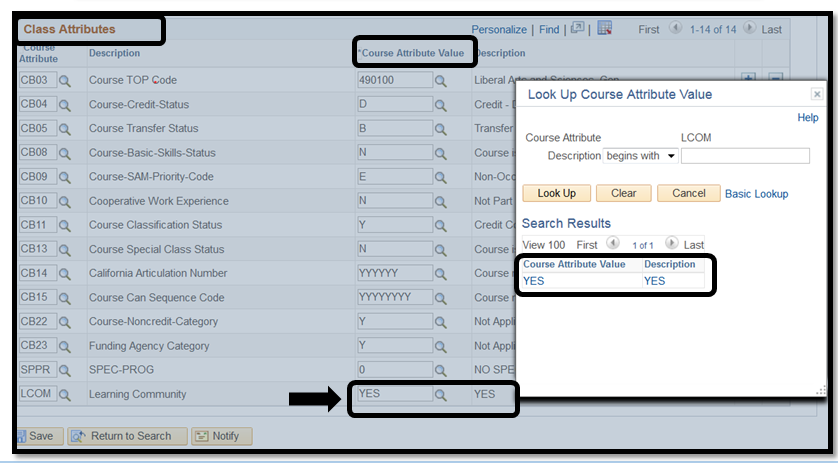
| 5. | Add a Class Attribute by first clicking |

| Step | Action |
|---|---|
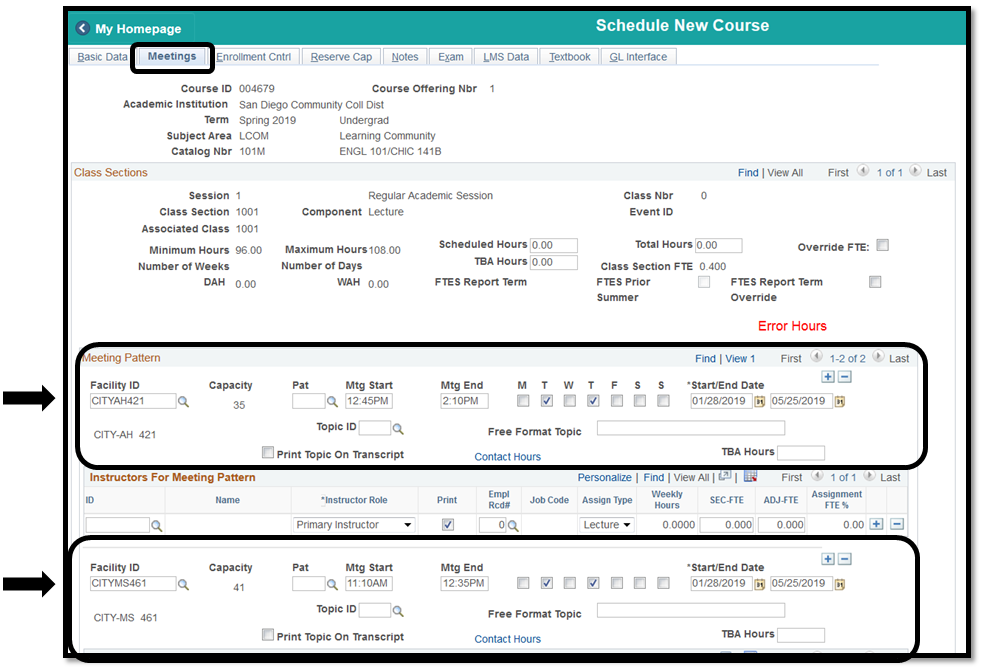
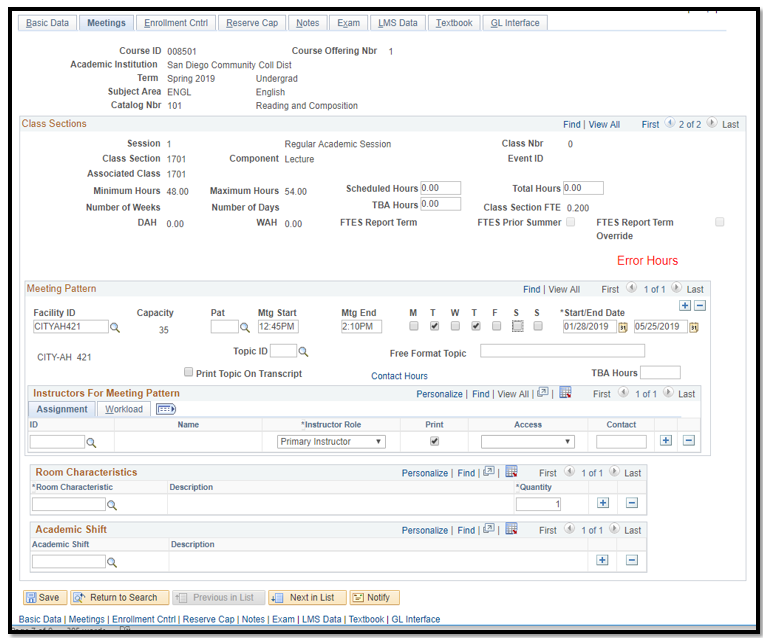
| 6. | On the Meetings tab, enter Meeting Patterns for both of the classes. Note: No instructors can be added to the parent class because this is NOT an actual subject. Instructors will be added to the ‘child’ classes. |
| Step | Action |
|---|---|
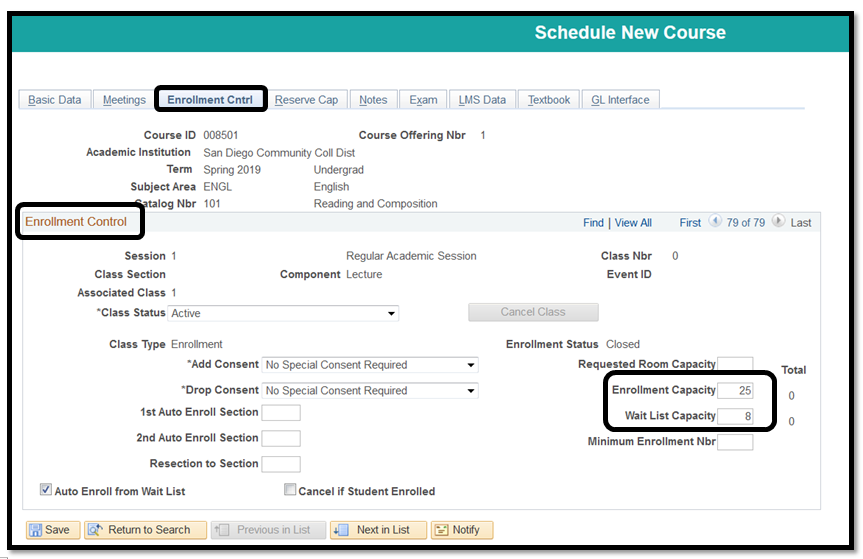
| 7. | On the Enrollment Cntrl tab, add Enrollment Capacity, Wait List Capacity and Instructor Consent Required if program requires restriction. |
| Step | Action |
|---|---|
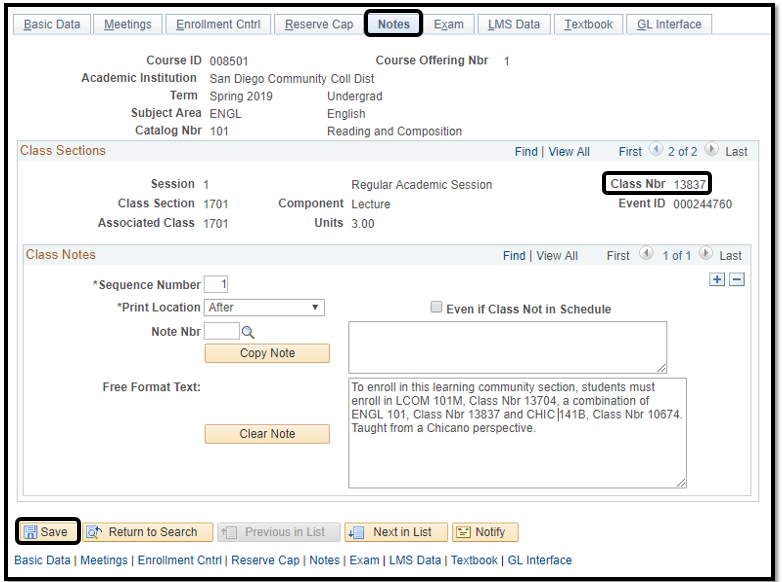
| 8. | On the Notes tab, add class note and Save. Make note of your Class Nbr to add into the Class Notes section of the individual 'child' classes. It is recommended to add the instructors name and email address in the notes so students are able to contact the instructors for the classes. |
| Step | Action |
|---|---|
| 9. | Click Return to Search to create the individual class sections. |
| 10. | Input the Term, Subject and Catalog Number. Click Search. |
| Step | Action |
|---|---|
| 11 | Search Results will generate the courses based on the criteria input. Select the appropriate campus. |

| Step | Action |
|---|---|
| 12. | On the Basic Data tab, if there are other classes already scheduled click on to add a new section under the Class Sections section. |
| 13. | Setup Basic Data tab as usual except Class Section, Associated Class and Primary Instr Section numbering will be 1701+ for City, 2701+ for Mesa, and 3701+ for Miramar. This numbering is to help identify Learning Community classes easily among non-Learning Community classes. Uncheck Schedule Print to remove the class from the printed schedule. NOTE: This Job Aid displays an example for a City College Class. |
| Step | Action |
|---|---|
| 14. | On the Meetings tab, input data as usual. |
| Step | Action |
|---|---|
| 15. | On the Enrollment Cntrl tab, enter Enrollment Capacity, and Wait List Capacity. Recommended to NOT put ‘Instructor Consent Required’ in the *Add Consent box. Restricting classes make it difficult for Admissions to manually enroll students into the class from the parent class. |
| Step | Action |
|---|---|
| 16. | On the Notes tab, add class note. Be sure Class Nbrs match for all linked Class Notes. Click Save. Repeat steps 8-16 to add the next linked section. |
| Step | Action |
|---|---|
| 17. | End of job aid. |