CM_005 - Course Catalog - Inactivate a Course
Course Catalog - Inactivate a Course
Business Process: Course Catalog
Module: Curriculum Management
Prerequisites
Enter prerequisites here.
Instructions
Enter instructions here.
Step | Action |
|---|---|
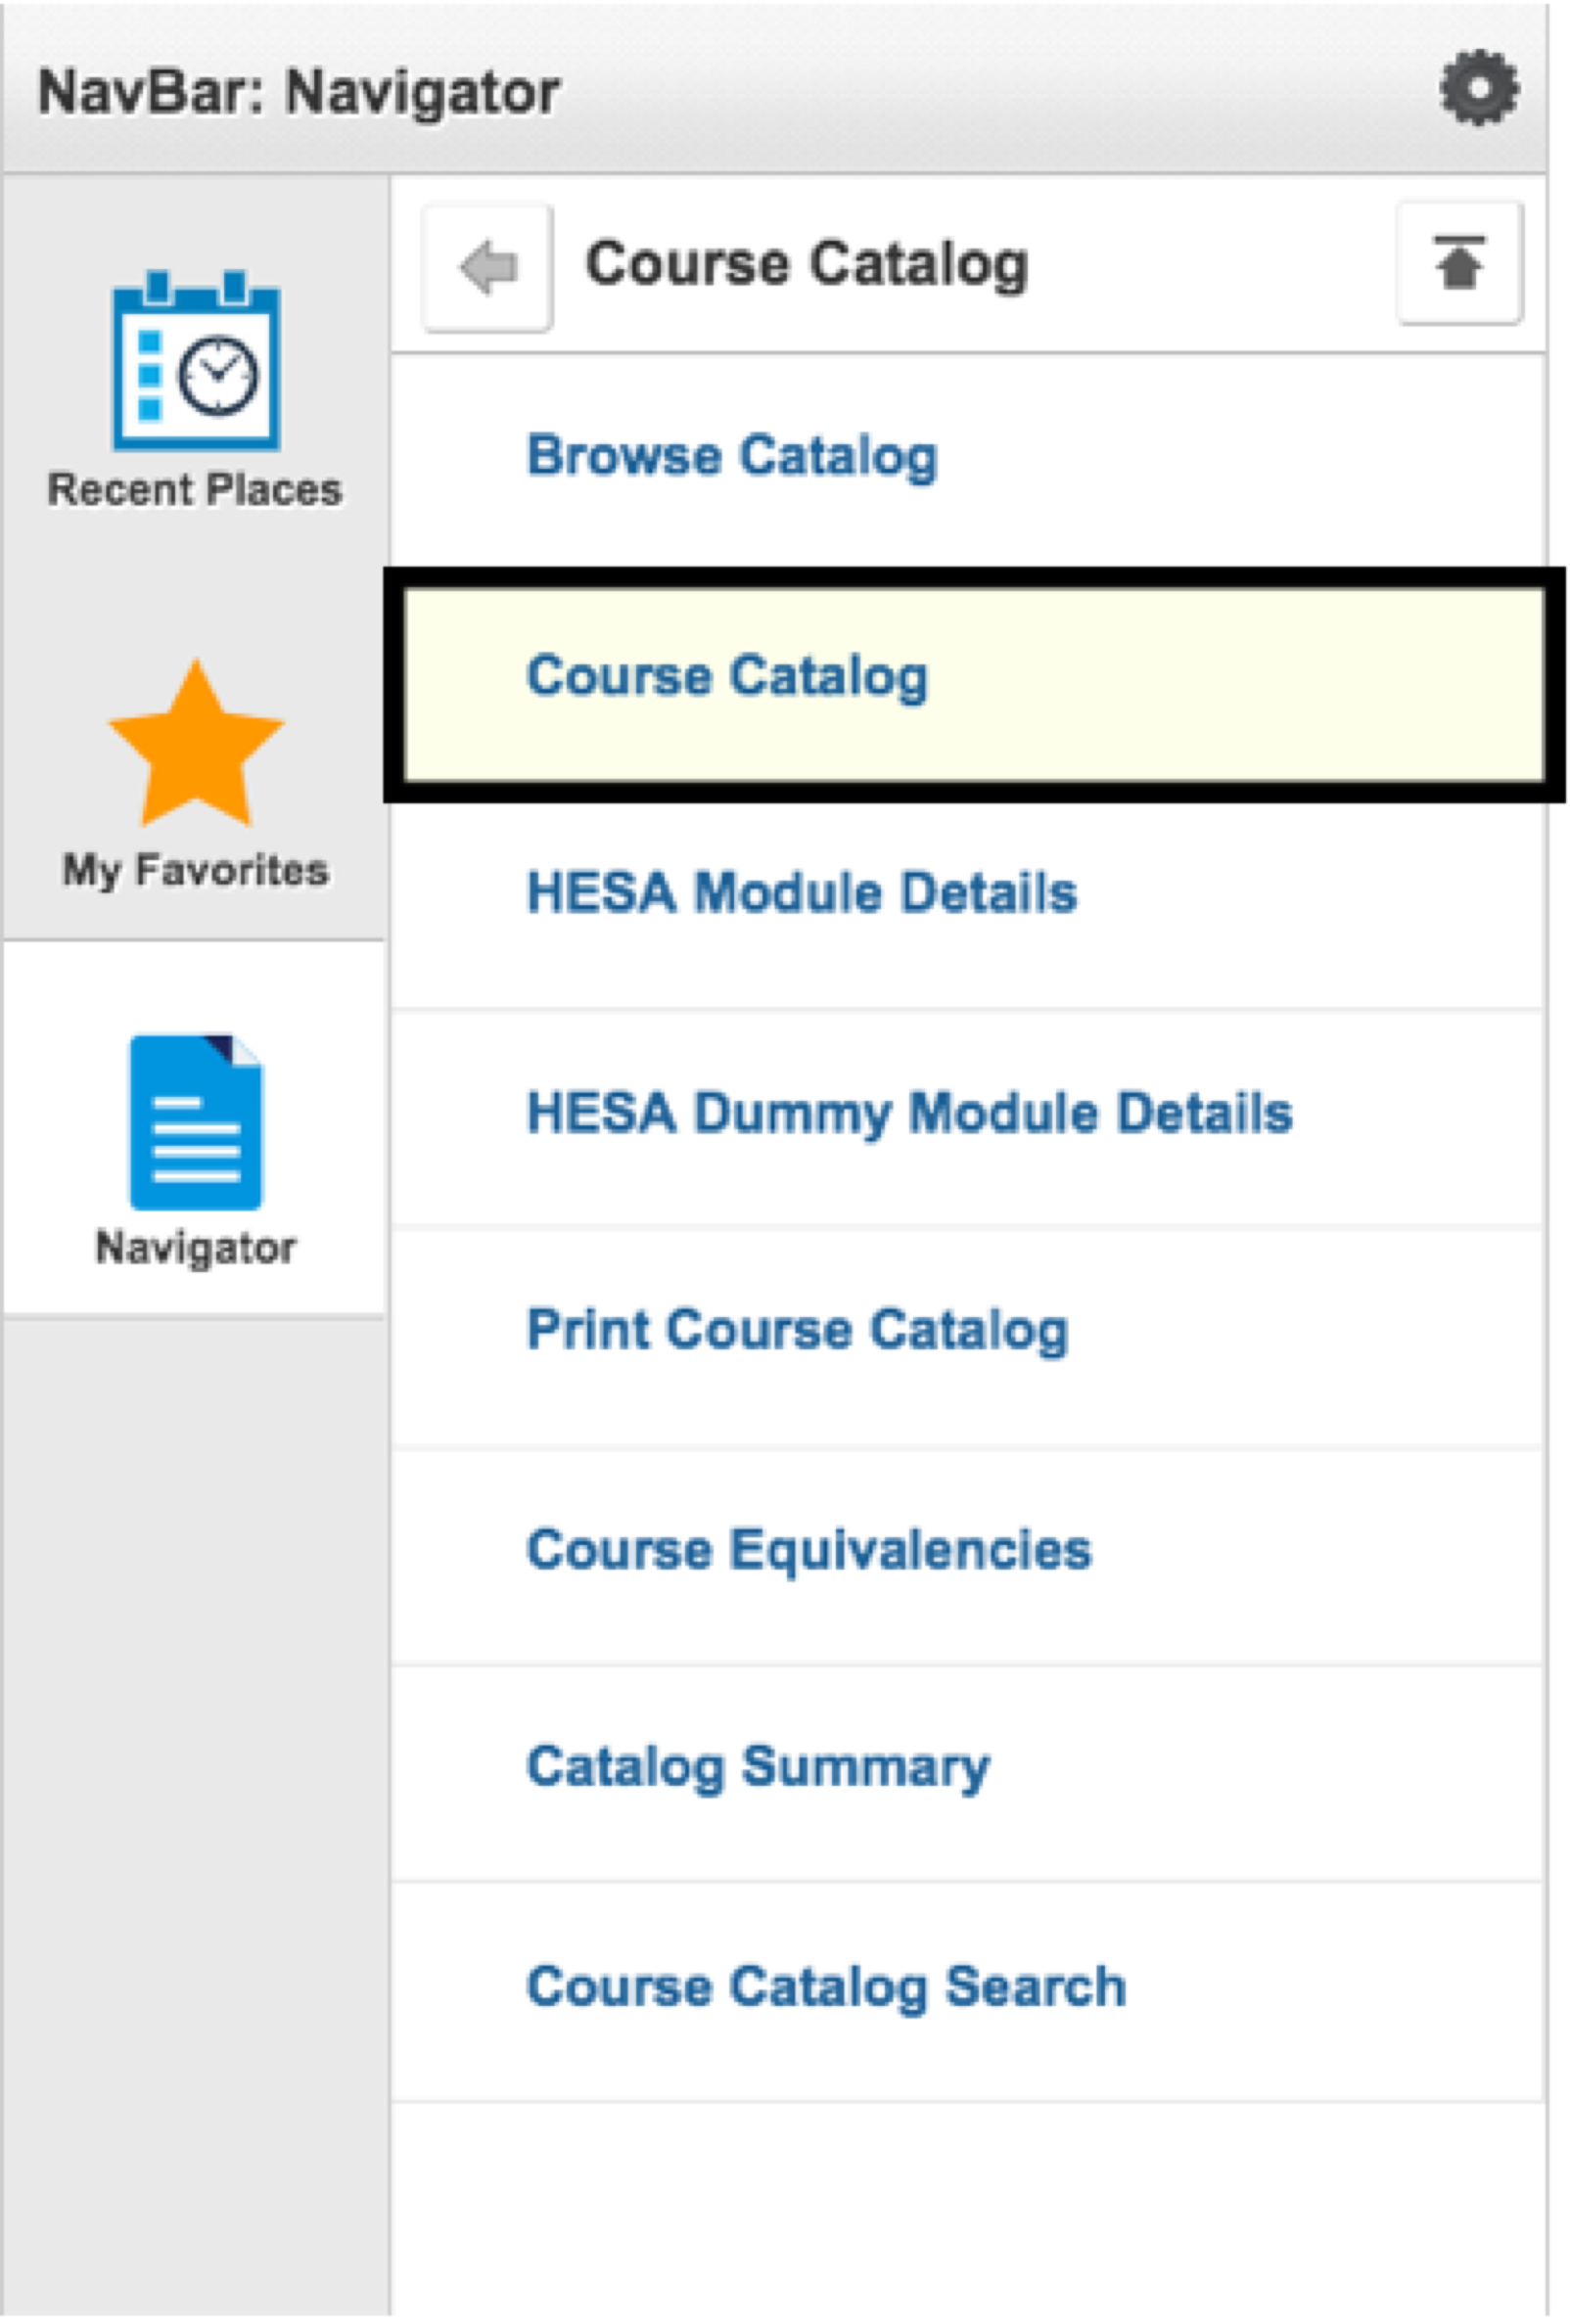
1. | Navigate to Curriculum Management → Course Catalog → Course Catalog. |
Step | Action |
|---|---|
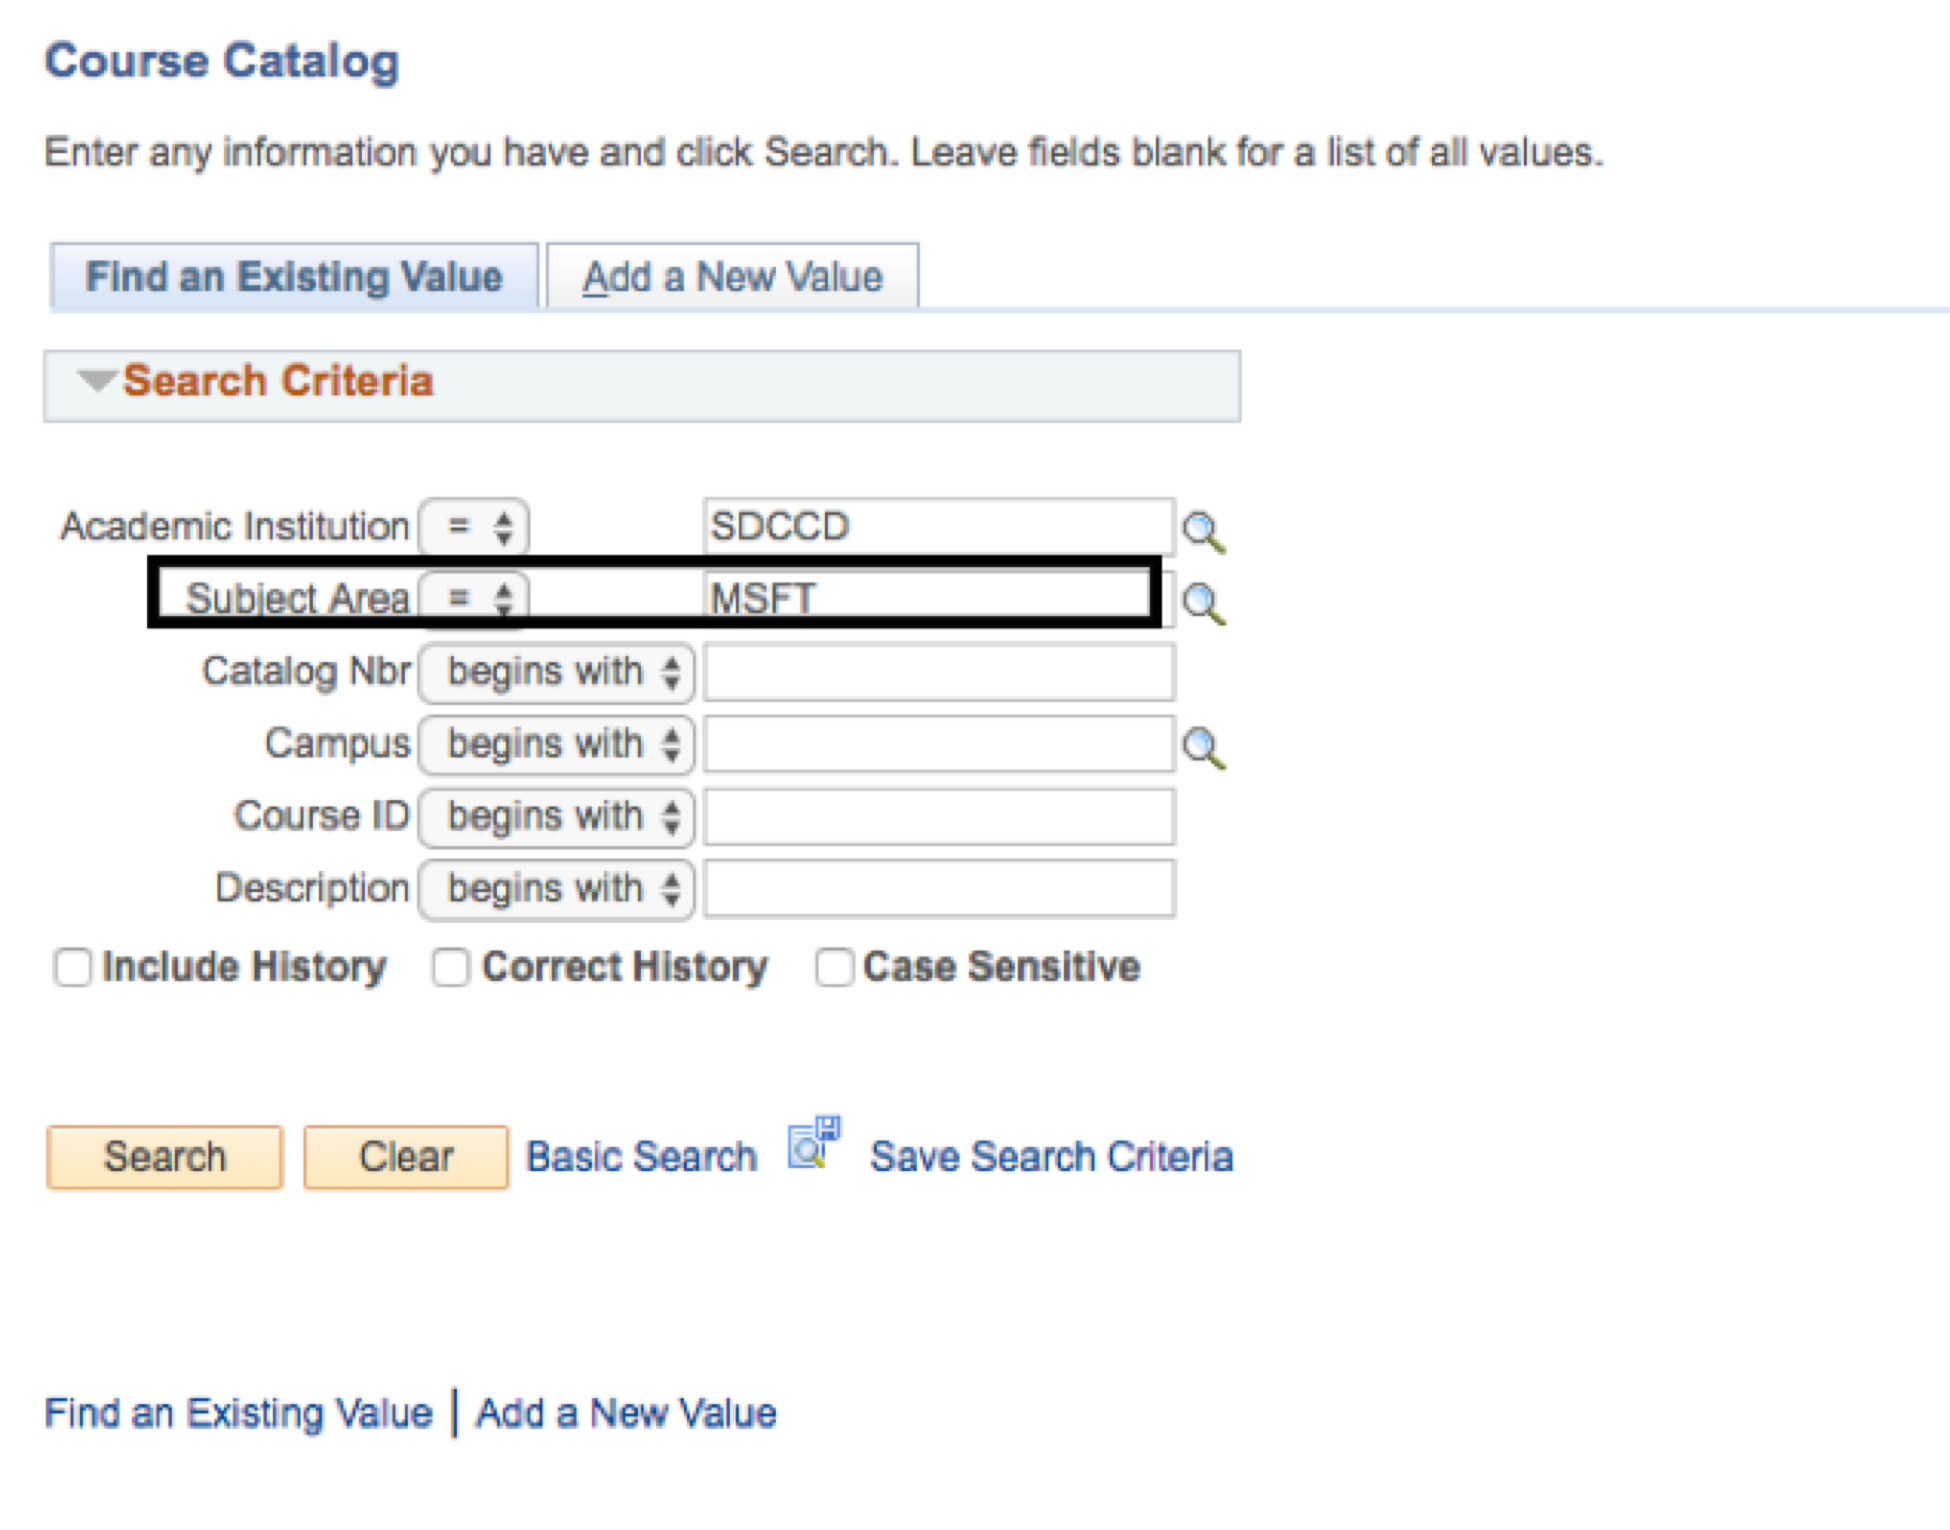
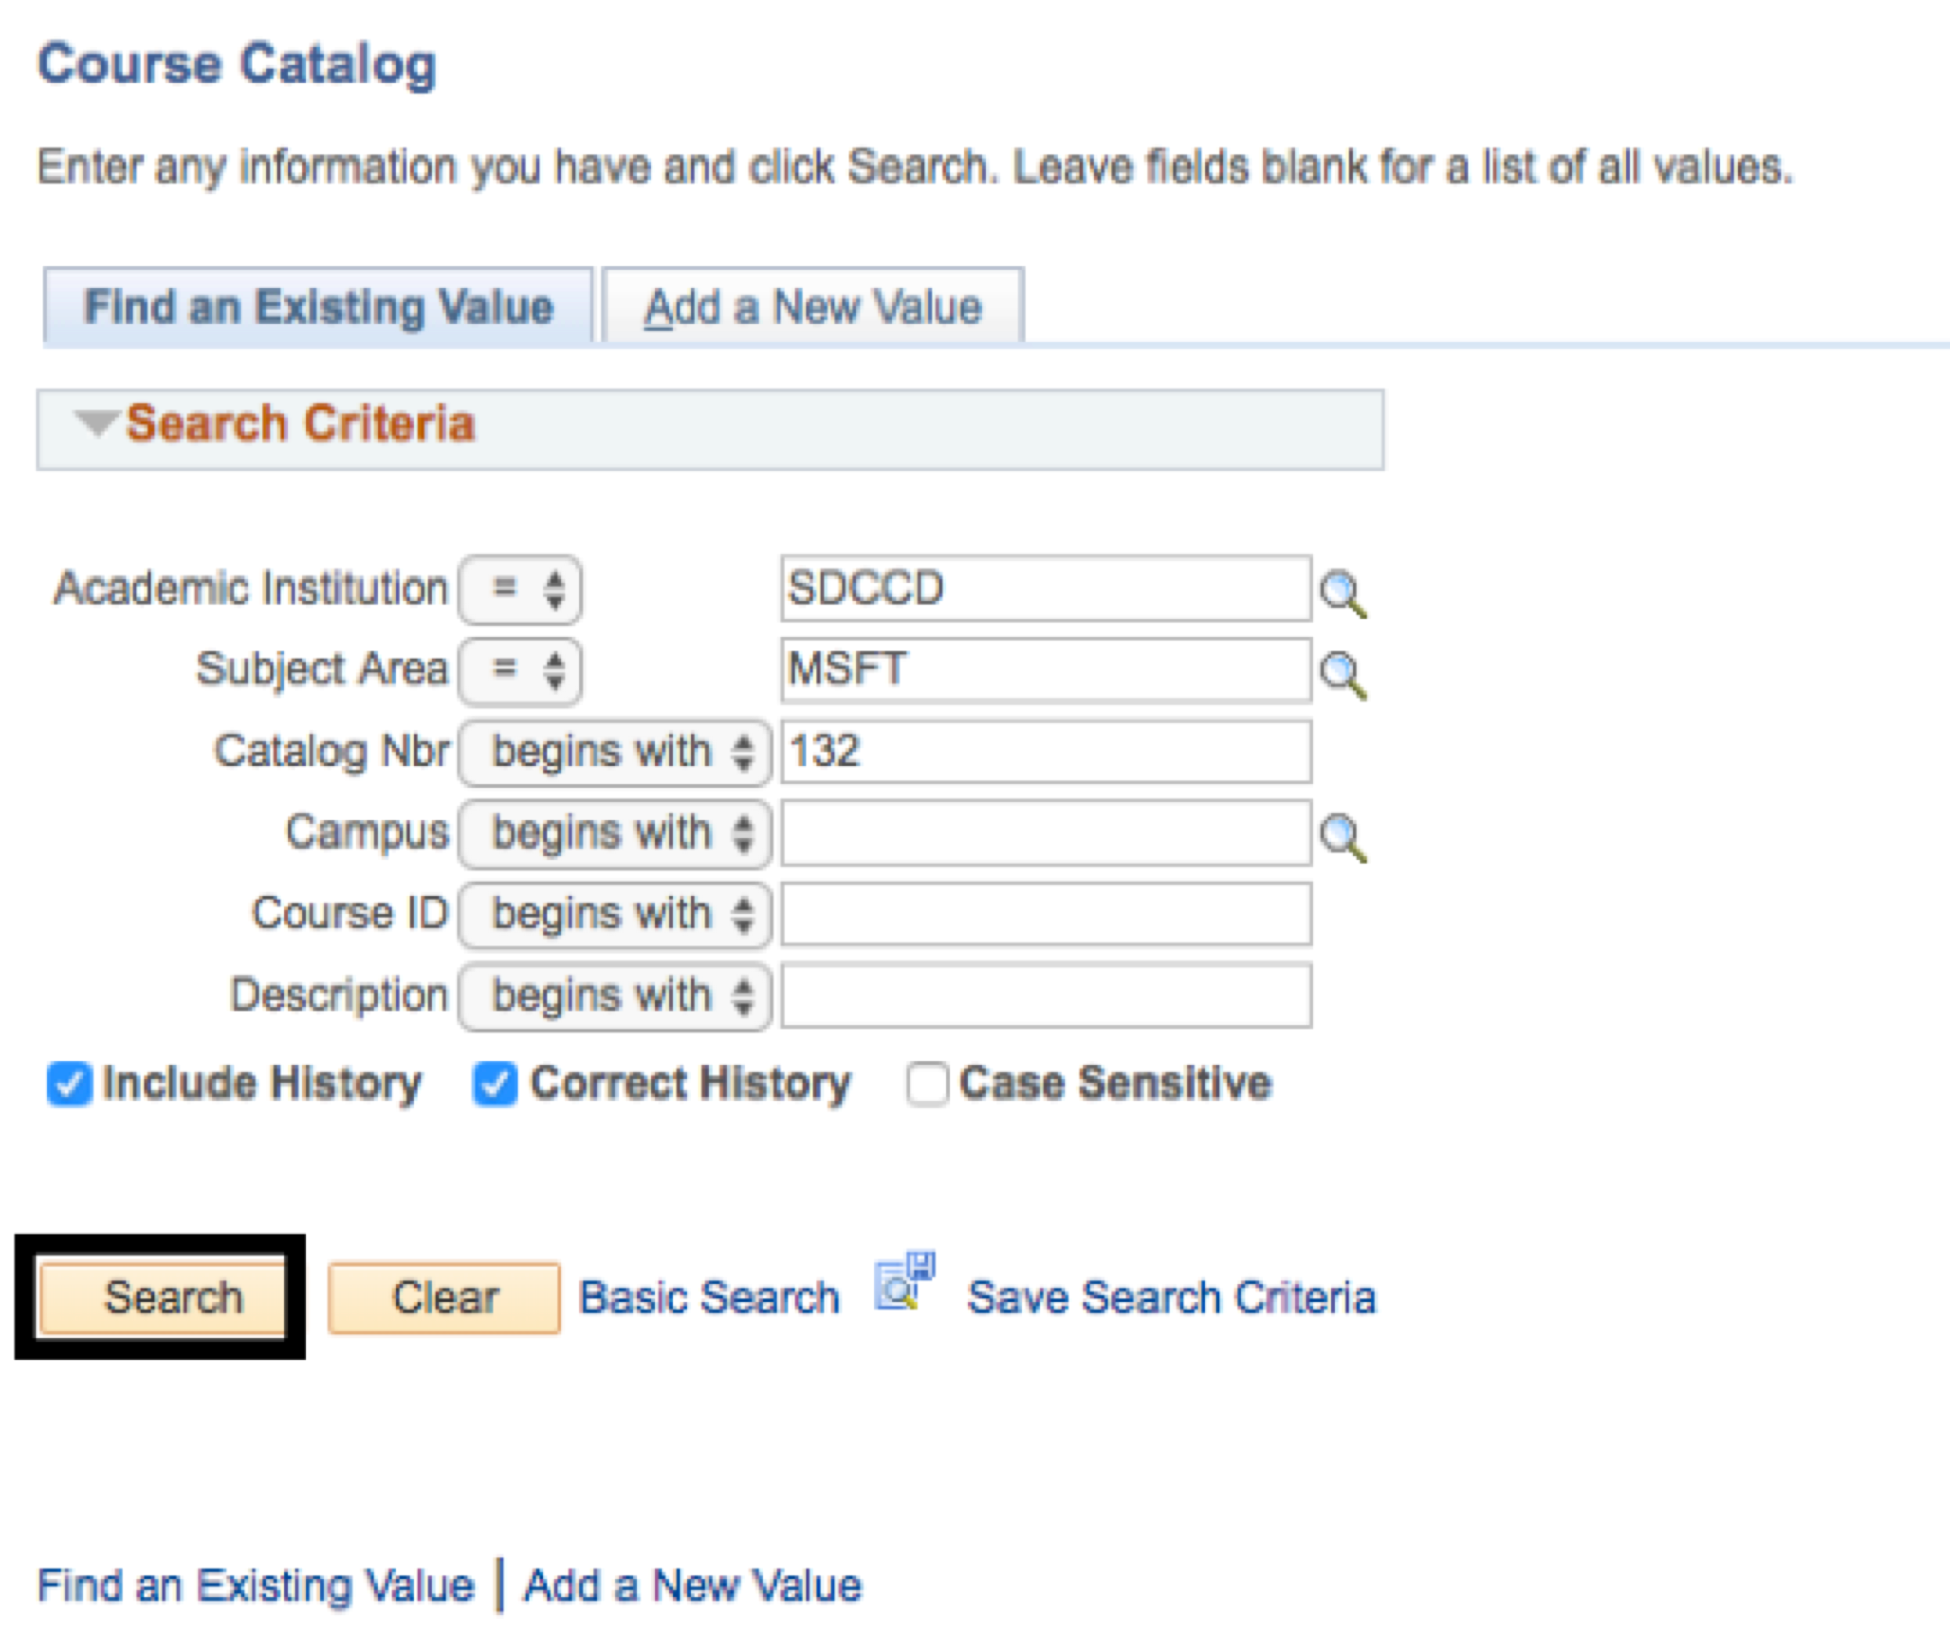
2. | In the Find an Existing Value tab, enter information into the Subject Area field. Note: Academic Institution field will automatically populate with SDCCD. |
| Step | Action |
|---|---|
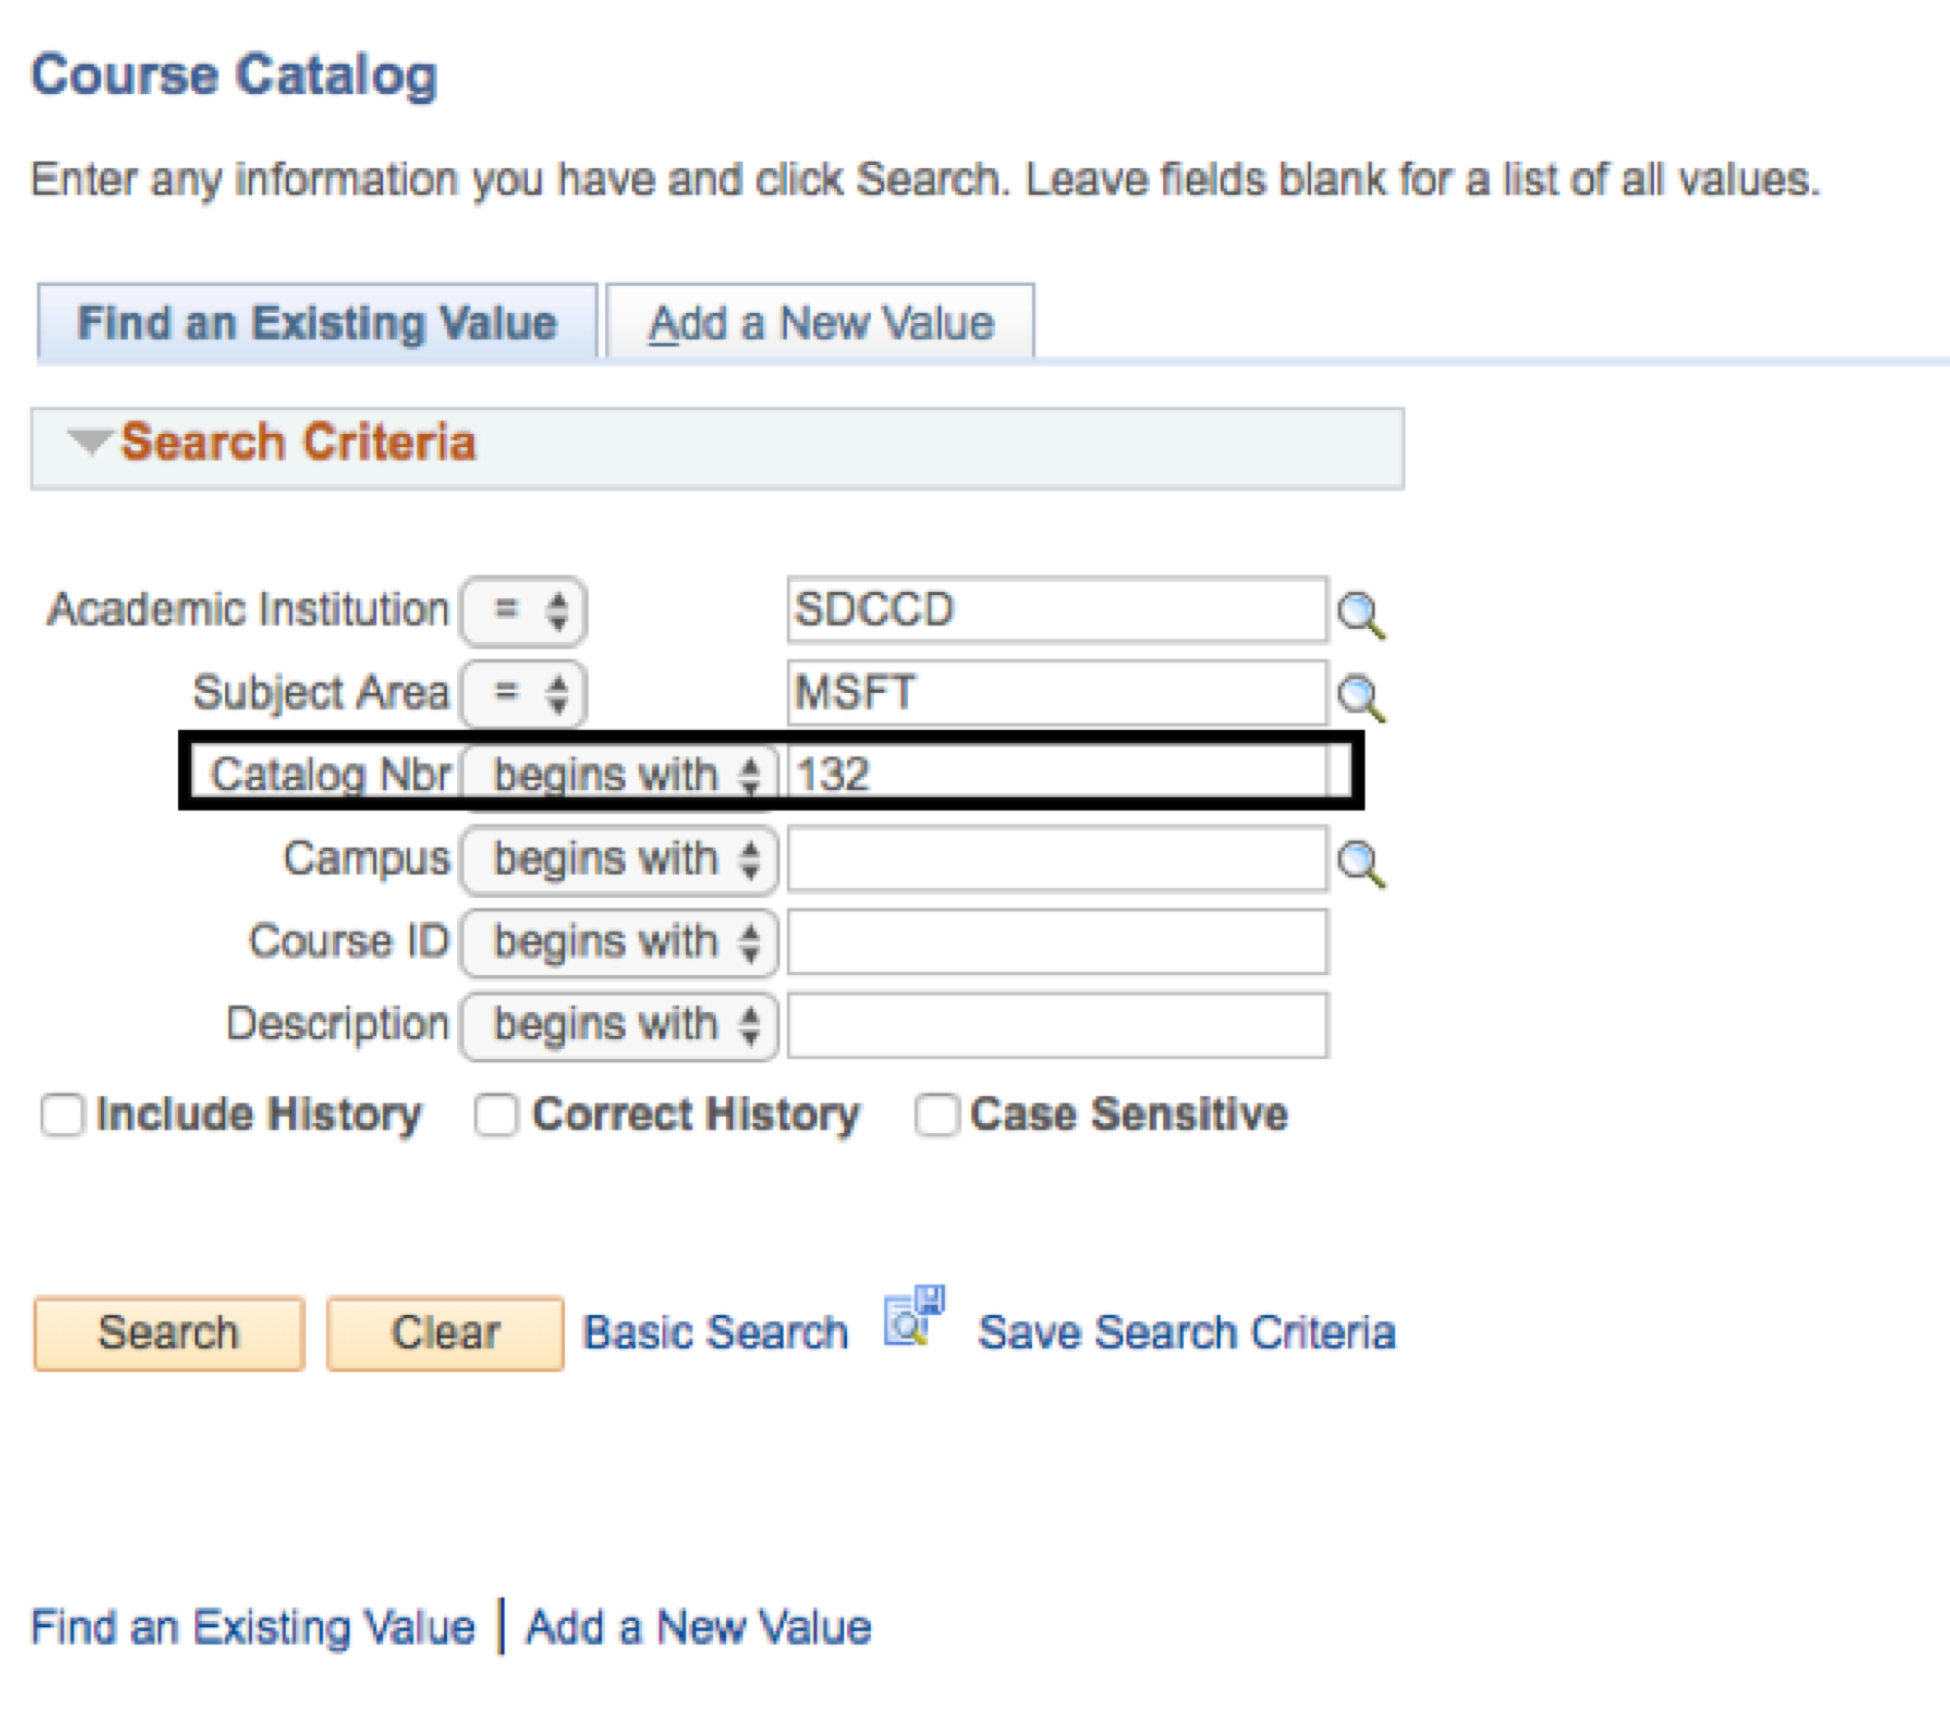
| 3. | In the Catalog Nbr field, type in the catalog number. |
| Step | Action |
|---|---|
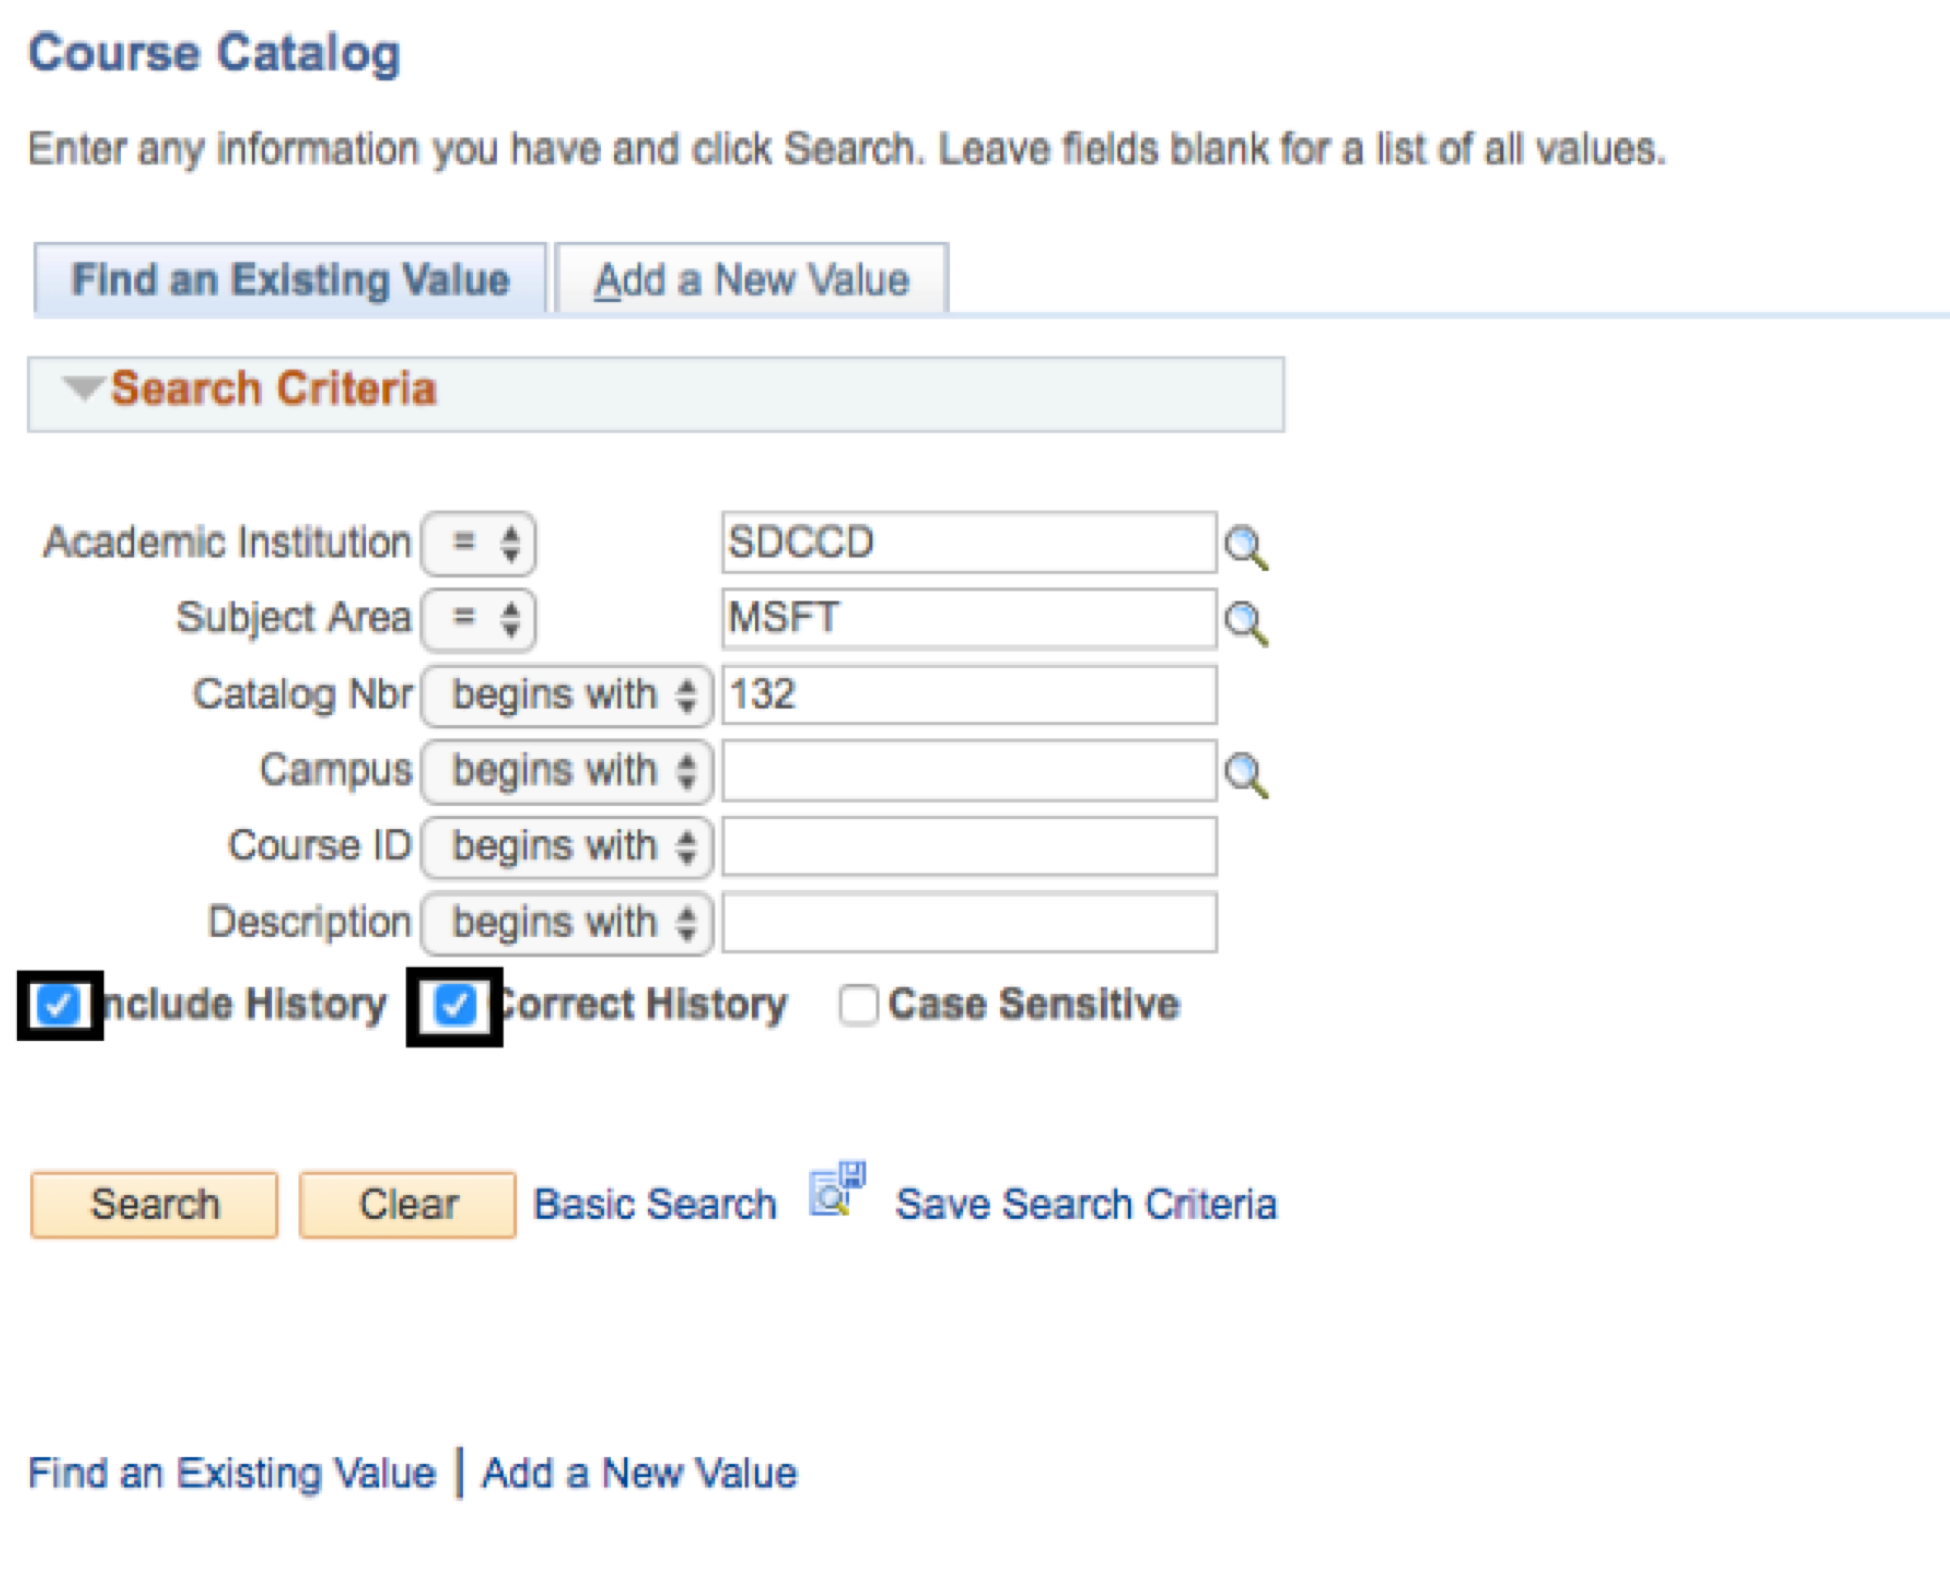
| 4. | Click Include History and Correct History boxes. Note: If you forget to do this on this tab, you will be able to do so once you access the course. |
Step | Action |
|---|---|
5. | Click on the Search button. |
| Step | Action |
|---|---|
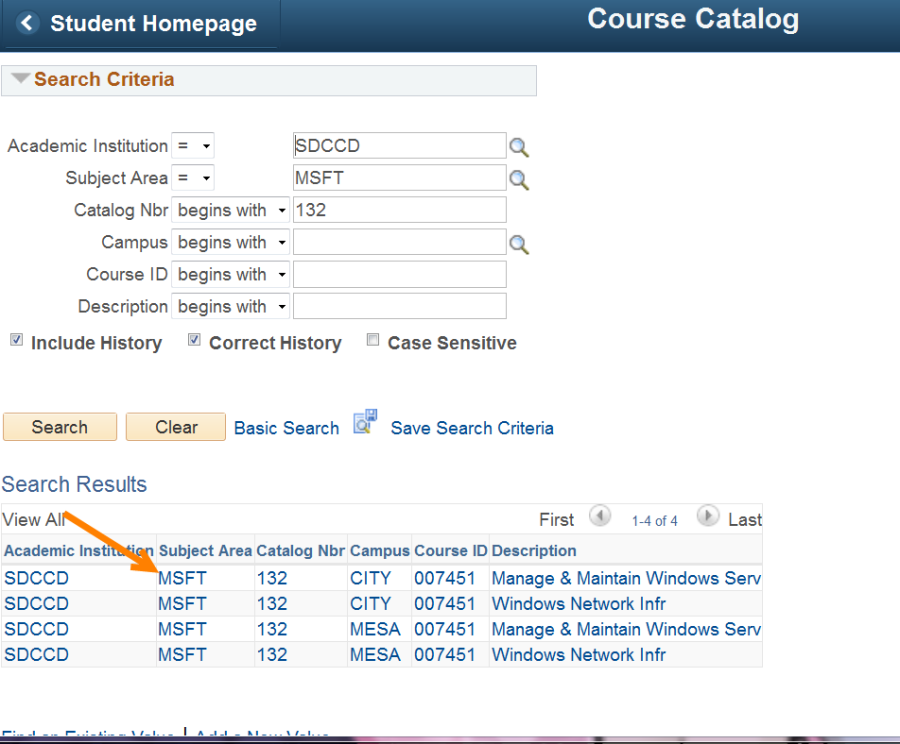
| 6. | The course should appear in the Search Results. Click anywhere in the Search Results box to access the course. Note: If you forgot to check the Include History and Correct History boxes during the search, do so when the course is displayed. The buttons are at the bottom of the page under Course Topics. If you make updates and then select Correct History you will be forced to click No when prompted to save changes in order to be able to select Correct History. This will cause you to lose updates. Checking Include History allows you see all the historical data associated with the course, which may be helpful if you need to research prior to making any updates. |

| Step | Action |
|---|---|
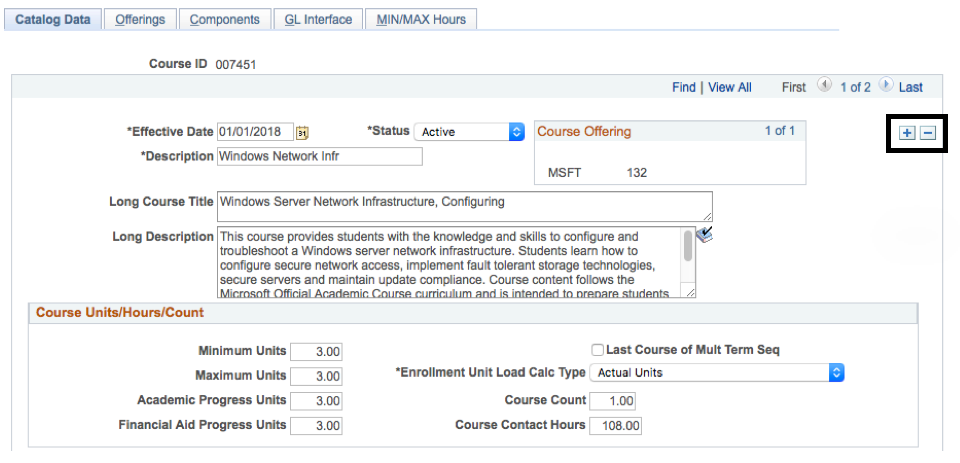
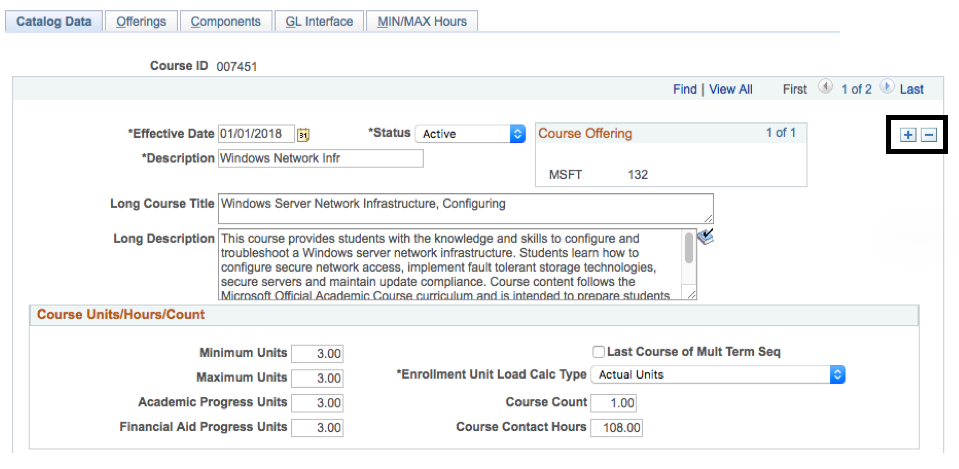
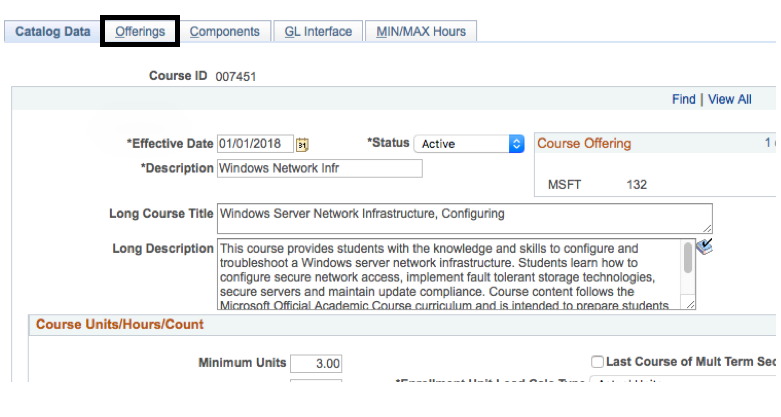
| 7. | On the Catalog Data tab click on the plus [+] sign icon to add a row. |
| Step | Action |
|---|---|
| 8. | The new row will appear. Today's date will populate in the Effective Date field. Type in the effective date (i.e.term) the update is required for. Effective Dates Best Practices: 08/01/XXXX = Fall; 01/01/XXXX = Spring/Intersession; 06/01/XXXX = Summer Keep the Status as "Active." |
| Step | Action |
|---|---|
| 9. | Click on the Offerings tab, adjacent to the Catalog Data tab. |
| Step | Action |
|---|---|
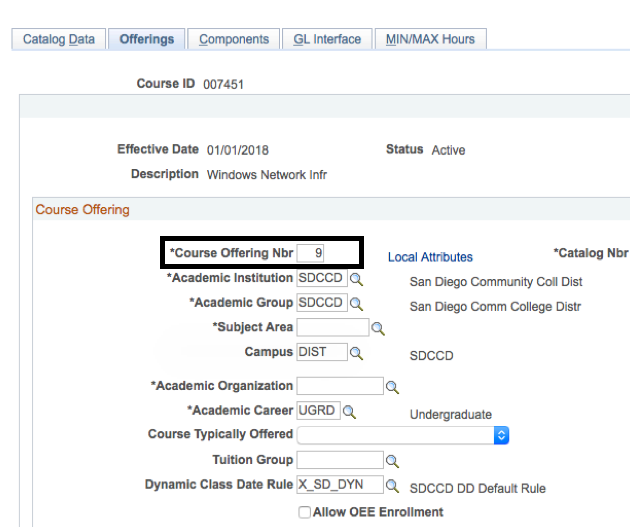
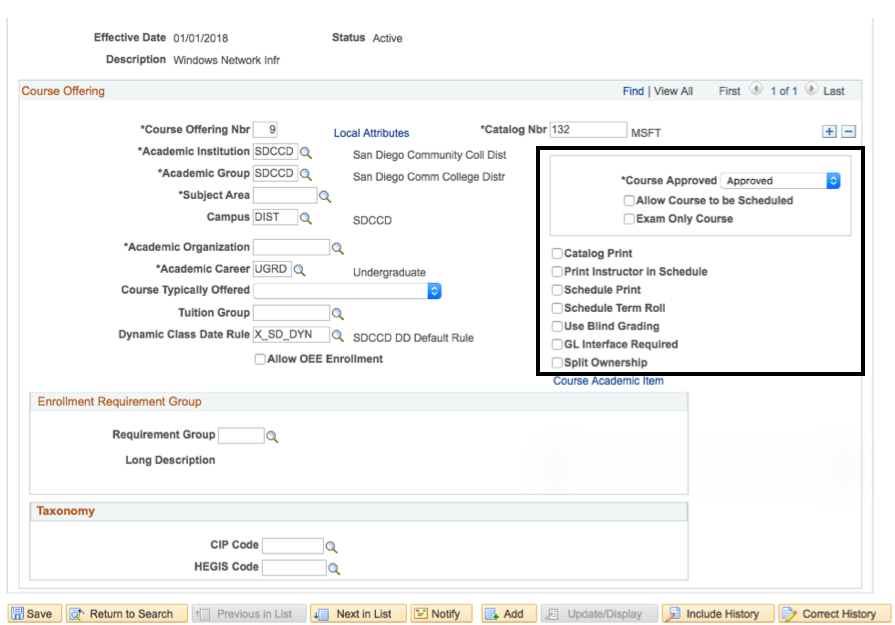
| 10. | On this page, change to Course Offering Nbr to "9." The Academic Institution field should remain SDCCD. |
Step | Action |
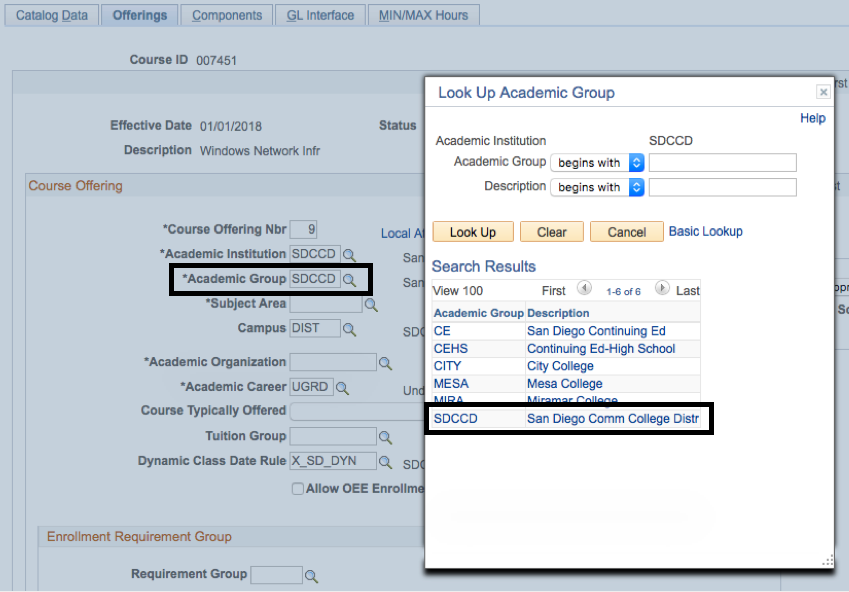
11. | In the Academic Group field, select "SDCCD" by clicking on the magnifying glass icon. |
| Step | Action |
|---|---|
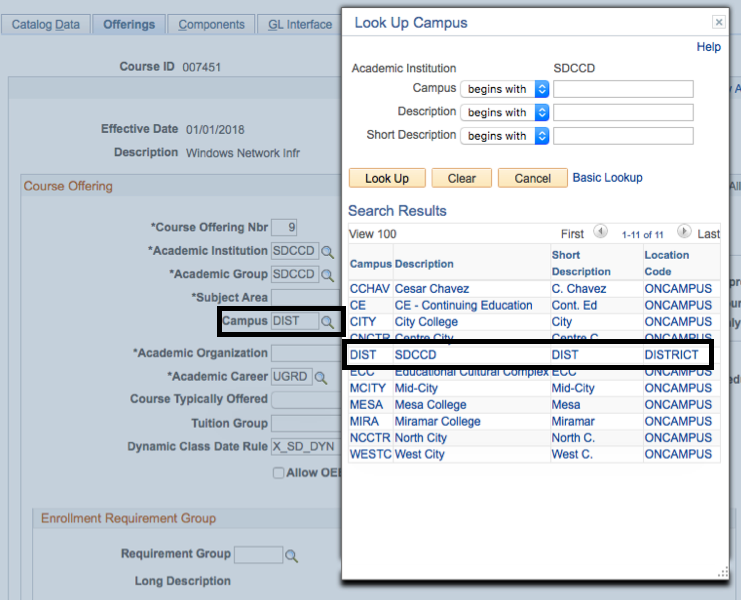
| 12. | In the Campus field, select "DIST" by clicking on the magnifying glass icon. |
| Step | Action |
|---|---|
| 13. | Uncheck the Allow Course to be Scheduled box. Uncheck the Catalog Print box. Uncheck the Print Instructor in Schedule box. Uncheck the Schedule Print box. Uncheck the Schedule Term Roll box. |
| Step | Action |
|---|---|
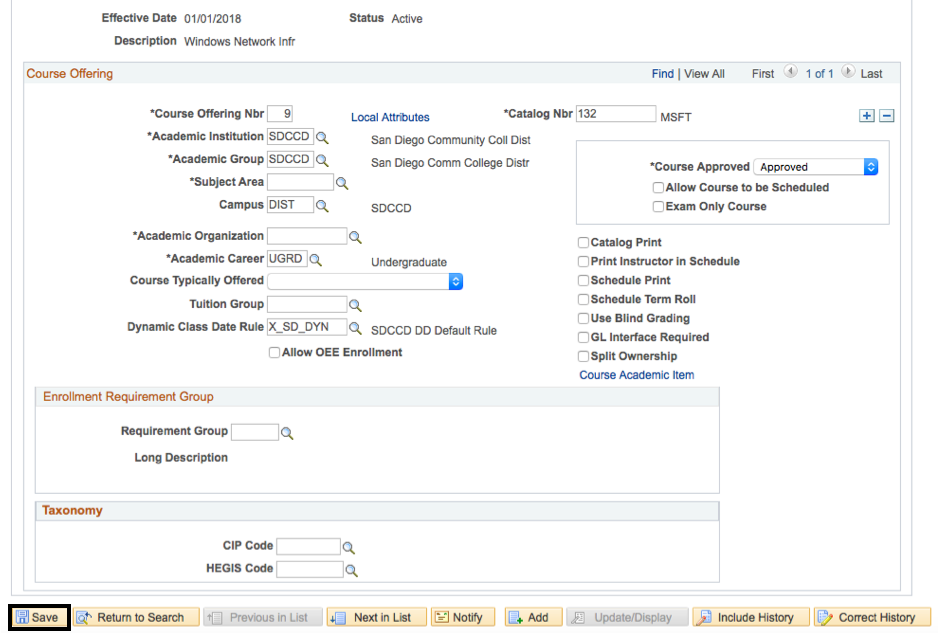
| 14. | Click the Save icon located at the bottom left hand corner of the page. |
| Step | Action |
|---|---|
| 15. | End of job aid. |