Deferment (Payment Plan) - Assigning
Assigning Deferment Payment Plans
Label | Description |
|---|---|
| Business Process | Deferments |
| Module | Student Financials |
| Prerequisites | A Deferment (Payment Plan) must already be created in order to assign a student. |
| Description | This Job Aid illustrates how to assign a student to a Deferment (Payment Plan) |
Instructions:
Step | Action |
|---|---|
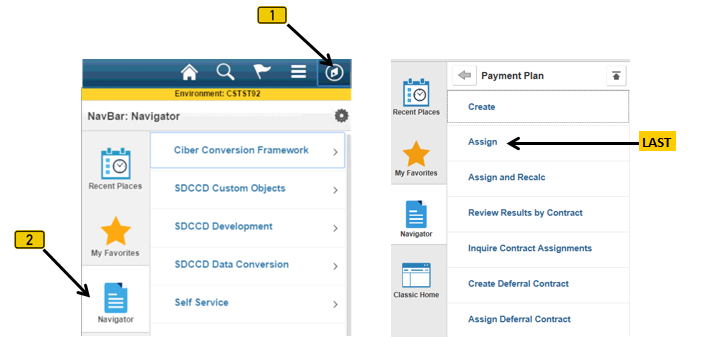
| 1. | Click on [ |


| Step | Action |
|---|---|
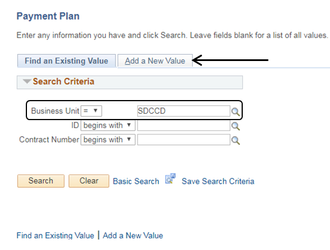
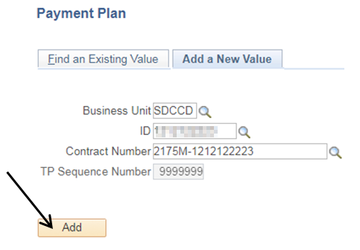
| 2. | Verify that the “Business Unit” field = “SDCCD”. Click the “Add a New Value” page (tab). |
| Step | Action |
|---|---|
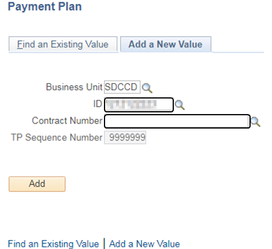
| 3. | Enter the student’s ID# into the “ID” field. For the “Contract Number” field, proceed to Step 4. |
| Step | Action |
|---|---|
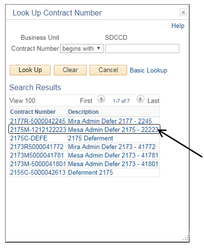
| 4. | A “Contract Number” [ Click on the magnifying glass [ |


| Step | Action |
|---|---|
| 5. | When all the fields are filled out click the “Add” [ |

| Step | Action |
|---|---|
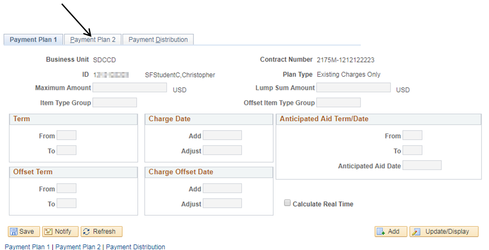
| 6. | Nothing needs to be filled out on the “Payment Plan 1” page (tab). Click the “Payment Plan 2” page (tab). |

| Step | Action |
|---|---|
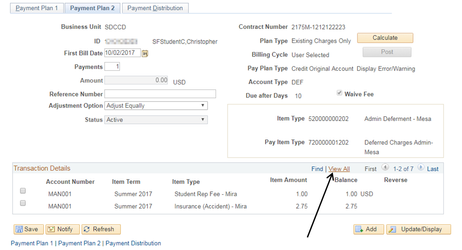
| 7. | Click on the “View All” link [ |

| Step | Action |
|---|---|
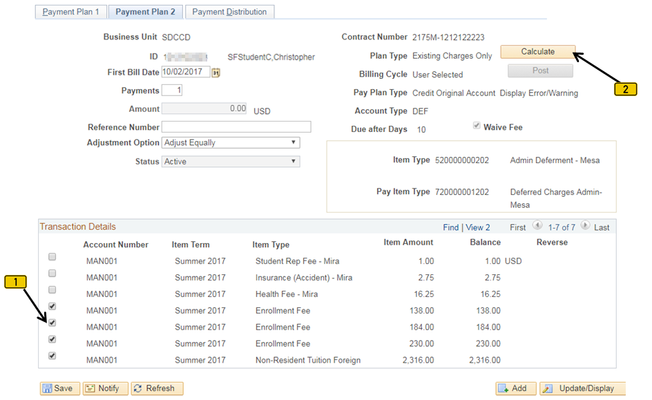
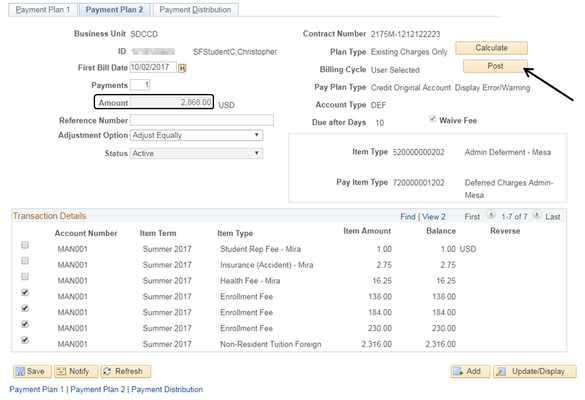
| 8. | Select the charges that are going to be deferred. Click in each box [  ] button. ] button. |


| Step | Action |
|---|---|
| 9. | Note: After clicking the “Calculate” button: 1) The “Amount” field will automatically populate with the total deferred amount. (Verify that the “Amount” field matches the total amount that needs to be deferred on the paperwork). 2) The “Post” button will no longer be greyed out. Click the “Post” button [ ] to post the deferment to the student’s account and defer the charges. ] to post the deferment to the student’s account and defer the charges. |
| Step | Action |
|---|---|
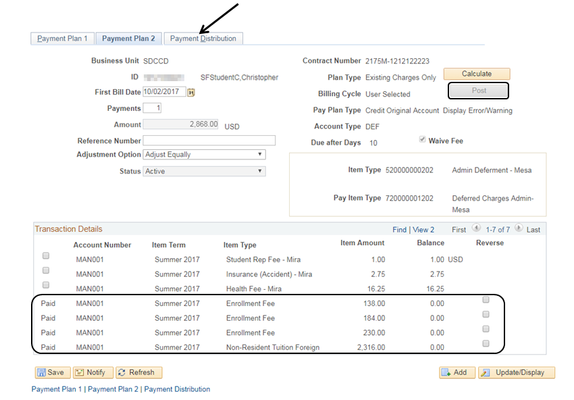
| 10. | Note: After clicking the “Post” button, the “Post” button will grey out again. Under the Transaction Details section: 1) The Check Mark Box [ 2) The “Balance” column will zero out, displaying “0.00”. 3) In the “Reverse” column, blank boxes [  ] ] |


| Step | Action |
|---|---|
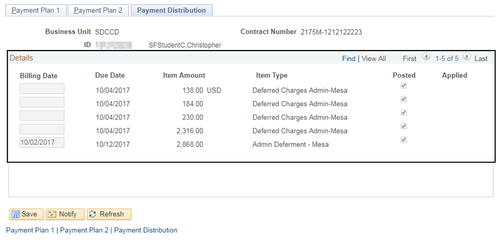
| 11. | Use the “Payment Distribution” page (tab) to verify the total amounts deferred. |
| Step | Action |
|---|---|
| 12. | Go to “View Customer Accounts” to confirm the deferment posted to the student’s account correctly. Click [ ] then [ ] then [ ] and navigate to Student Financials -> View Customer Accounts ] and navigate to Student Financials -> View Customer Accounts |
| 13. | End of job aid. |