Cashiering - Adding Registers To Cashier Via Set Up SACR
Cashiering - Adding Registers To Cashiers Via "Set Up SACR"
Label | Description |
|---|---|
| Business Process | Cashiering Configuration |
| Module | Student Financials |
| Prerequisites | Cashier must be activated in PeopleSoft. NOTE: This is a configuration process and is different from assigning a register to a cashier after a Cashier’s Office has been opened. |
| Description | This Job Aid illustrates how to add a Register to a Cashier via SET UP SACR. |
Instructions:
Step | Action |
|---|---|
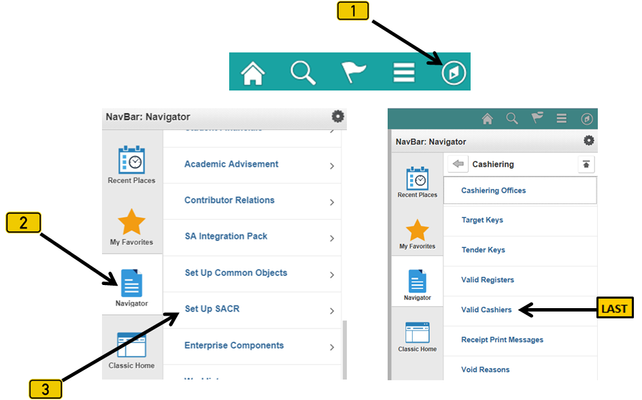
| 1. | Click on [ |


| Step | Action |
|---|---|
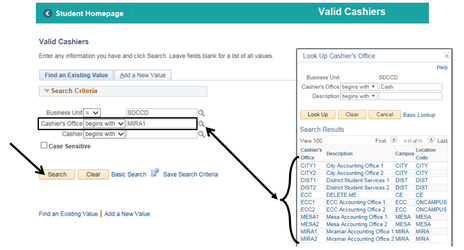
| 2. | In the “Cashier’s Office” field, enter the “Cashier’s Office” for the Cashier the Register is to be added to. [Note: You can also click the magnifying glass [ |

| Step | Action |
|---|---|
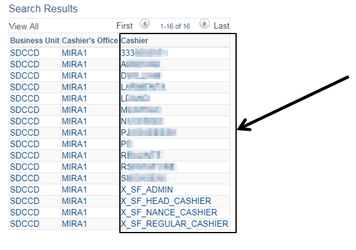
| 3. | A list of Cashiers already assigned to the selected Cashier’s Office will be displayed. From this list, select the Cashier the Register will be added to. |
| Step | Action |
|---|---|
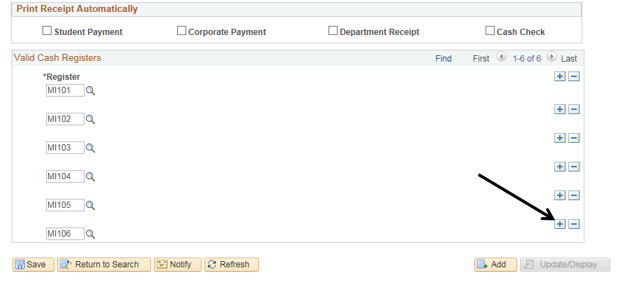
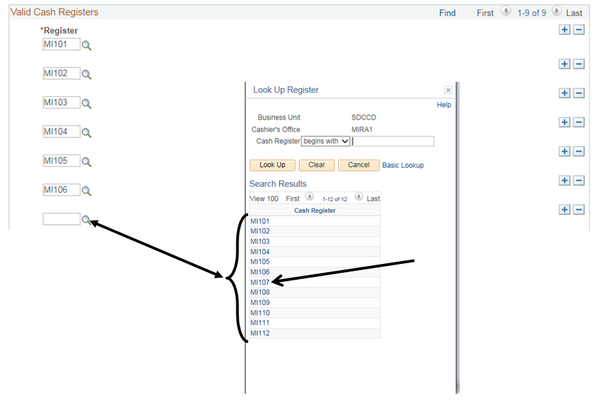
| 4. | A list of Registers the Cashier has already been assigned will be displayed. Click the bottom-most plus sign [ |

| Step | Action |
|---|---|
| 5. | Click the magnifying glass [ |

| Step | Action |
|---|---|
| 6. | Click “Save”. The Register has been assigned to the Cashier. |

| Notes/Recommendations |
|---|
1) Each Cashier should have his/her own Register. Never assign multiple people to the same Register in the same Business Day. 2) It is recommended that each Cashier be assigned the same Register daily. 3) Depending on internal controls and policies, it may be ideal to assign only a few Registers to each Cashier. |
| Step | Action |
|---|---|
| 7. | End of job aid. |