Schedule of Classes - Create or Maintain Schedule of Class TBA
Schedule of Classes- Create/Maintain Schedule of Classes
Instructions:
This job aids provides directions on how to schedule a new TBA class section.
Step | Action |
|---|---|
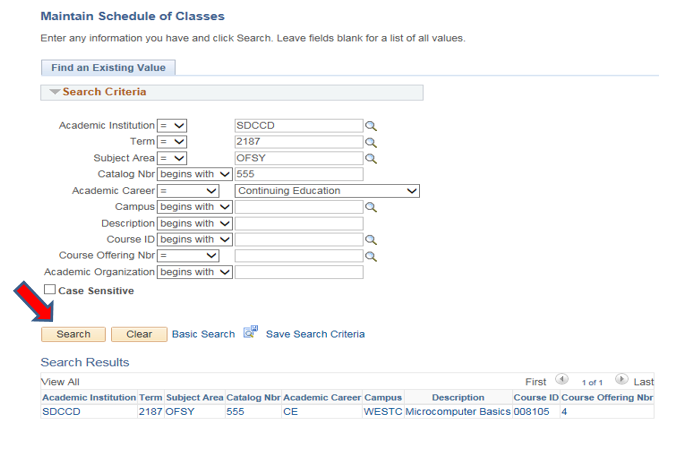
| 0. | Click on Navigate toCurriculum Management → Schedule of Classes→ Maintain Schedule of Classes |
| 1. | Maintain Schedule of Classes:
|


| Step | Action |
|---|---|
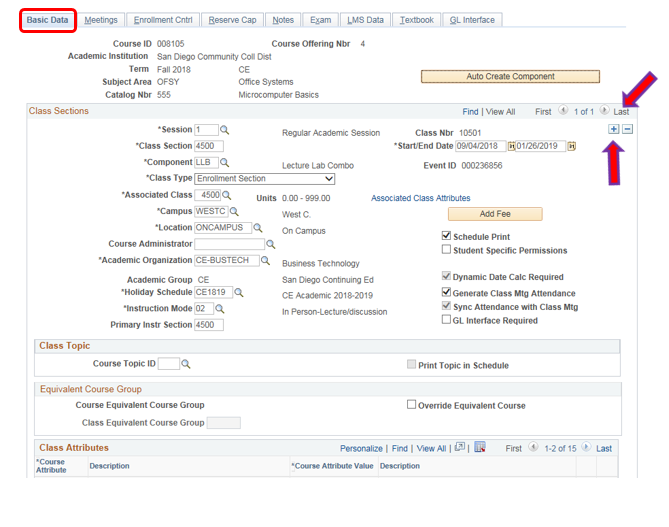
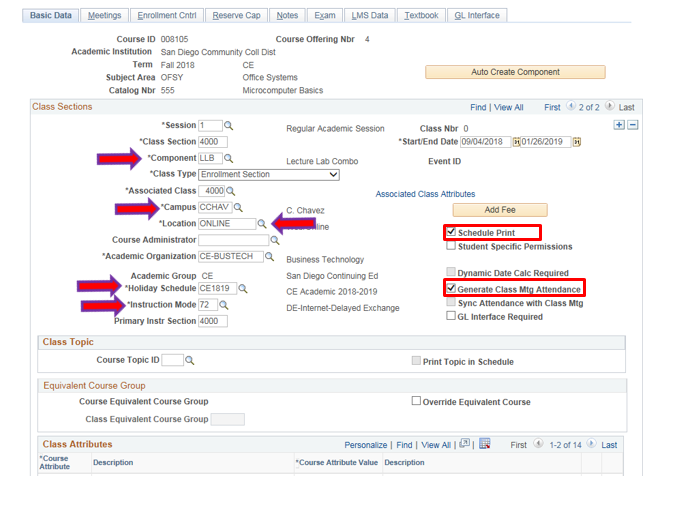
| 2. | Under the Basic Data page:
|
| Step | Action |
|---|---|
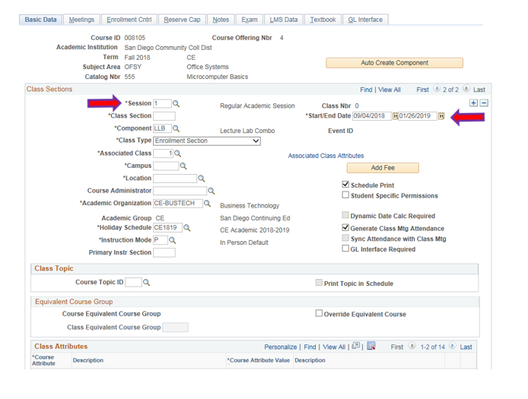
| 3. | Under SESSION-Enter 1 = Regular Academic Session for full semester classes OR Enter DYN (Dynamically Dated Session) for short-term semester classes. Note: Click the magnifying glass to show more options (ie.; 8wk1, 8wk2, 6wk1, etc. |
| Step | Action |
|---|---|
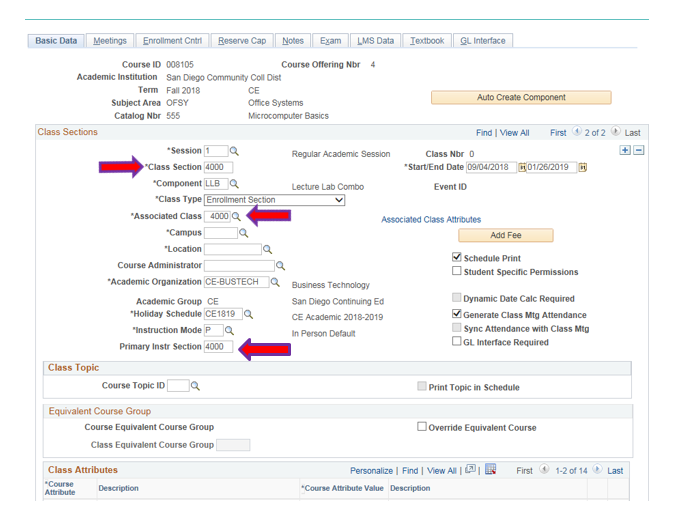
| 4. | Class Section: Manually assign a four digit number using the first two digits=Campus Location and last two digits= class section: 4000-4199 = Cesar Chavez Campus, i.e. 4000, 4001, 4002, etc. 4200-4399 = ECC, i.e. 4100, 4101, 4102, etc. 4400-4599 = North City Campus, i.e. 4200, 4201, 4202, etc. 4600-4799 = West City Campus, i.e. 4300, 4301, 4302, etc. 4800-4999 = Mid-City Campus, i.e. 4400, 4401, 4402, etc. Note: A Duplicate Key Value Message will appear if the section already exists. Proceed to the next section number and try again. Note: The Class Section, the Associated Class and the Primary Instr Section must always match. Manually enter the correct number. |
| Step | Action |
|---|---|
| 5. |
|
| Step | Action |
|---|---|
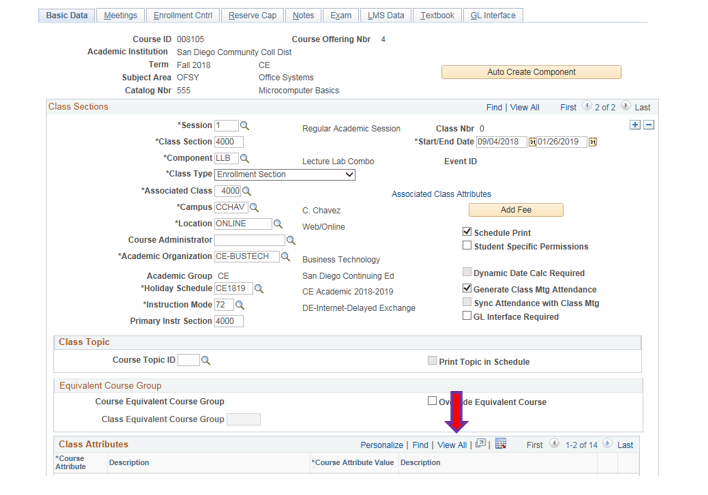
| 6. | Under Class Attributes, click on “View All” to see all of the attributes. |
| Step | Action |
|---|---|
| 7. | End of job aid. |