Clearing prerequisites by student groups
Business Process: Clearing Prerequisites by Student Groups
Module: Academic Advising
Navigation:
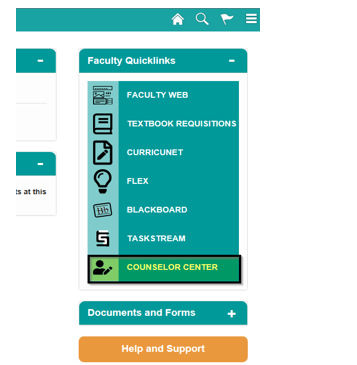
Log-in to the Faculty Portal. From the Faculty Portal click on the Counselor Center tab. This will land you on the Student Success search page.
Instructions:
This Job Aid will outline the process necessary to clear prerequisites using Student Groups.
Step | Action |
|---|---|
| 1. | From the Faculty Portal click on the Counselor Center tab. This will land you on the Student Success search page. |
| Step | Action |
|---|---|
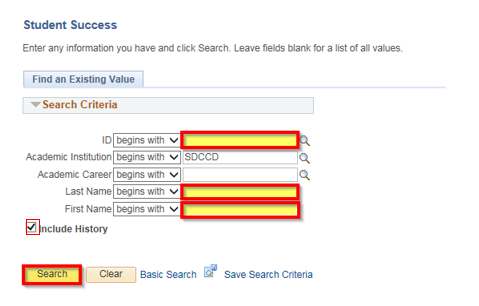
| 2. | To find the student, use “Find an Existing Value” and use the search criteria provided. Enter the Student’s ID. NOTES: If you do not know the Student’s ID, you can search using the first and last name fields. Include History box should be checked on default. If it is not, make sure to check the box. |
| 3. | Click on Search |
| Step | Action |
|---|---|
| 4. | You have landed on the Student Success Page. Click on the General Info tab. |

| Step | Action |
|---|---|
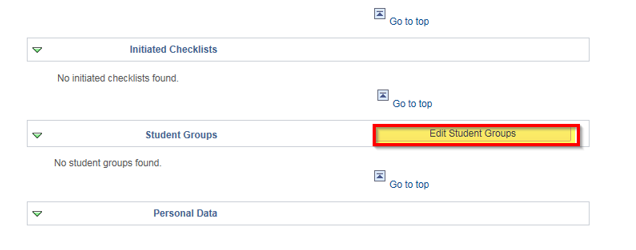
| 5. | Click on Edit Student Groups button. |
| Step | Action |
|---|---|
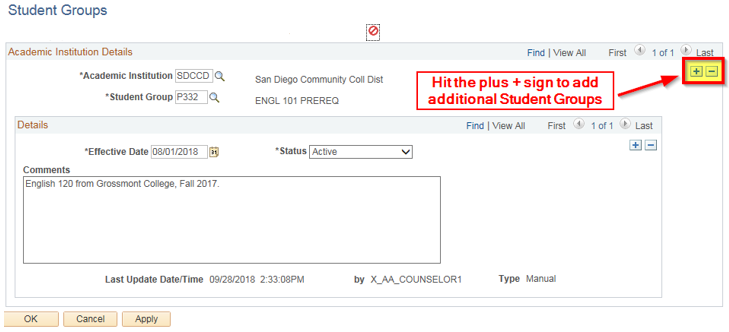
| 6. | If a Student Groups exists, you must add a row. |
| Step | Action |
|---|---|
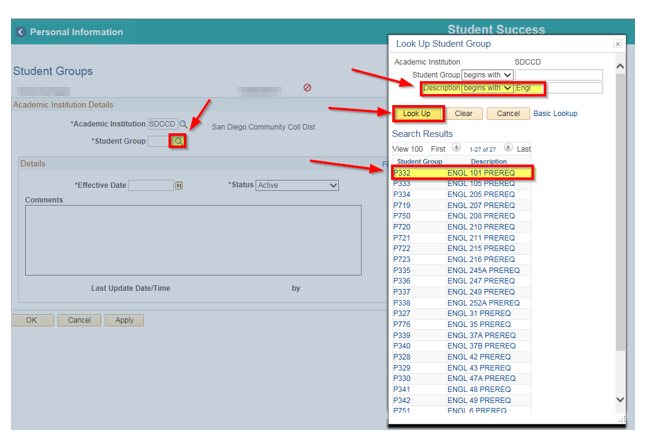
| 7. | Click the magnifying glass to select the student group. Search for the Student Group by populating the Description field (ex: engl, math) and clicking look up. Select the student group from the drop down box. |
| Step | Action |
|---|---|
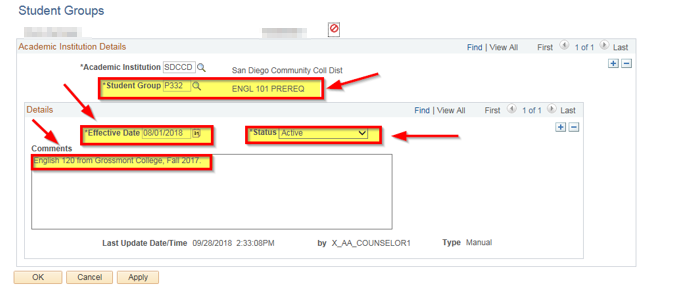
| 8. | Selecting the Student Group from the drop down menu will add the student group and give you a description of the student group. It will populate the effective date as the current date and change the status to active. You must use the best practice dates to populate the *Effective Date Fall = August 1st, Spring = January 1st, Summer = June 1st. Example: 08/01/2018, 01/01/2018 06/01/2018 You can add a comment describing the reason you added the student group. |
| Step | Action |
|---|---|
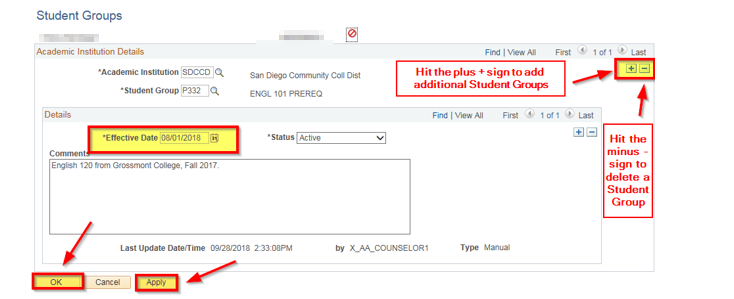
| 9. | Clicking OK will add the student group and return you back to the General Info page. Clicking Apply will add the student group but leave you on the page to add additional student groups. You must also click the plus + sign in order to add additional Student Groups. If you click OK and need to add additional Student Groups, you must now click the plus + sign in order to add additional Student Groups. You can also delete a student group by clicking the minus - sign. |
| Step | Action |
|---|---|
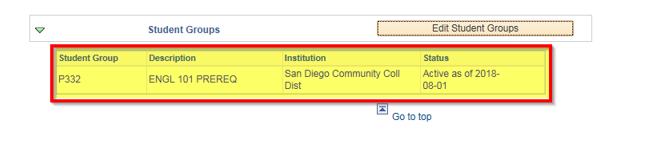
| 10. | Clicking OK, The Student Group will now appear on the General Info page. |
| Step | Action |
|---|---|
| 11. | End of job aid. |