...
| Step | Action |
|---|---|
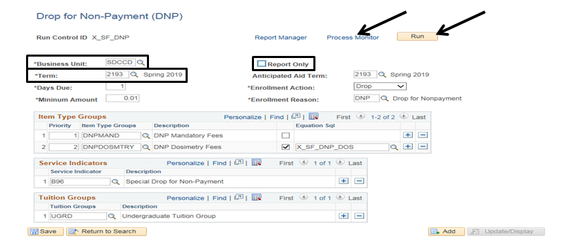
| 4. | Review the Run Control:
|

| Step | Action |
|---|---|
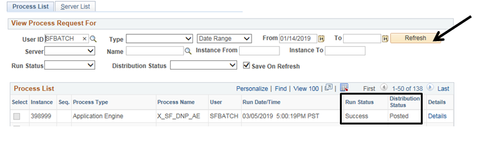
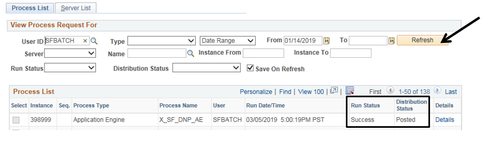
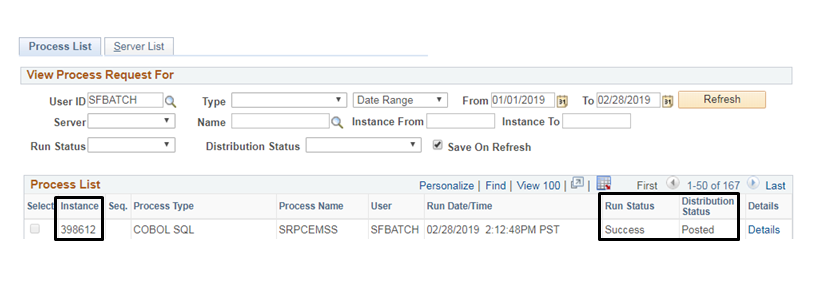
| 5. | Periodically click “Refresh” until the “Run Status” column = “Success” and the “Distribution Status” = “Posted”. |
| Step | Action |
|---|---|
| 6. | Click [ |


...
| Step | Action |
|---|---|
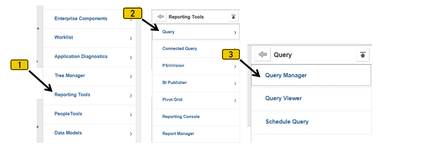
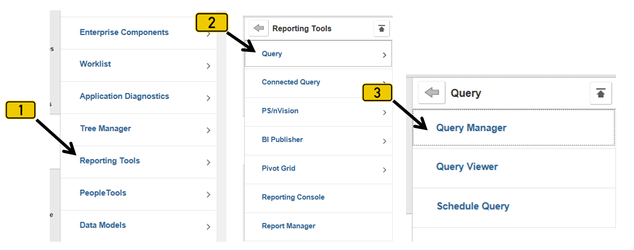
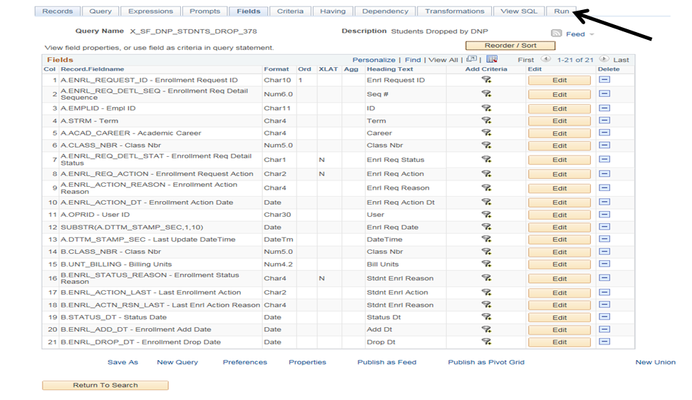
| 7. | Navigate to Reporting Tools > Query > Query Manager. |
| Step | Action |
|---|---|
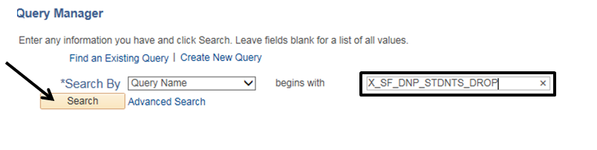
| 8. | In the “begins with” field, enter “X_SF_DNP_STDNTS_DROP” and then click “Search”. |
| Step | Action |
|---|---|
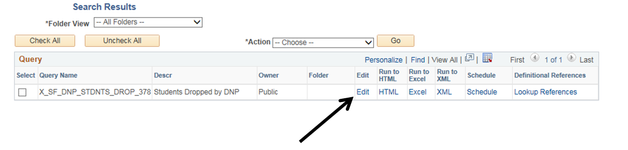
| 9. | Click “Edit”. |

| Step | Action |
|---|---|
| 10. | Click the “Run” page (tab). |

| Step | Action |
|---|---|
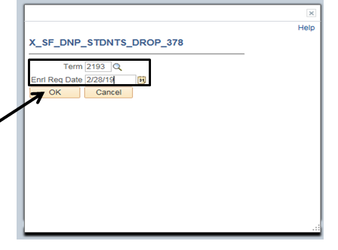
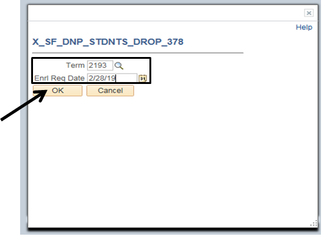
| 11. | In the “Term” field, enter the appropriate Term. In the “Enrl Req Date” field, enter the date you ran the job in Update Mode (normally today’s date). Click “OK”. |
| Step | Action |
|---|---|
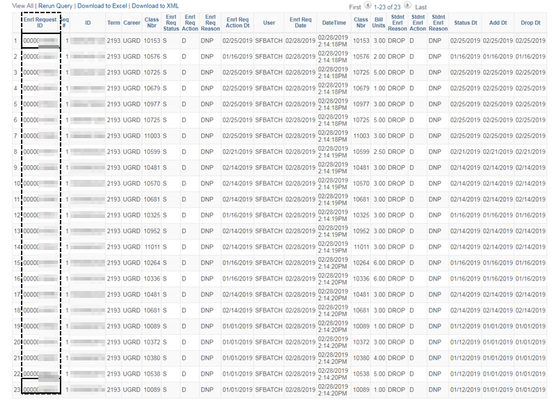
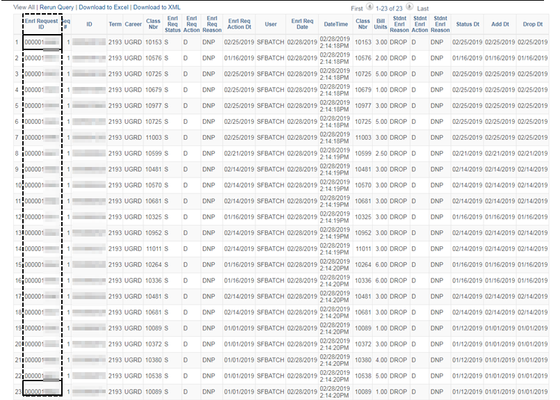
| 12. | From the generated spreadsheet data, make a note of the first and last numbers in the “Enrl Request ID” column. In the screenshot below, those numbers are “0000015980” and “0000016002”. |
| Step | Action |
|---|---|
| 13. | Click [ |


...
| Step | Action |
|---|---|
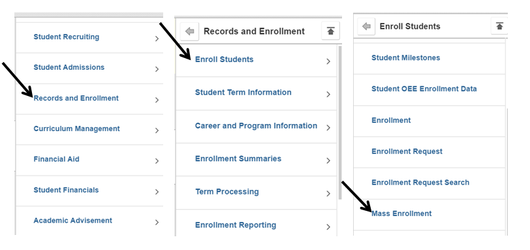
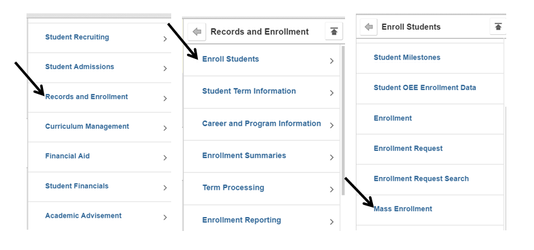
| 14. | Navigate to Records and Enrollment > Enroll Students > Mass Enrollment. |
| Step | Action |
|---|---|
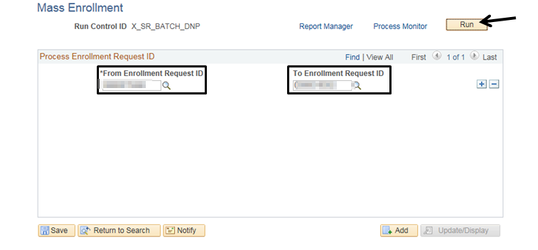
| 15. | Click the “Search” button to display a list of Run Controls. Click/Select “X_SR_BATCH_DNP”. |
...
| Step | Action |
|---|---|
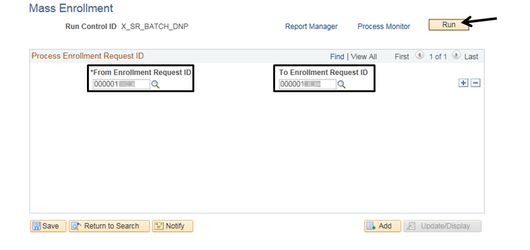
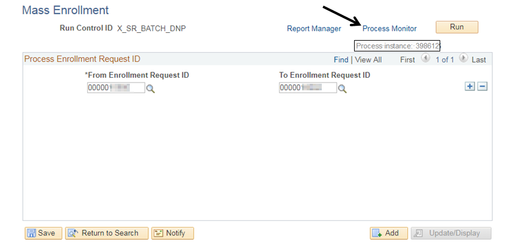
| 16. | Enter the first Enrollment Request ID (from the query) into the “*From Enrollment Request ID” field. Enter the last Enrollment Request ID (from the query) into the “To Enrollment Request ID” field. Click “Run”. |
| Step | Action |
|---|---|
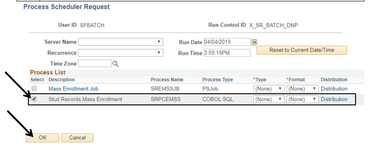
| 17. | Select “Stud Records Mass Enrollment” (Process name: “SRPCEMSS”) then click OK. |
| Step | Action |
|---|---|
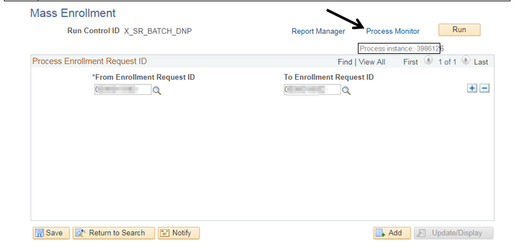
| 18. | Take note of the “Process Instance” # and then click the “Process Monitor” link. |
| Step | Action |
|---|---|
| 19. | The process is complete once the “Run Status” column = “Success” and the “Distribution Status” column = “Posted” for your Instance |

| Result: |
|---|
| The charges won't be removed from any student's account until Tuition Calculation has been run. The Tuition Calculation process will remove the charges from those student accounts that have not been paid. |
| Step | Action |
|---|---|
| 20. | End of job aid. |