...
Step | Action |
|---|---|
| 1. | Click on [ |


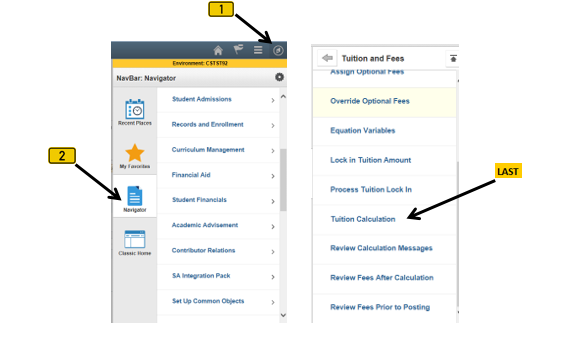
| Step | Action |
|---|---|
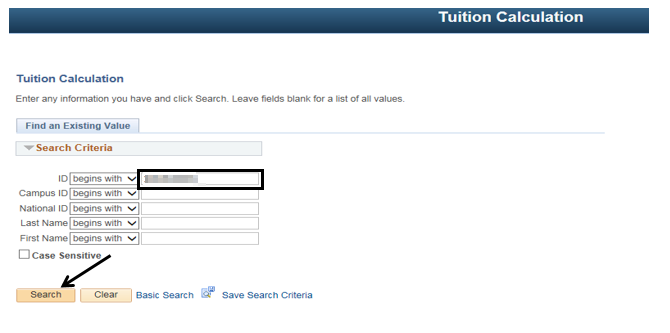
| 2. | Enter the student's ID into the “ID” field. Then click the “Search” button [ |

| Step | Action |
|---|---|
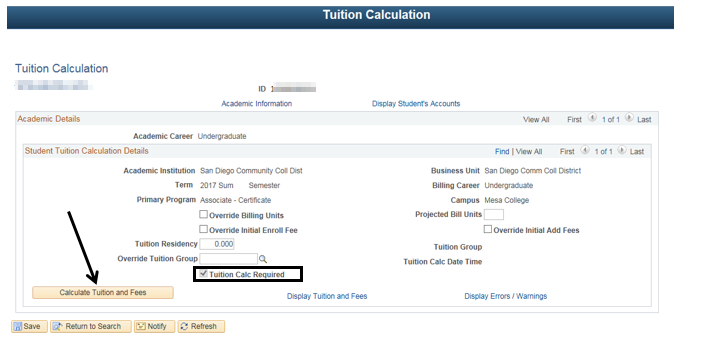
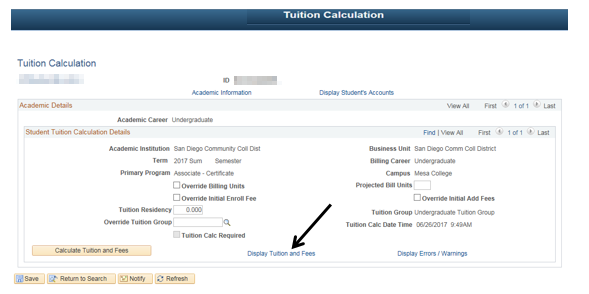
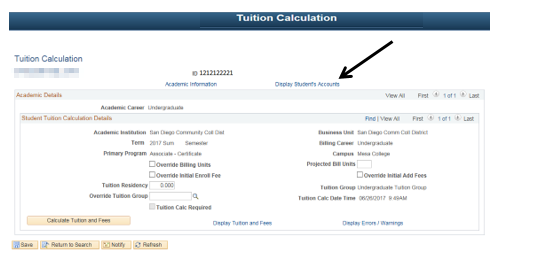
| 3. | If the “Tuition Calc Required” box [ |
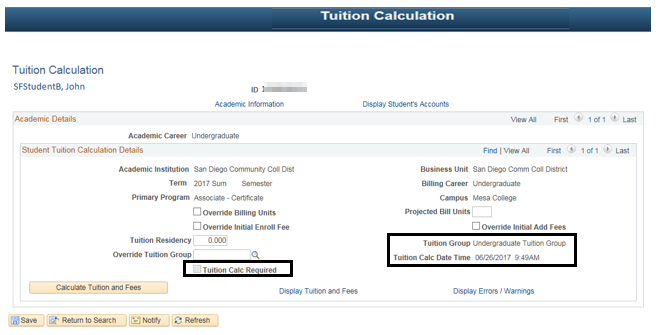
| 4. | Until tuition and fees have been calculated at least once, the “Tuition Group” and “Tuition Calc Date Time” fields are blank. After calculation, the fields display the tuition group into which the student was placed and when the calculation took place. |
| 5. | Click the “Calculate Tuition and Fees” button [ |


| Result of Step 5 |
|---|
After calculating tuition, the check mark in the “Tuition Calc Required” box [ |

| Step | Action |
|---|---|
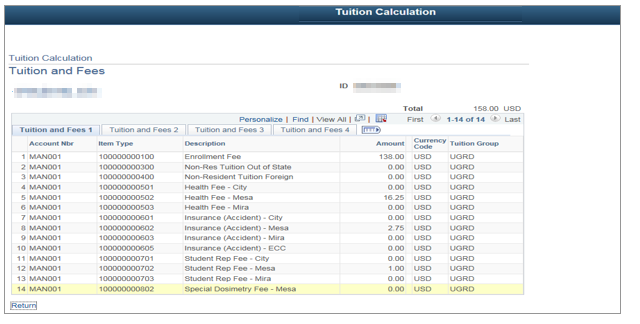
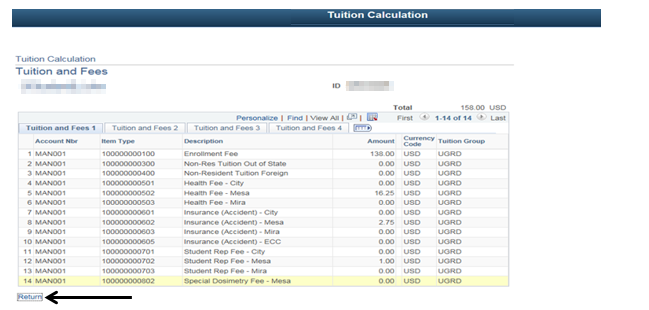
| 6. | Click the “Display Tuition and Fees” link [ |

| Result of Step 6 |
|---|
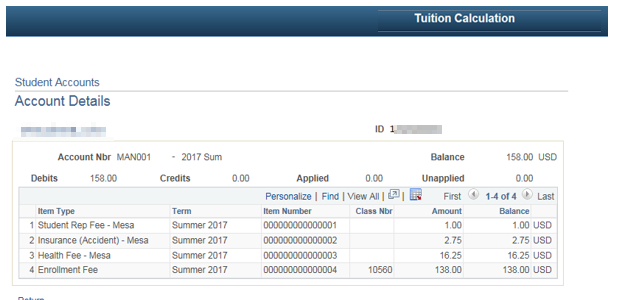
| Review charges for tuition and fees that have been calculated and charged to the student’s account. |
| Step | Action |
|---|---|
| 7. | Click the “Return” link [ |

| Step | Action |
|---|---|
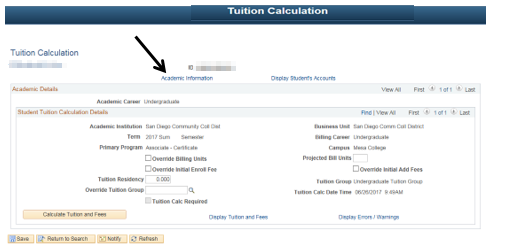
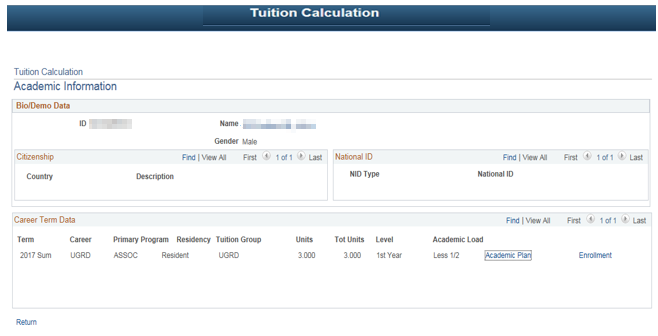
| 8. | The Academic Information page displays career data and also has links to Academic Plan and Enrollment information. Click the “Academic Information” link |

| Result of Step 8 |
|---|
Student’s Academic Information is displayed |
| Step | Action |
|---|---|
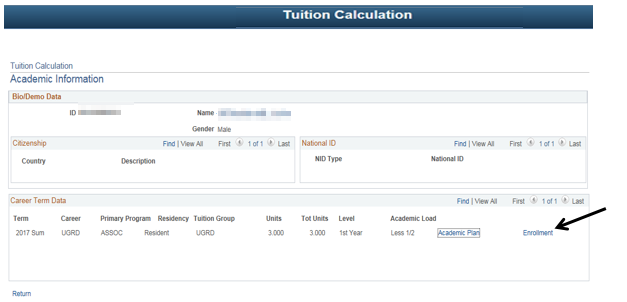
| 9. | Click the “Enrollment” link [ |

| Step | Action |
|---|---|
| 10. | Click the “Return” link [ |


| Step | Action |
|---|---|
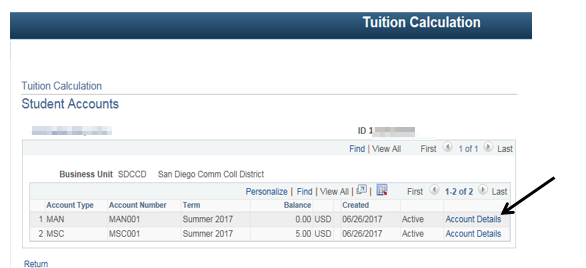
| 11. | Click the Display Student’s Accounts link [ |

| Step | Action |
|---|---|
| 12. | Click an entry in the Account Details column [ |

| Result of Step 12 |
|---|
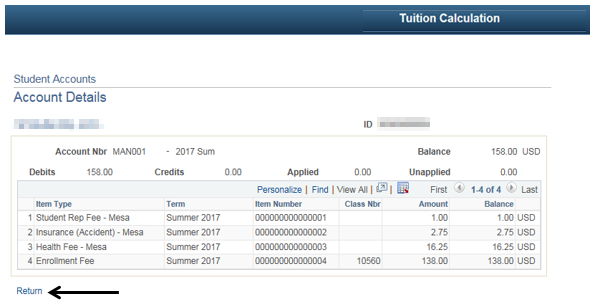
Student’s Account Details are displayed. |
| Step | Action |
|---|---|
| 13 | Click the “Return” link [ |

| Step | Action |
|---|---|
| 14. | End of job aid. |