| View file | ||||
|---|---|---|---|---|
|
Instructions
This Job Aid will go over the process necessary to create a Tech Prep (TPRP) class section. Tech Prep classes are a subset of classes under the greater umbrella of Credit for Prior Learning/Credit by Exam and are used to grant students with credit for completing a course at a different institution.
| Step | Action |
|---|---|
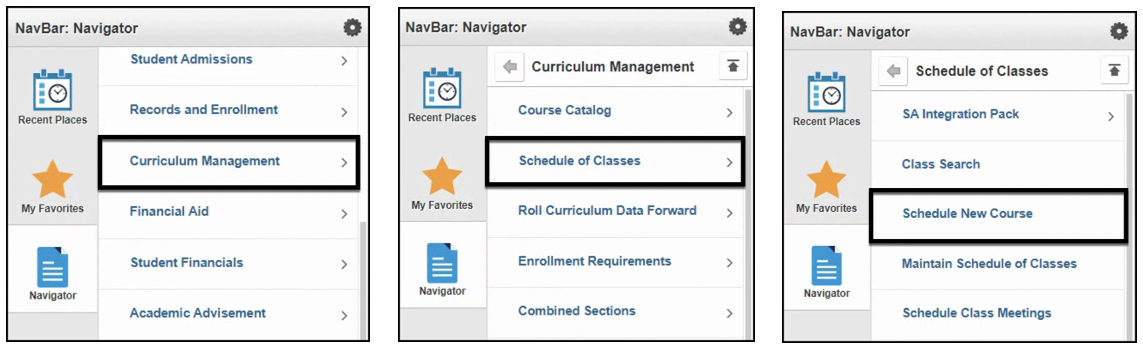
| 1. | Click on the compass icon Curriculum Management > Schedule of Classes > Schedule New Course |


| Step | Action |
|---|---|
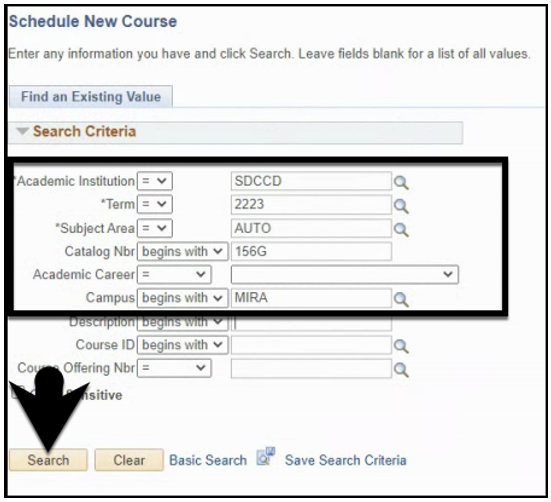
| 2. | Search for your course by entering the Academic Institution, Term, Subject Area, Catalog Nbr and Campus. Click the Search button. |
| Step | Action |
|---|---|
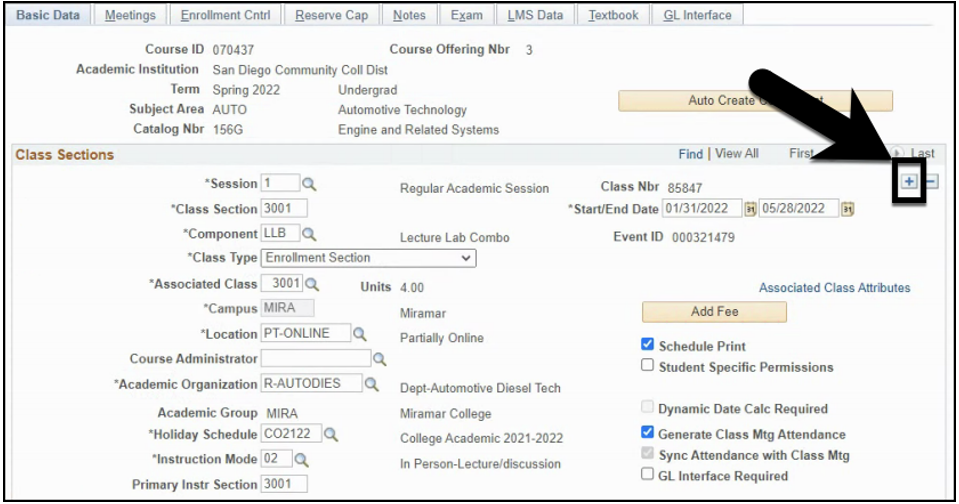
| 3. | You will be directed to the Basic Data Tab where you can add a new section of the course. Click on the |

| Step | Action |
|---|---|
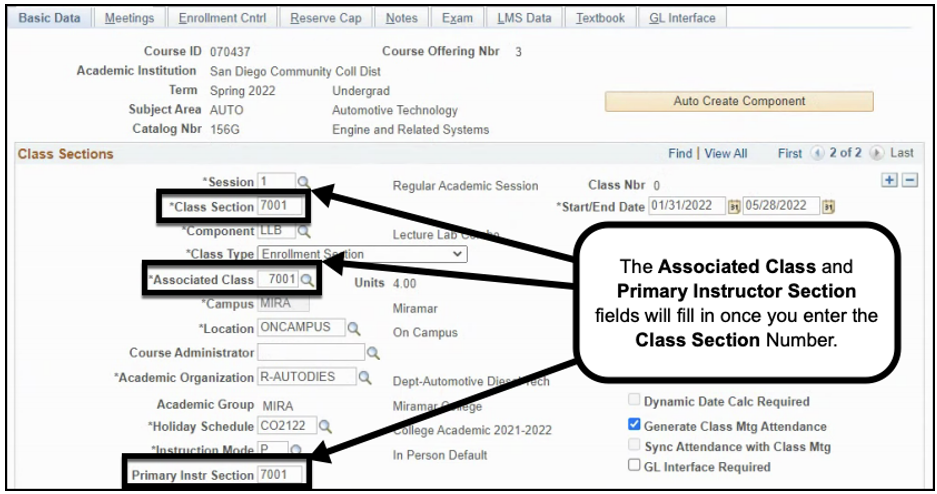
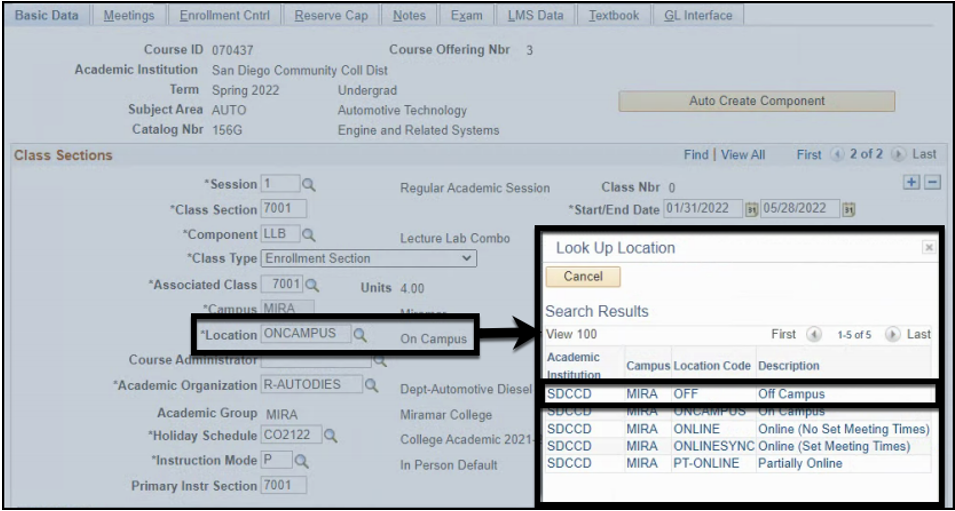
| 4. | Begin by entering the Class Section Number. Tip: All class sections scheduled by the District Office should begin with the number 7XXX. |
| Step | Action |
|---|---|
| 5. | Select the ‘OFF’ Location Code from the Look Up Location list. |
| Step | Action |
|---|---|
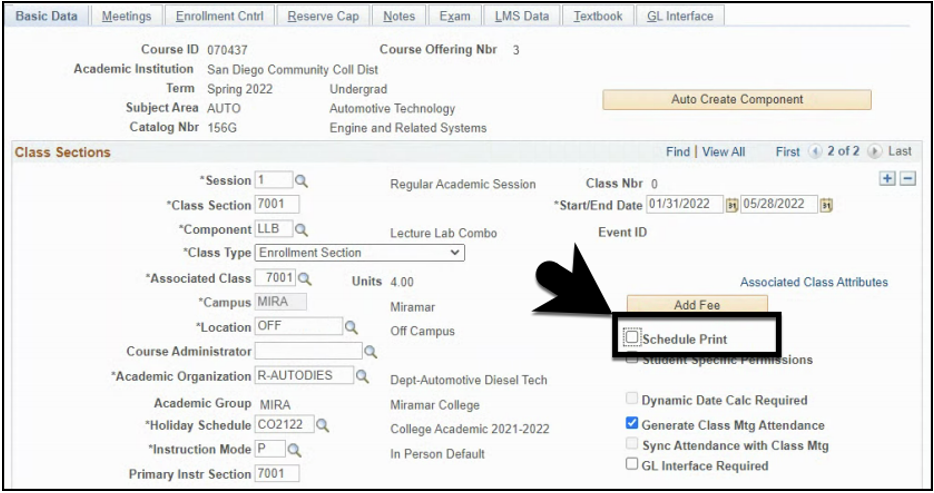
| 6. | Uncheck the Schedule Print check box. |
| Step | Action |
|---|---|
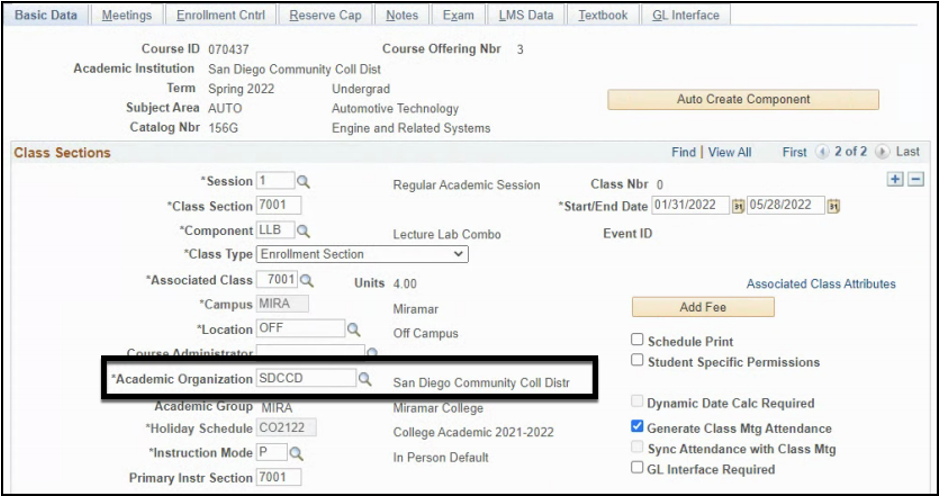
| 7. | Change the Academic Organization to ‘SDCCD’. |
| Step | Action |
|---|---|
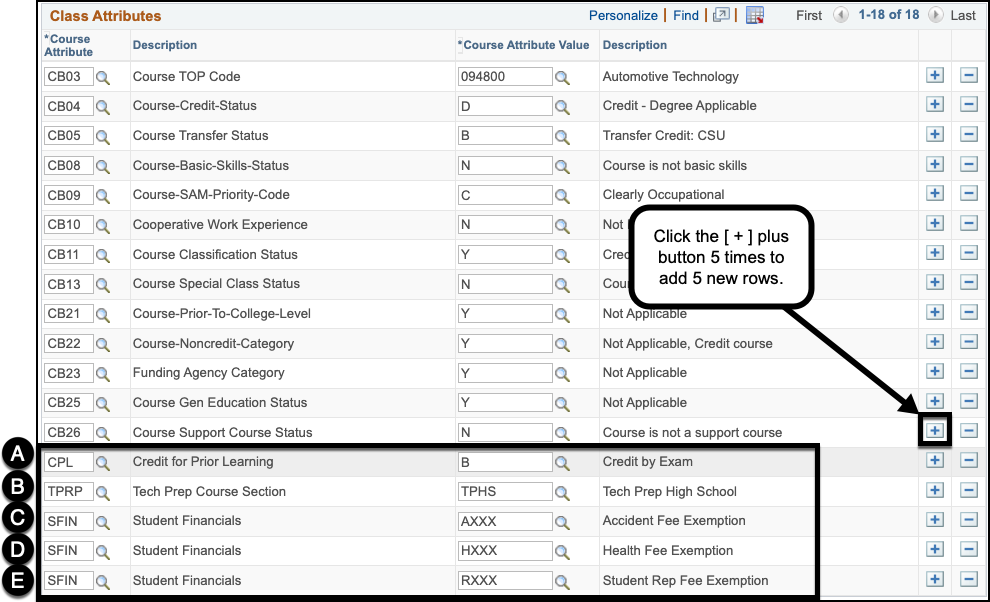
| 8. | In the Class Attributes Section, click on the Add the following Class Attributes and Class Attribute Values: A. Class Attribute = CPL and Class Attribute Value = B B. Class Attribute = TPRP and Class Attribute Value = TPCE or TPHS C. Class Attribute = SFIN and Class Attribute Value = AXXX D. Class Attribute = SFIN and Class Attribute Value = HXXX E. Class Attribute = SFIN and Class Attribute Value = RXXX |
| Step | Action |
|---|---|
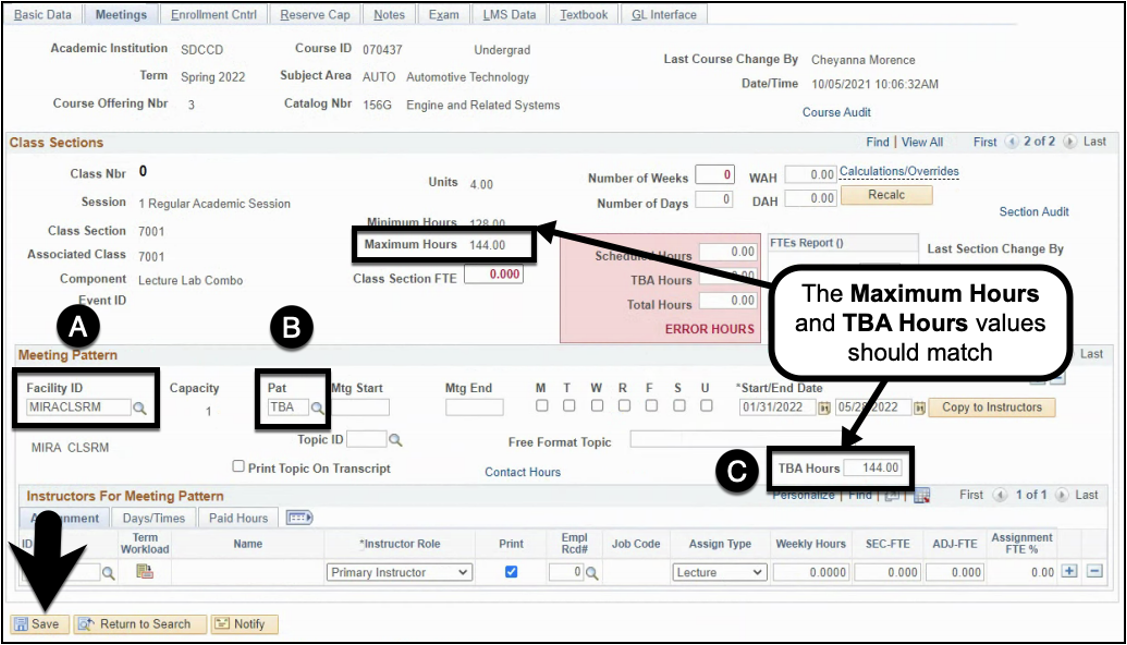
| 9. | Click on the Meetings Tab to begin entering meeting pattern information. Enter the following: A. Facility ID = <Campus>CLSRM B. TBA Meeting Pattern = TBA C. TBA Hours = Should equal the Maximum Hours value |
| Step | Action |
|---|---|
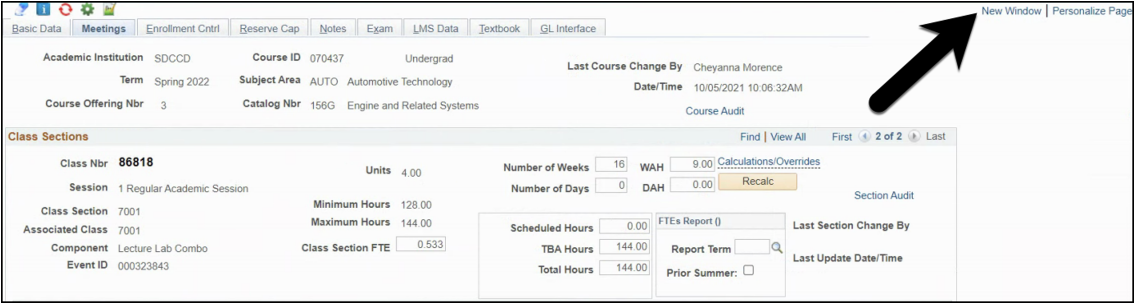
| 10. | Click the New Window link. |
| Step | Action |
|---|---|
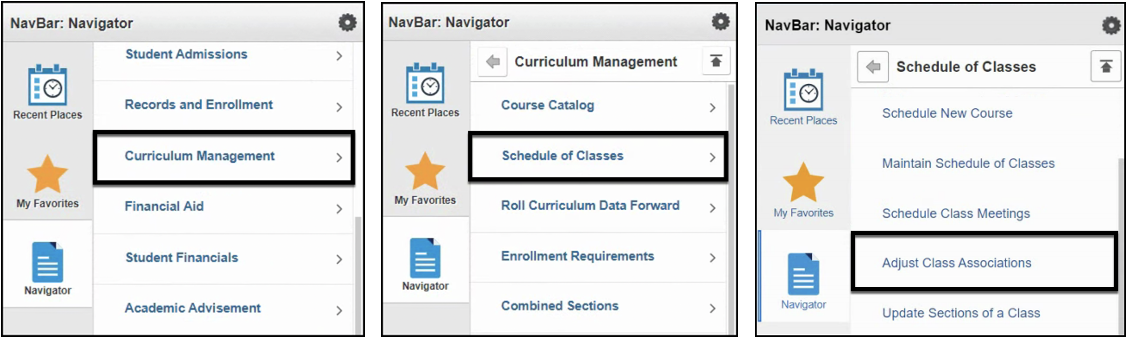
| 11. | Click on Curriculum Management > Schedule of Classes > Adjust Class Associations |

| Step | Action |
|---|---|
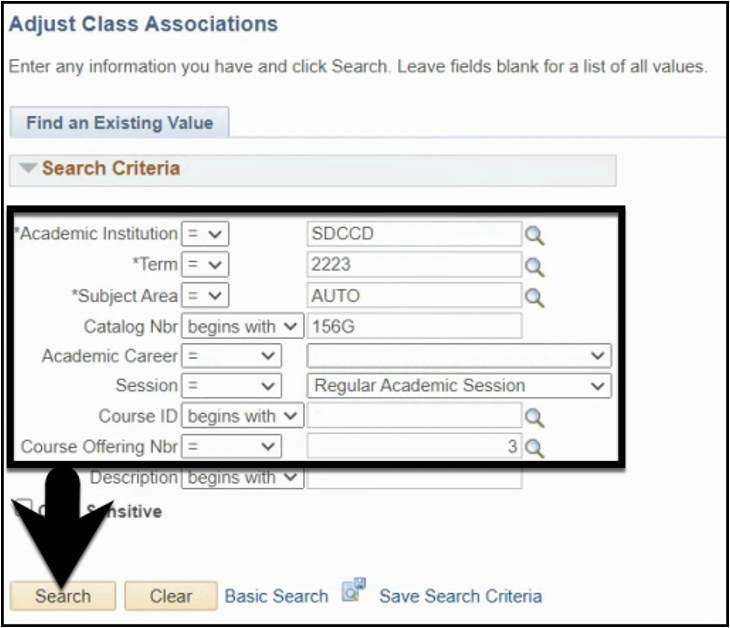
| 12. | On the Adjust Class Associations search page, enter the Term, Subject Area, Catalog Nbr, Session, and Course Offering Nbr. Click the Search button. |
| Step | Action |
|---|---|
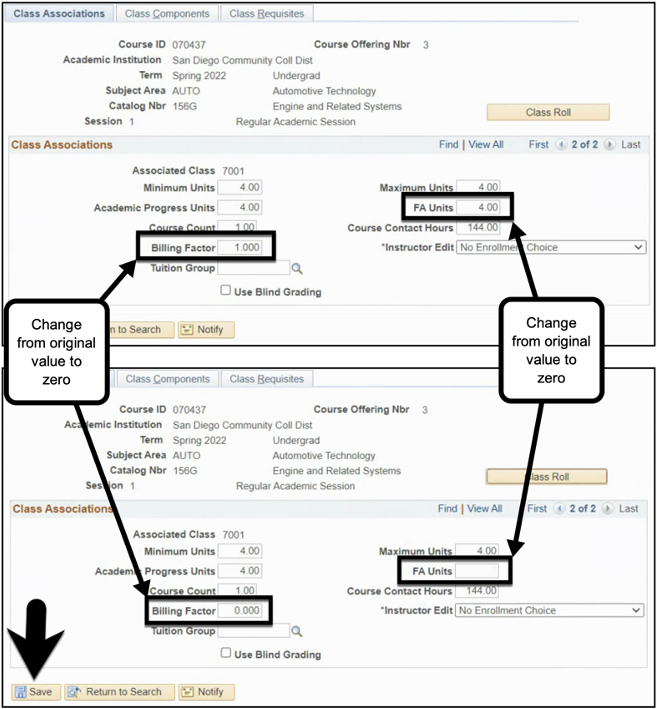
| 13. | Find the Associated Class Number you just scheduled. Adjust the FA Units and Billing Factor. |
| Step | Action |
|---|---|
| 14. | End of Process. |