...
| Step | Action |
|---|---|
| 2. | Enter the Term, Subject Area, Catalog Nbr and Campus. Click the Search button. |

| Step | Action |
|---|---|
| 3. | If there are existing sections for a course, click the plus button |

| Step | Action |
|---|---|
| 4. | After clicking the plus icon |
...
| Step | Action |
|---|---|
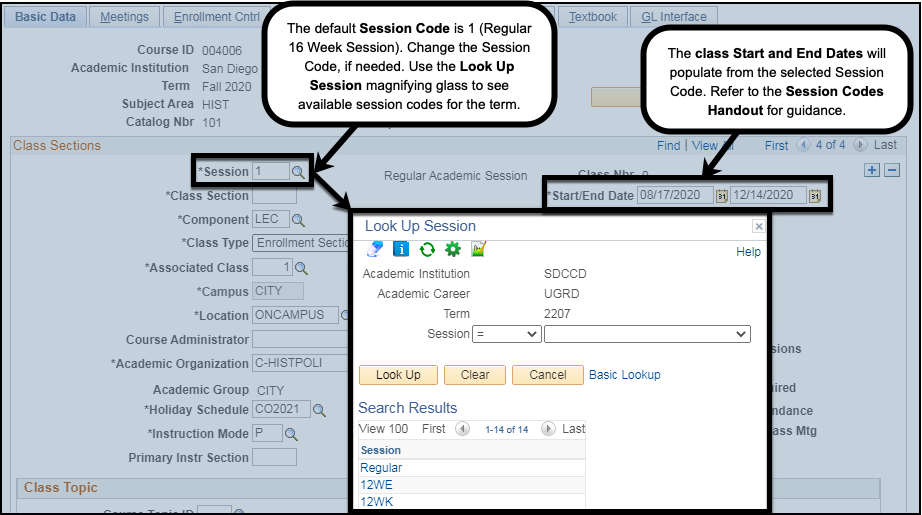
| 5. | Begin by selecting the Session Code and Class Start and End Date. |
| Step | Action |
|---|---|
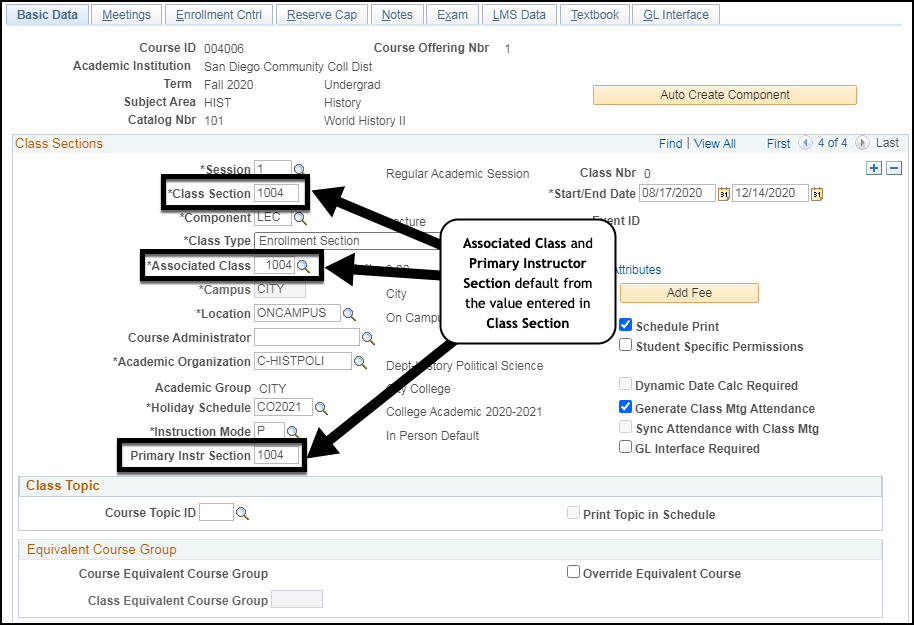
| 6. | Add the Class Section Number. The Associated Class Number and Primary Instr Section will default from the Class Section Number. Note:
Example: The class below is scheduled at City College and it is the fourth section scheduled, the Class Section Number is 1004. Reminder: Check with your campus lead scheduler about using special Class Section Numbers. Warning: Class Section Numbers should not be repeated within the same term, campus, and Course ID. |
| Step | Action |
|---|---|
| 7. | Select the Location for the class section. Tip: Refer to the Course Modality Definitions Handout for guidance. |
...
| Step | Action |
|---|---|
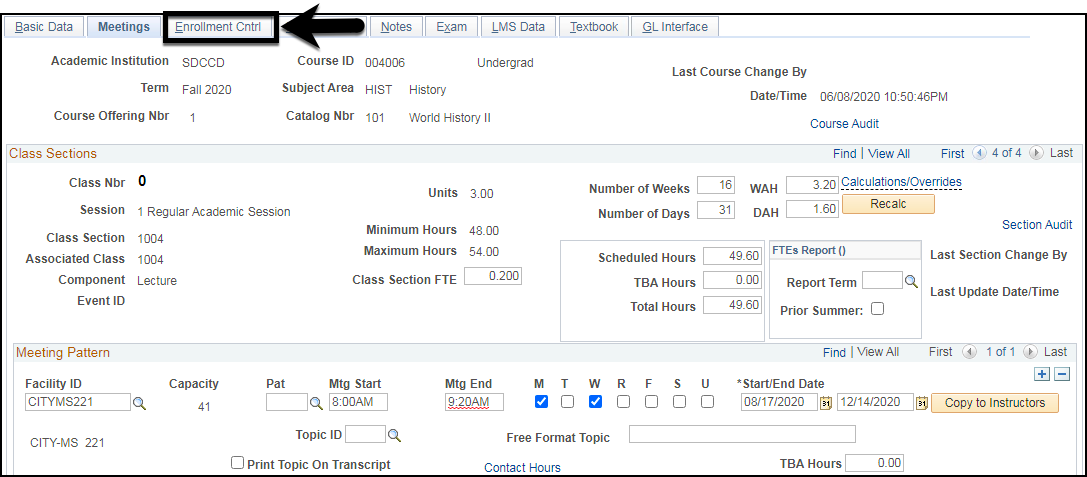
| 12. | Click on the Enrollment Cntrl Tab.of job aid. |
| Step | Action |
|---|---|
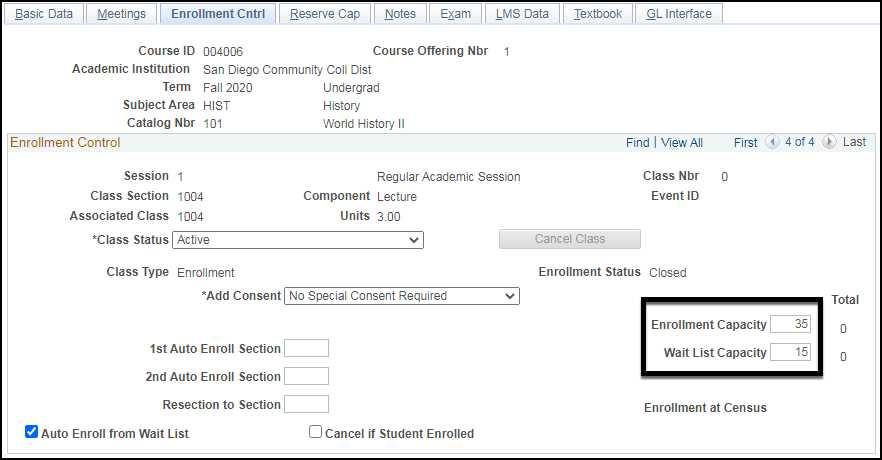
| 13. | Enter the Enrollment Capacity (Class Cap) and the Wait List Capacity (Wait Cap). |
| Step | Action |
|---|---|
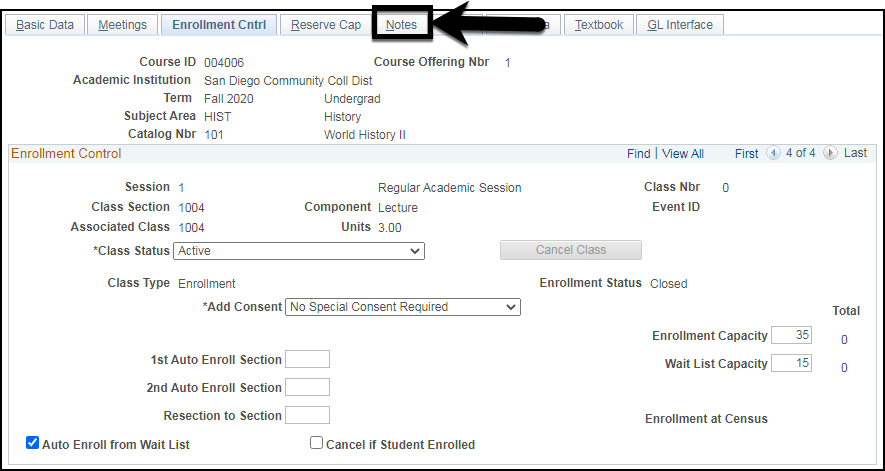
| 14. | Click on the Notes Tab. |
| Step | Action |
|---|---|
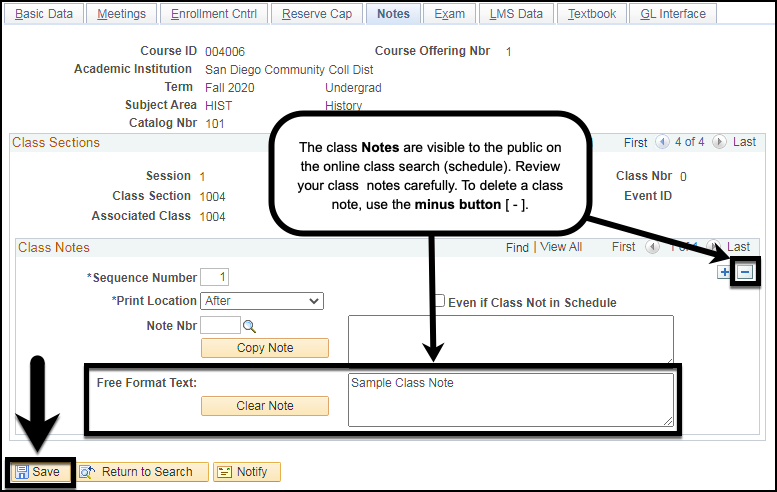
| 15. | Enter any necessary Class Notes in proper case. Click the Save button to save the newly scheduled class section. |
| Step | Action |
|---|---|
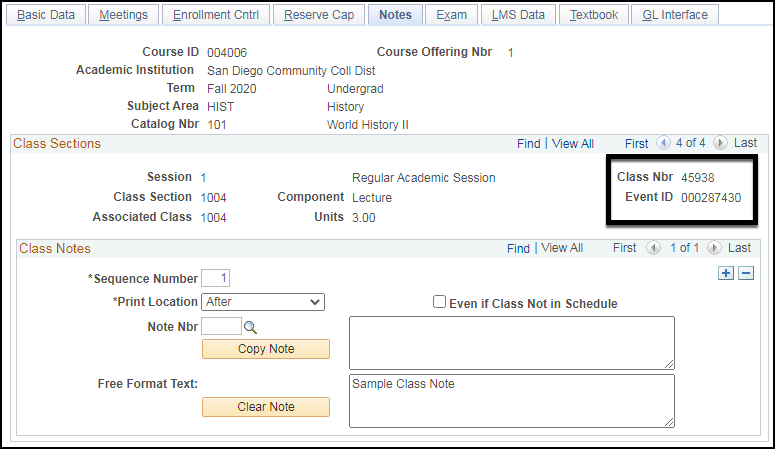
| 16. | Once the class section is saved, the system will populate the Class Nbr and the Event ID for the section. |
| Step | Action |
|---|---|
| 17. | End of Job Aid. |