...
| View file | ||||
|---|---|---|---|---|
|
Business Process: Creating permission (add codes)
Module: Curriculum Management
...
A class section for the course has to exist on the current schedule of classes.On the Enrollment Control tab for the class section, “Instructor consent” has already been added.
Instructions
This Job Aid will go over the process necessary to create permission codes for a class section for the first time.
| Step | Action |
|---|---|
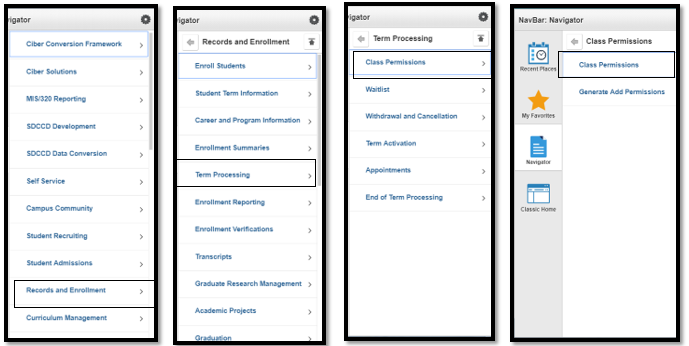
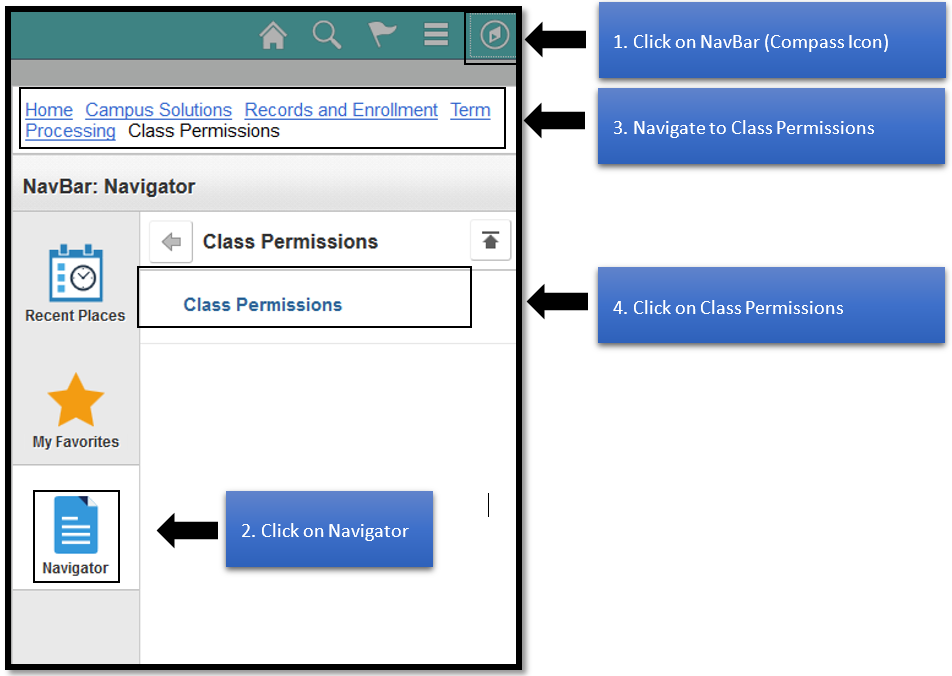
| 1. | Click on |


| Step | Action |
|---|---|
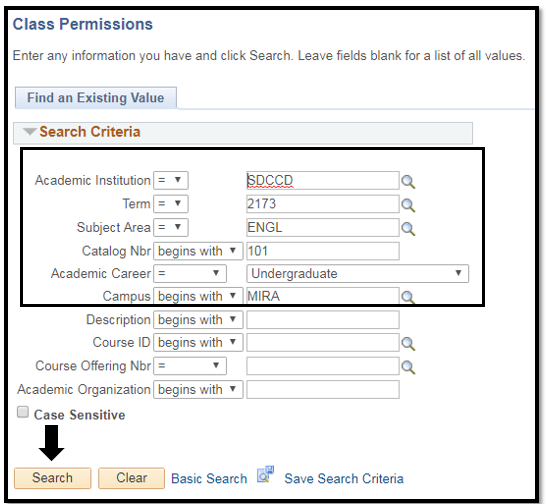
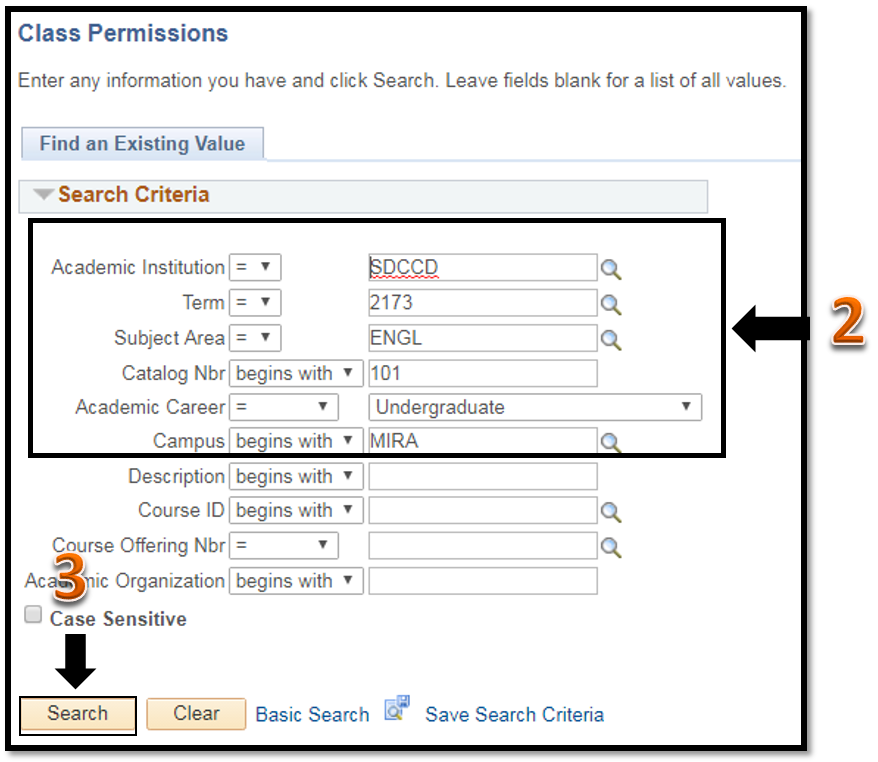
| 2. | Enter in as much information about search criteria on the class you want to create generate permission numbers for in the fields within the black box. Note: If you do not know some of the information, you can use the |
| 3. | Click on Search once you have input in the informationentered your criteria. Note: The |


| Step | Action |
|---|---|
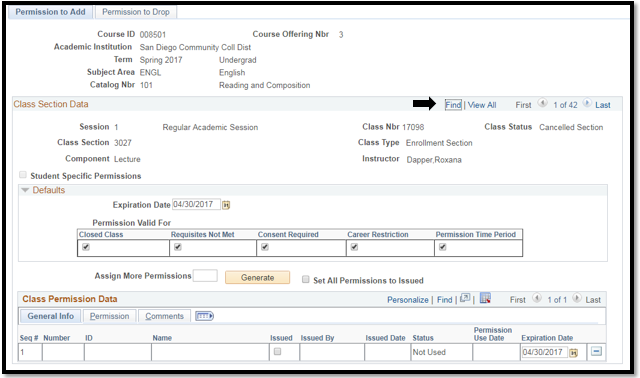
| 4. | On the Permission to Add tab, you will be directed to the first section of the course. |
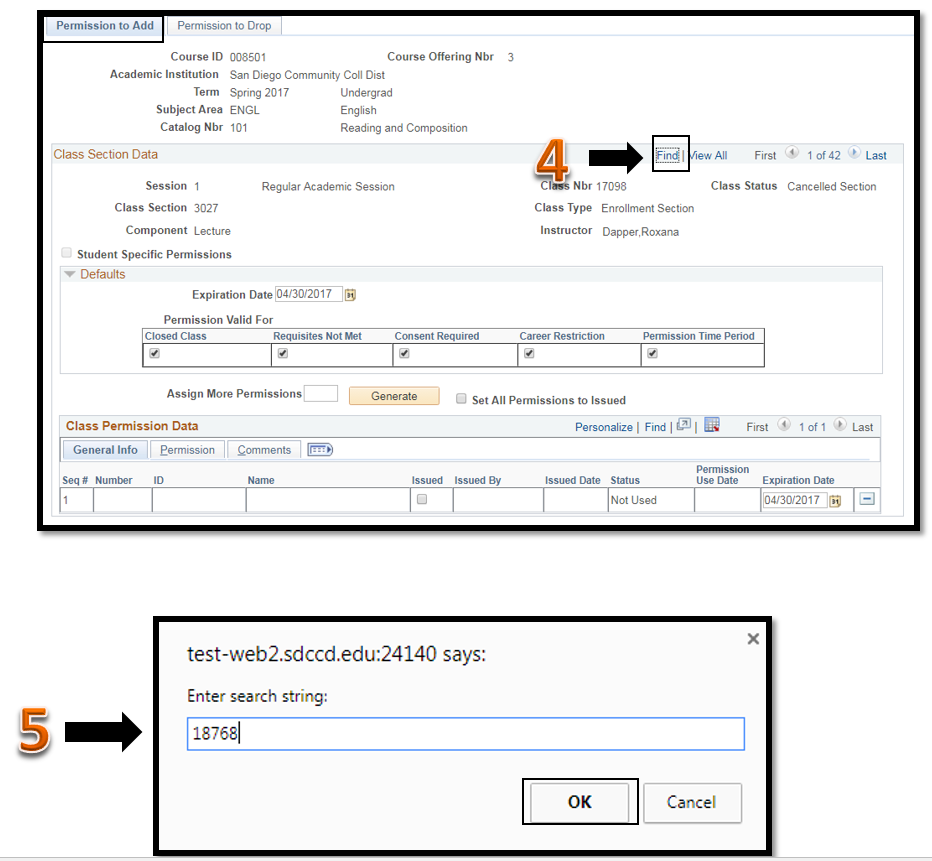
| 5. | To create permission numbers for your specific section, click on the Find link. Then, enter the class nbr for the section. Example: I want to create permission numbers for the 42nd section of ENGL 101 at Miramar College (Class Nbr = 18768) |
...
the Class Nbr in the box that says Enter Search String for the section you need, then click OK. |
| Step | Action |
|---|---|
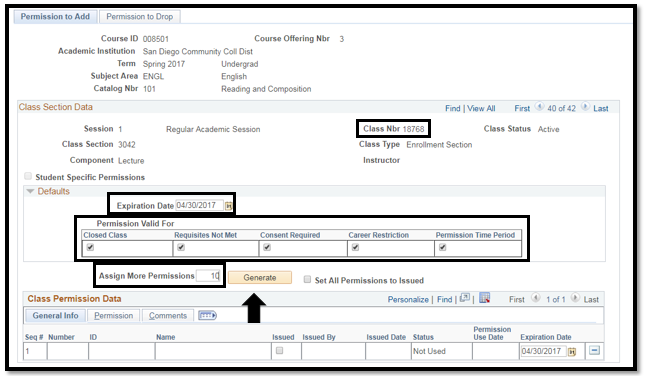
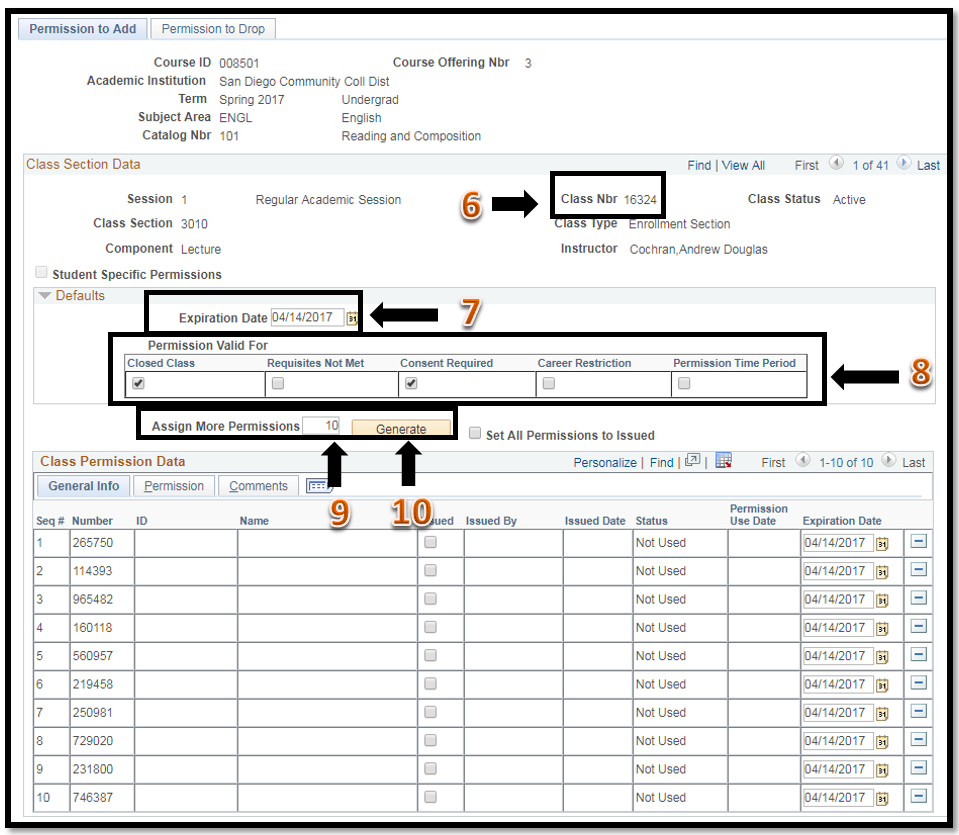
6. | You will be directed to the Permission to Add tab for the class section you selected (Class Nbr=18768) |
7. |
| Step | Action |
|---|---|
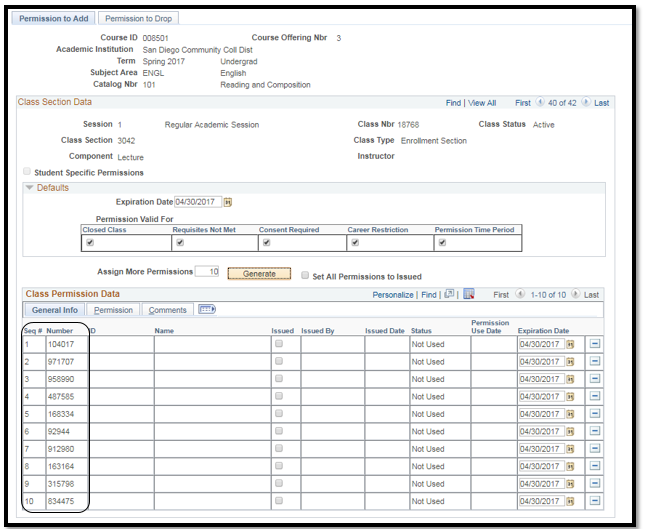
| 10. | End of job aidEnter the The Expiration Date for the permission numbers. Note: This date defaults to the current date, if you need to change it, enter in a new date. Check the appropriate Permission Valid for checkboxes for the permission numbers for the section. Enter the number of permission numbers you want to create for the class section in the Assign More Permissions field. Click Generate. |
...
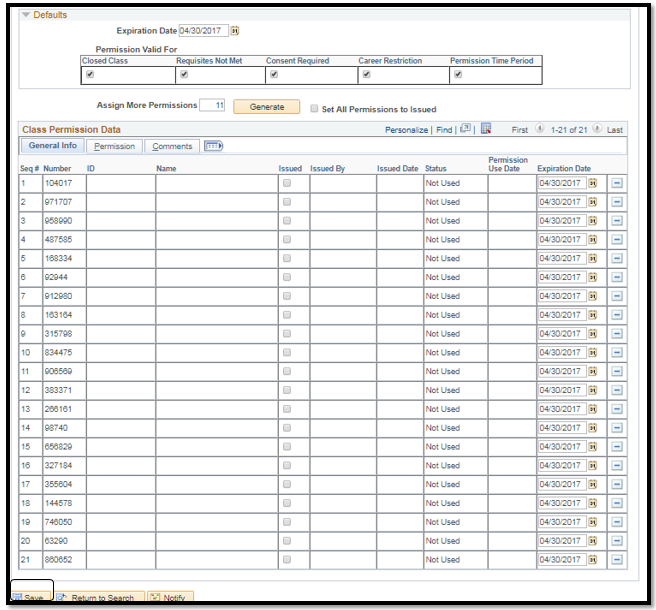
You can view the permission numbers you created by scrolling to the bottom of the screen in the Class Permission Data.
*Note: Class Permission numbers vary in length
...
...
In the example below, 11 more add codes generated. You can view the permission numbers you created by scrolling to the bottom of the screen in the Class Permission Data.
*Note: Class Permission numbers vary in length.
...
defaults. Do not change the date. The expiration date for permission numbers is determined by the add/drop deadline and not the date in this field. | |
8. | Permission Valid for defaults to all boxes checked/selected. The Permission Valid For check boxes are used to specify the conditions that a class permission overrides. · Check = Allow enrollment · Uncheck = Do NOT allow enrollment Closed Class - Select to allow students to enroll in a class that is full. Verify box is checked. Requisites Not Met - Select to allow students to enroll in a class for which they do not meet the prerequisites. Uncheck the box. Consent Required - Select to allow students to enroll in a class that requires instructor or department consent to add, as indicated by the Add Consent field on the Enrollment Cntrl page. Verify box is checked. Career Restriction - Select to allow students to enroll in a class that is outside their career. Uncheck the box. Permission Time Period - Select to allow students to enroll in a class after the add/drop deadline. Uncheck the box. |
9. | Enter the number of permission numbers you want to create for the class section in the Assign More Permissions field. |
10. | Click Generate. |
| Step | Action |
|---|---|
| 11 | End of process. |