...
| Step | Action |
|---|---|
| 6. |
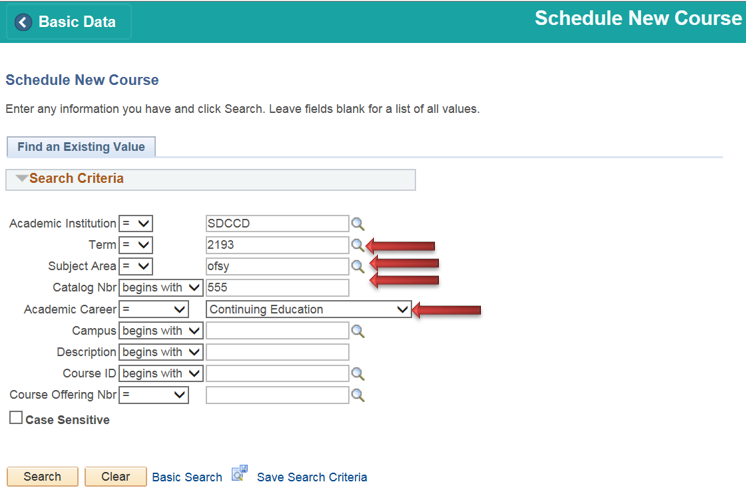
Note: Term 3 (Spring) + year (2019)= Spring 2019 i.e. 2193 Term 5 (Summer) + year (2019) = Summer 2019 i.e. 2195 Term 7 (Fall) + year (2019) = Fall 2019 i.e. 2197
|
| Step | Action |
|---|---|
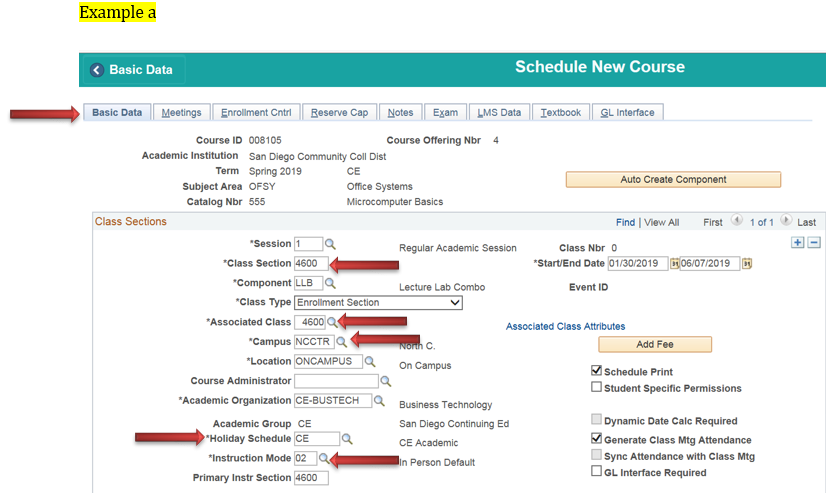
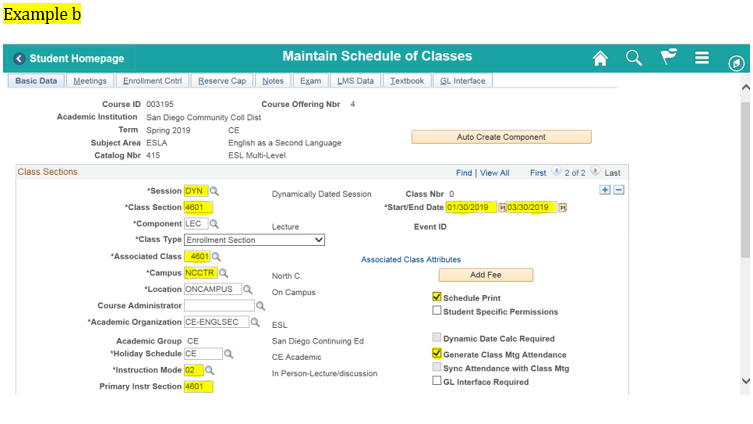
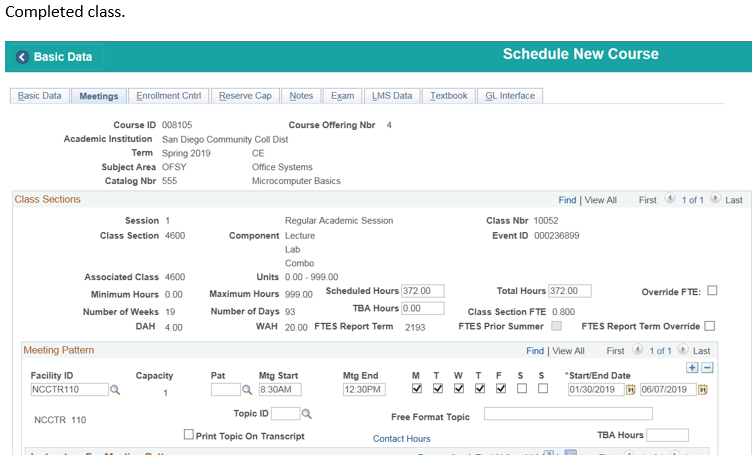
| 7. | BASIC DATA tab: Class Sections:
|
| Step | Action |
|---|---|
| 8. | Click on the Meetings tab to build the class’s meeting pattern.
|

| Step | Action |
|---|---|
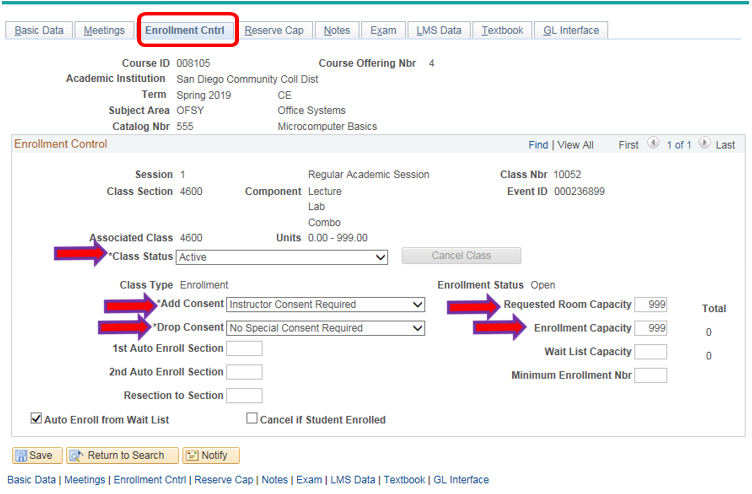
| 9. | Begin on the Enrollment Cntrl tab.
|
| Step | Action |
|---|---|
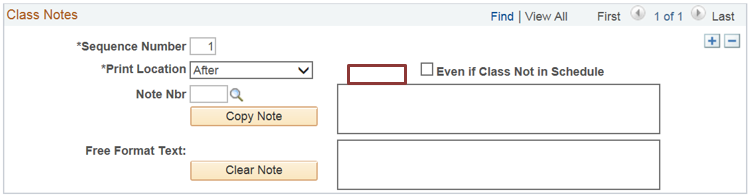
| 10. | Click on Note Tab: Class Notes Section; click the “+” to add a row for another Sequence Number if necessary. These notes will print in the class schedule. Sequence numbers are set ups as: Sequence Number 1=Star Line and description of class Sequence Number 2=Material Fees Sequence Number 3=Community Ed Fees Click SAVE. |
| 11. | End of Job Aid. Note: After saving this class go to the following navigation for the Adjust Class Associations page. Navigation>Curriculum Management>Schedule of Classes>Adjust Class Associations. For reference use the Adjust Class Associations job aid. |