Changing Student Program Plan Stack
Business Process: Changing student program plan stack
...
| Step | Action |
|---|
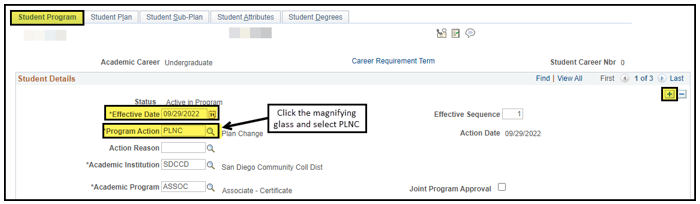
| 7. | If the student is in Active in Program status on the Student Program tab, click on the plus sign to add a new row. Complete the following steps: - Effective Date: The effective date will automatically populate to the current date and does not need to be changed.
- Program Action: Select the action by clicking on the magnifying glass or type in PLNC (Plan Change)
- Requirement Term: Do not change on this tab.
NOTE: Do not click OK. This will revert the page back to the SSSP page, and a new effective dated row will be required on the SSSP page to return to the Program/Plan stack. |
| Step | Action |
|---|
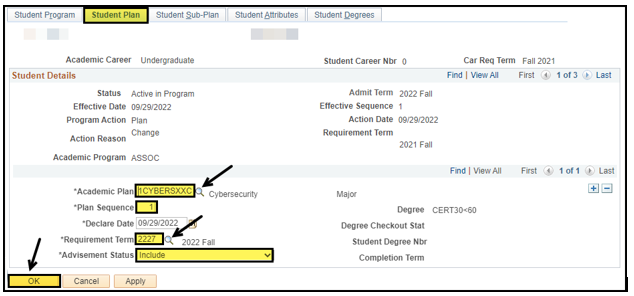
| 8. | Click on the Student Plan tab. The existing plan can be changed, or additional plans can be added. To Change a Plan: - Select an Academic Plan by clicking on the magnifying glass next to the current plan and select the appropriate educational plan. This will overwrite the new plan over the old plan.
- The Plan Sequence will remain the same as the previous plan.
- The Declare Date will default to the current date.
- The Requirement Term will default to the Admit term on the Program tab. Evaluate if the term needs to change. To change, click on the magnifying glass, and select the new requirement term.
- Advisement Status should be set to Include.
- Click OK when complete. The page will return to the Student Success page.
NOTE: Do not add plans to the student’s program/plan stack for What-If purposes. |
| Step | Action |
|---|
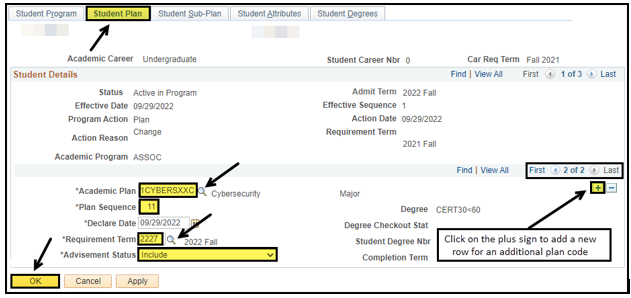
| 9. | To Add an Additional Plan: - Click on the plus sign to add a new row.
- Select an Academic Plan by clicking on the magnifying glass and select the appropriate educational plan.
- Click View All and evaluate the plan sequencing:
- The student’s primary plan should be the lowest sequence numbered plan.
- Financial Aid and Veterans will only pay on the lowest numbered plan, no matter the advising status. This means if the student has both a 10 and 20, but the 10 is in to Do Not Include advising status and the 20 in Include, FA will still award based on the plan code with the 10 sequence number.
- Sequence numbers should not be duplicated.
- Sequence numbers will either begin with a 1 or 10
- 10: current or past conversion student.
- 1: new or conversion student with admit via CCCapply.
- Both 1 and 10 sequence numbers will sequence up by 10 automatically when a new plan row is added. 1 will sequence to 11, 21, etc. 10 will sequence to 20, 30, etc.
- Plans are listed in alphabetical order, not sequencing order.
- The Declare Date will default to the current date.
- The Requirement Term will default to the Admit term on the Program tab. Evaluate if the term needs to change. To change, click on the magnifying glass, and select the new requirement term.
- Advisement Status should be set to Include.
- If any additional plans remain that the student is no longer pursuing or has completed, delete by clicking on the minus sign.
- Click OK when complete. The page will return back to the Student Success page.
NOTE: Do not add plans to the student’s program/plan stack for What-If purposes. |
| Step | Action |
|---|
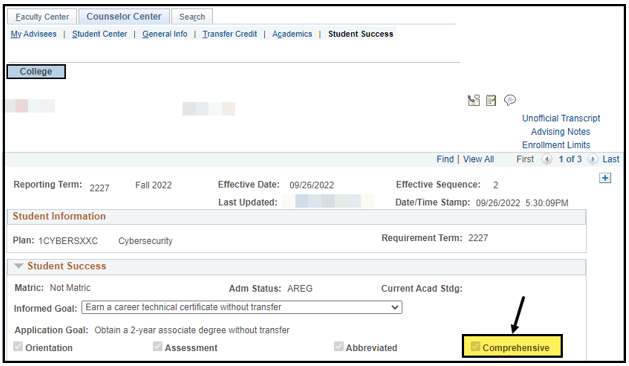
| 10. | On the Student Success page, the Comprehensive check box has been populated now that the student has a formal Ed Plan. |
| Step | Action |
|---|
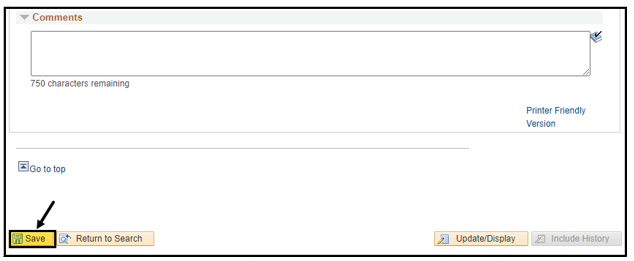
| 11 | Click Save on the Student Success page to complete the transaction. |
| Step | Action |
|---|
| 12 | End of Procedure |