Opening A Cashier Office
| Label | Description | ||
|---|---|---|---|
| Business Process | Cashiering | ||
| Module | Student Financials | ||
| BP ID | SF 014C | ||
| Prerequisites | Prerequisites | Cashiers, Registers, and Tenders must already be set-up in the system. Registers that Cashiers are eligible to use must already be set-up. The Cashier Office to be opened must already be closed. | |
| Description | This Job Aid illustrates how to open a Cashier Office [Steps 1-3], open Registers [Steps 4-5], and Open Cashiers [Steps 6-11] | Comments | N/A |
Instructions
| Step | Action |
|---|---|
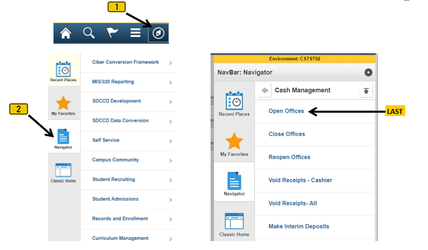
| 1. | Click on [ |


| Step | Action |
|---|---|
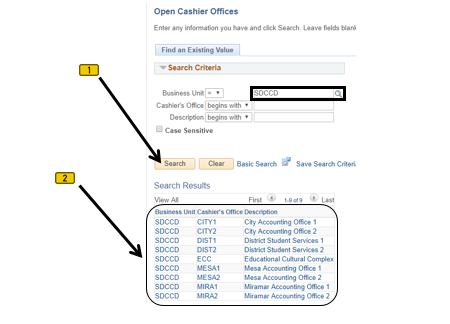
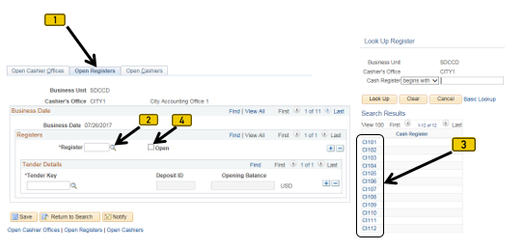
| 2. | Verify that the “Business Unit” field =“SDCCD”. If you already know the appropriateCashier’s Office, enter it into the “Cashier’s Office” field. If not, click the “Search” button to display a list to chooseselect from. Click the appropriate Cashier’s Office (e.g. CITY1). |

| Step | Action |
|---|---|
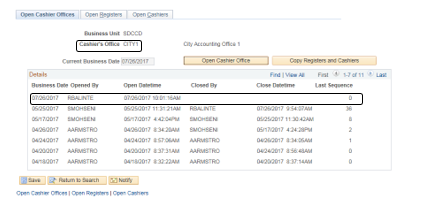
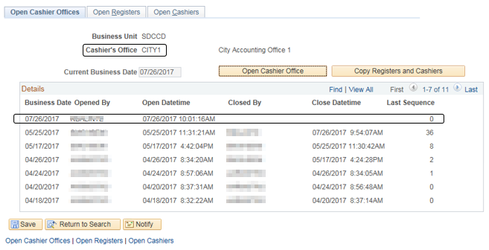
| 3. | Verify that the “Current Business Date” field is correct. Click on the “Open Cashier Office” button [ |

...
| Result of Step 3 |
|---|
The sample screenshot below shows that Cashier Office “CITY1” has been opened. |
| Step | Action |
|---|---|
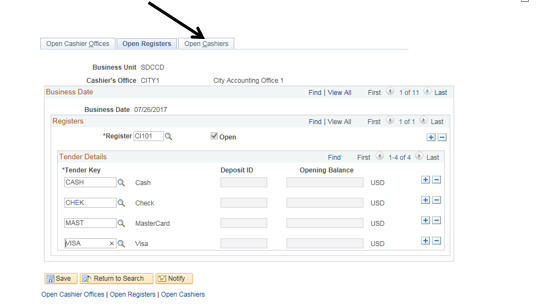
| 4. | Click on the “Open Registers” page (tab). Click on the magnifying glass [ |


| Step | Action |
|---|---|
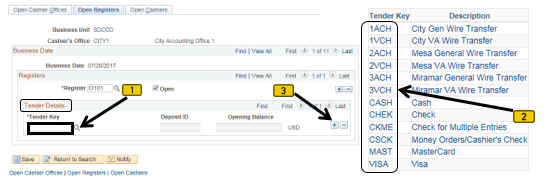
| 5A. | The “Tender Details” section is where the various forms of payment will be assigned to the Register. Click the magnifying glass [ NOTE: Assigning specific Tender Keys to a Register restricts that Register to only those Tender Keys. |


| Result of Step 5A |
|---|
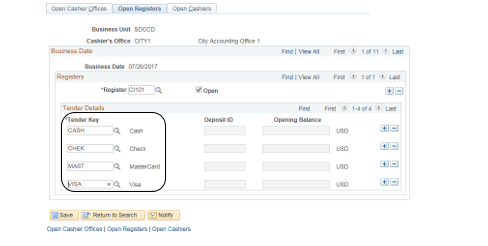
| The sample screen-shot below shows that the following “Tender Keys” have been assigned to Register CI101: CASH, CHEK, MAST, VISA |
| Step | Action |
|---|---|
| 5B. | Each Cashier should be assigned to a unique “Register”. So, if you have two Cashiers, two Registers need to be opened. If you have three Cashiers, three Registers need to be opened, etc. Click on the plus sign [ |

...
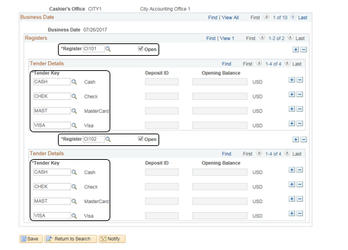
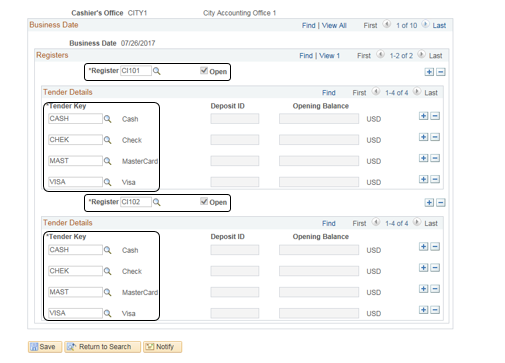
| Result of Step 5A-5B |
|---|
The following screenshot sample shows that Registers CI101 and CI102 have been opened. Both Registers have been assigned the Tender Keys of CASH, CHEK, MAST, VISA. |
| Step | Action |
|---|---|
| 6. | Click the “Open Cashiers” page/tab. |

| Step | Action |
|---|---|
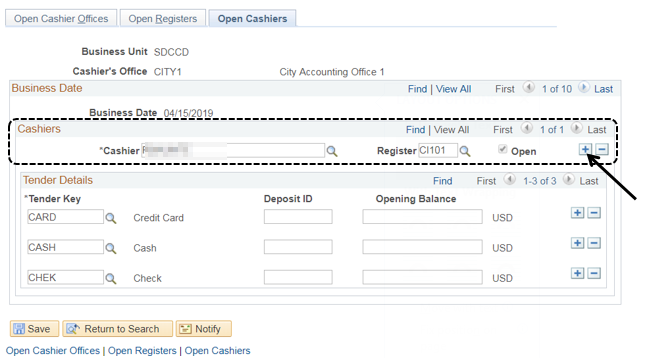
| 7. | In the “Cashiers” section, click on the magnifying glass [ |

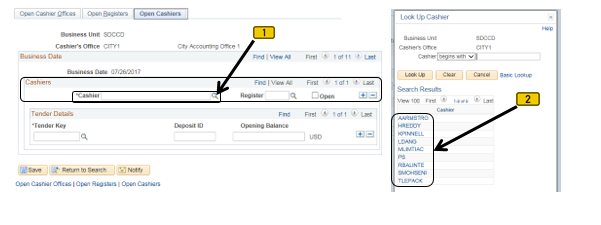
| Step | Action |
|---|---|
| 8. | Click on the magnifying glass [ |

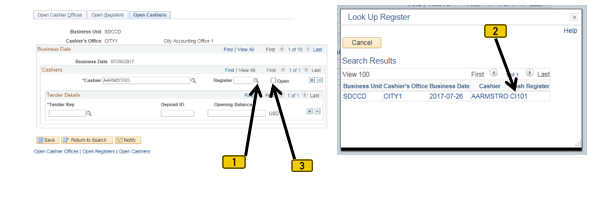
| Step | Action |
|---|---|
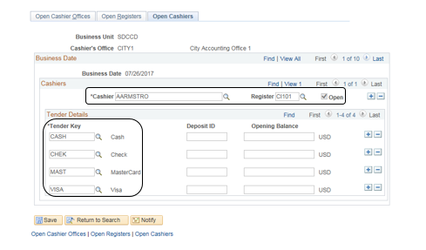
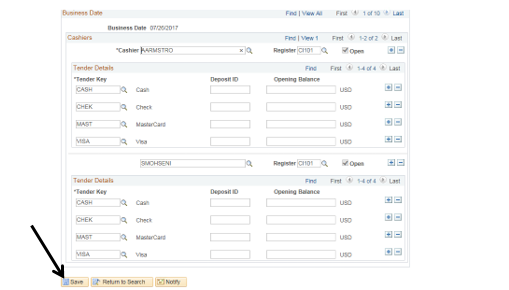
| 9. | Assign the appropriate Tender Keys to the Cashier. [This process is the same as assigning Tender Keys in the “Open Registers” tab.] Click the magnifying glass [ |


...
| Result of Step 9 |
|---|
| In the following samplescreensample screen-shot, AARMSTRO has been assigned to Register CI101. He has been assigned the following Tenders: CASH, CHEK, MAST, VISA. |
| Step | Action |
|---|---|
| 10. | To add more cashiers, click the plus sign [ |

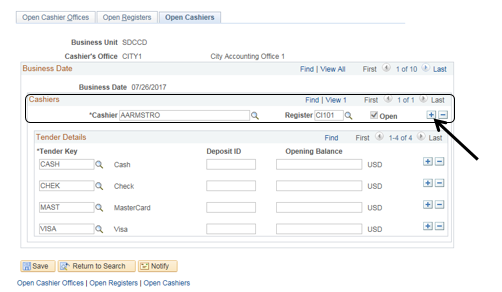
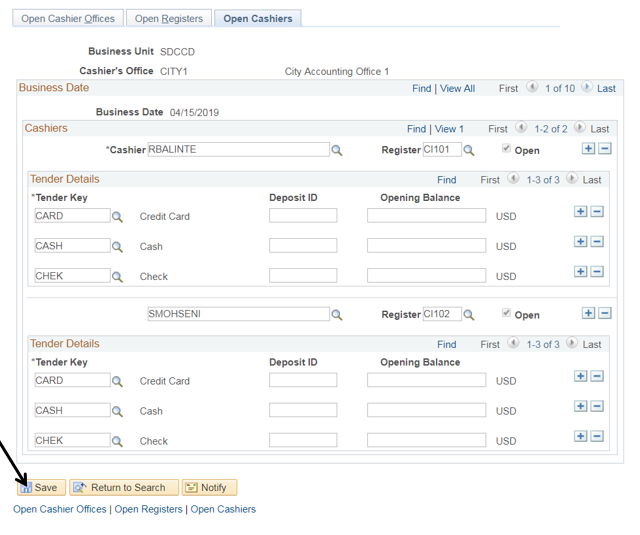
| Result of Step 10 |
|---|
The following sample screenshot shows that two cashiers, AARMSTRO RBALINTE and SMOHSENI, have been opened. AARMSTRO RBALINTE has been assigned to Register CI101. SMOHSENI has been assigned to Register CI102. Both have been assigned the same Tender Keys: CASH, CHEK, MAST, VISA |
...
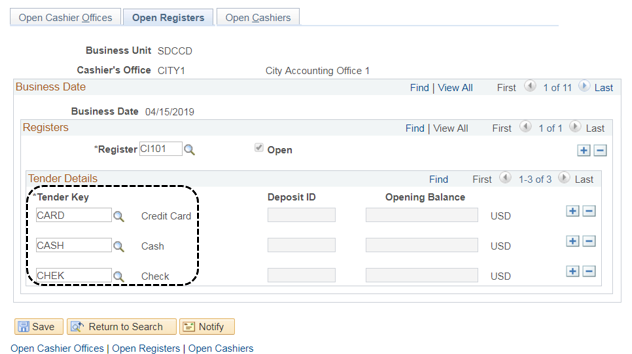
CARD. |

| Step | Action |
|---|---|
| 11. | Click the “Save” button [ |

| Step | Action |
|---|---|
| 12. | End of job aid. |
...