Clearing prerequisites by student groups
Business Process: Clearing Prerequisites by Student Groups
Module: Academic Advising
...
This Job Aid will outline the process necessary to clear prerequisites using Student Groups.
Step | Action |
|---|---|
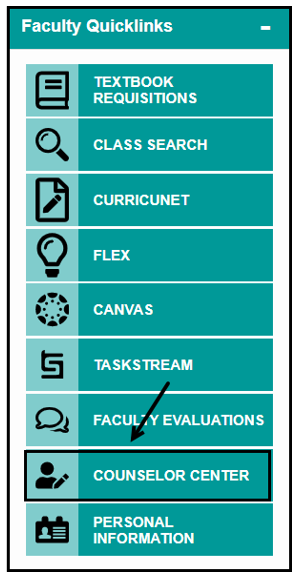
| 1. | From the Faculty Portal, under the Faculty Quicklinks, click on the Counselor Center tab. The Student Success search page will appear. |

| Step | Action |
|---|---|
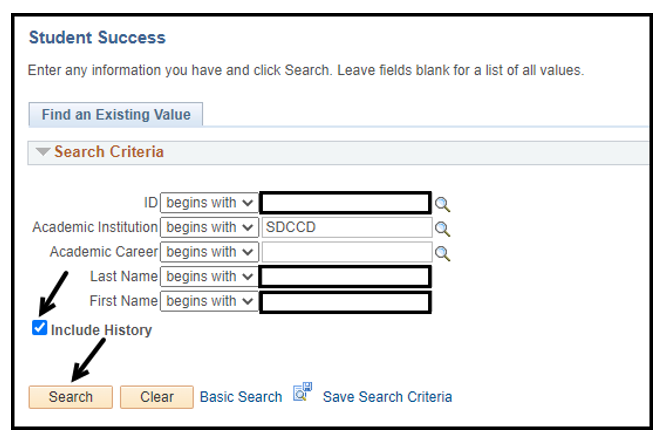
| 2. | On the Student Success search page, enter the Student ID number. Click Search. NOTE: If you do not know the Student’s ID, you can search using the first and last name fields. Include History box should default as checked. If it is not, make sure to check the box. |

| Step | Action |
|---|---|
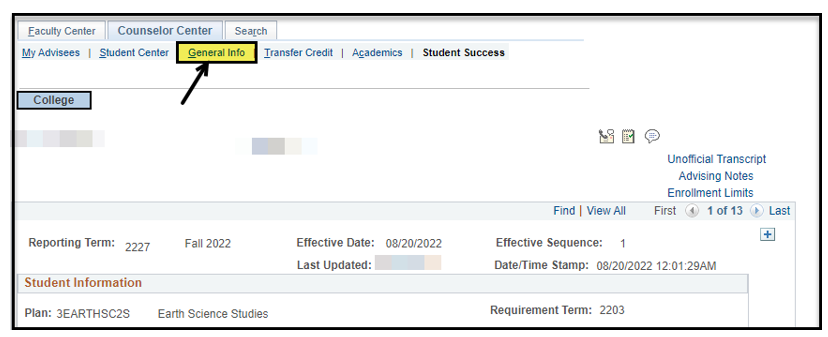
| 3. | Click the General Info tab. |
| Step | Action |
|---|---|
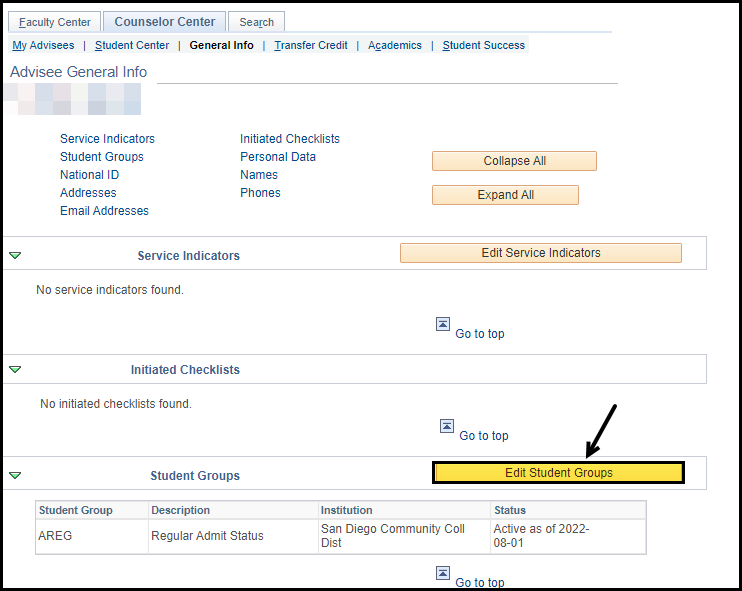
| 4. | Click on the Edit Student Groups button. |

| Step | Action |
|---|---|
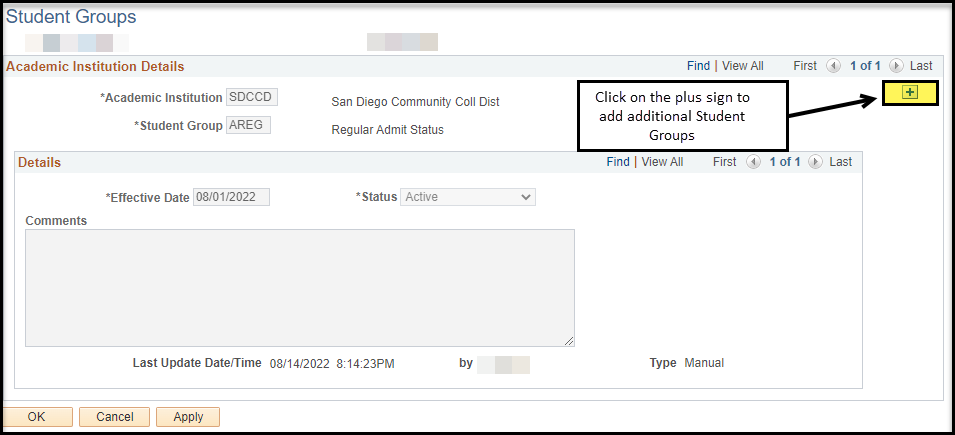
| 5. | Since a student group already exists, click on the plus sign to add a new row. |

Step | Action |
|---|---|
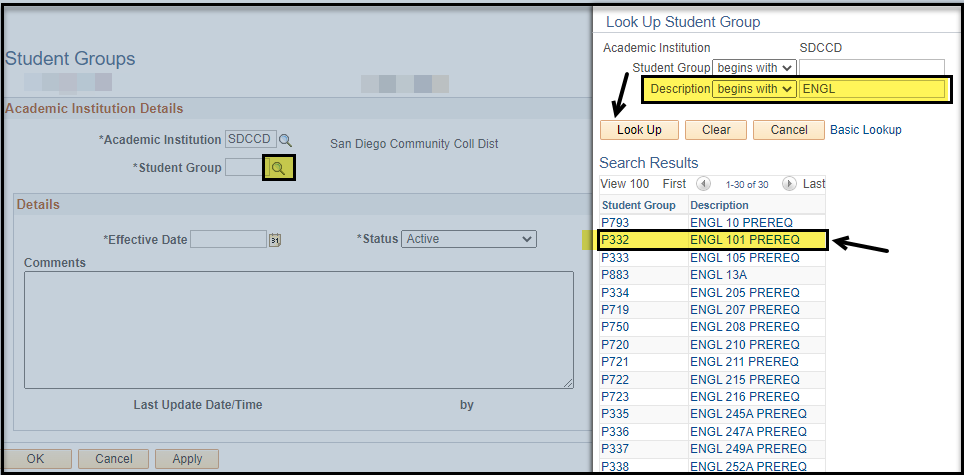
| 6. | Click the magnifying glass to select the new student group. Search for the student group by populating the Description field (ex: ENGL, MATH) and clicking Look Up. |

| Step | Action |
|---|---|
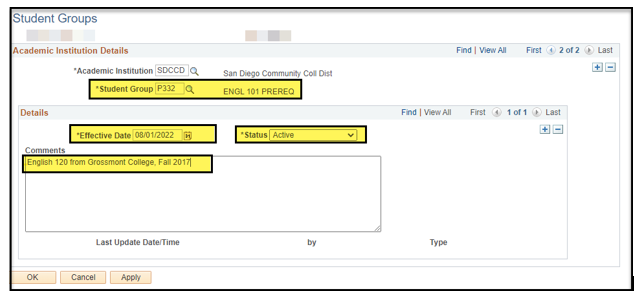
| 7. | The Effective Date will populate as the current date. The status is defaulted as Active. Use the following Best Practice date to populate the Effective Date: Fall = August |
1st Spring = January |
1st Summer = June |
1st Example: 08/01/2022 01/01/2022 06/01/20222 NOTE: For a student group to active for a term, the effective date MUST be dated on or before the first day of that term. Add a Comment describing the reason the student group was added. |

| Step | Action |
|---|---|
| 8. | Click OK: this will add the student group and the page will return to the General Info page. Click Apply: this will save the current student group, but the Student Group page will remain so additional student groups can be added in one session.
To delete an incorrect student group, click the minus sign. |


| Step | Action |
|---|---|
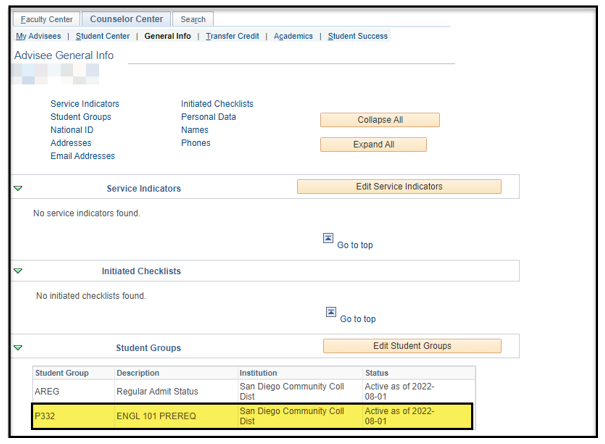
| 9. | When OK is clicked, the page will return to the General Info page and the Student Group will be saved on the student’s record. |

| Step | Action |
|---|---|
| 10. | End of job aid. |
...