...
Business Process: Scheduling learning community sections
Module: Student Records – curriculum managementCurriculum Management
Instructions:
This Job Aid will go over the process necessary to create Learning Community sections: LCOM shell and individual sections.
| Step | Action |
|---|---|
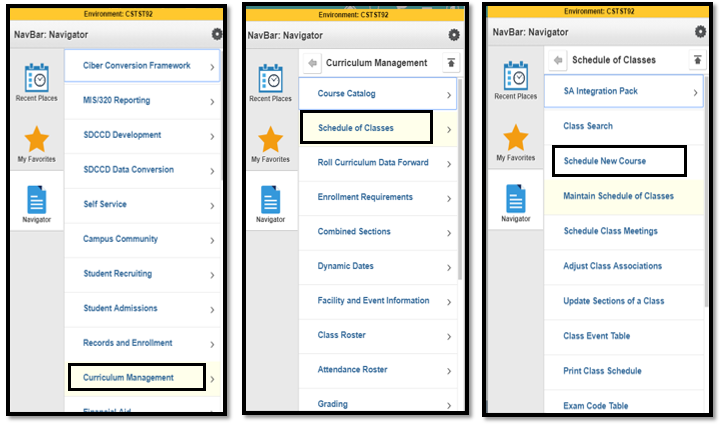
| 1. | Click on |

 navigate
 and |

Curriculum Management -> Schedule of Classes -> Schedule New Course. |
| Step | Action |
|---|---|
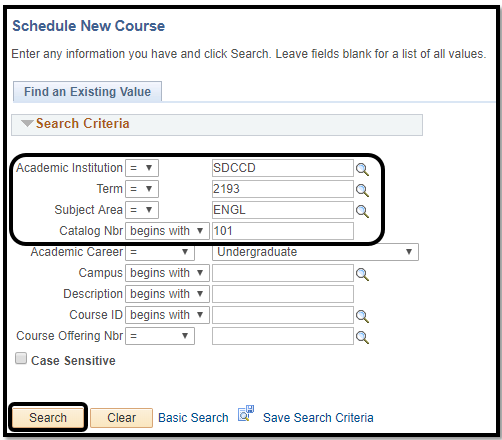
| 2. | On Schedule New Course page input the Term, Subject and Catalog Number. Click Search. |
...
| Step | Action | ||||||
|---|---|---|---|---|---|---|---|
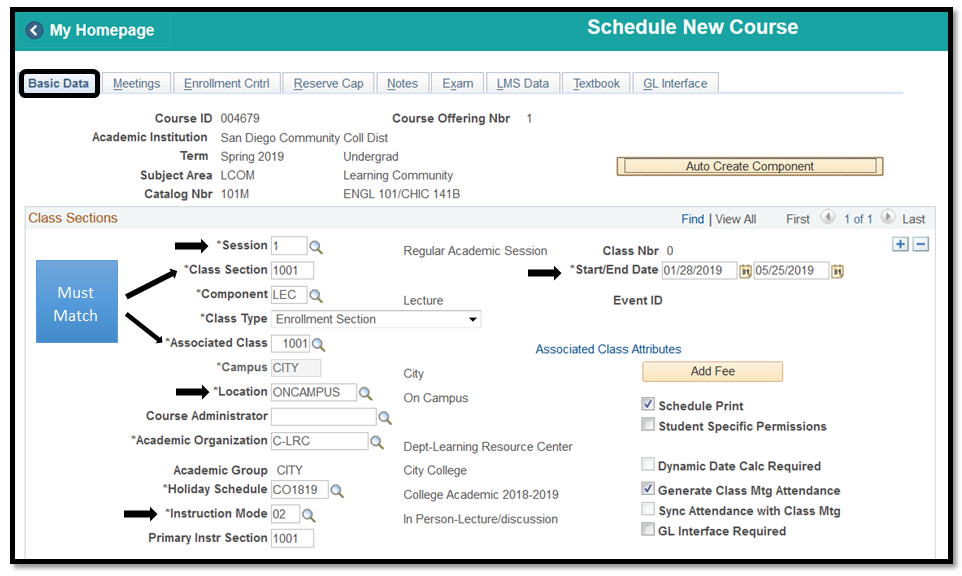
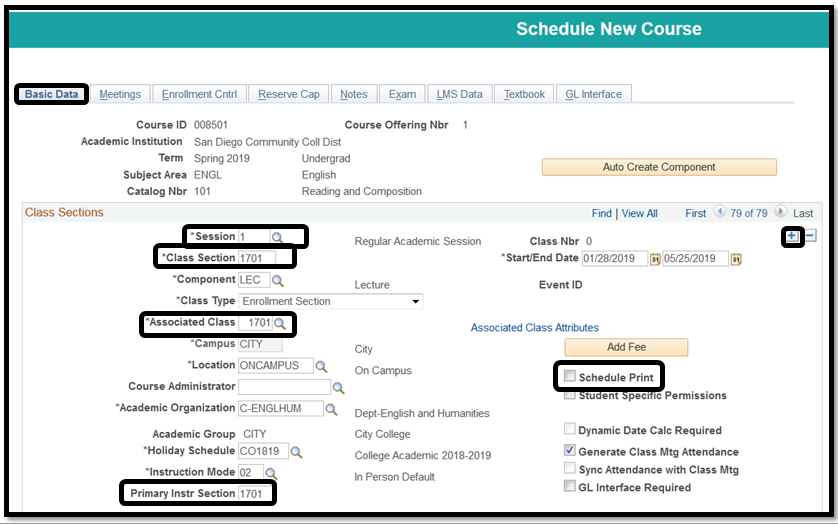
| 4. | The page below displays after selecting the offering campus. Fill in class information on the Basic Data tab (*Session, *Class Section, *Associated Class, *Instruction Mode). | ||||||
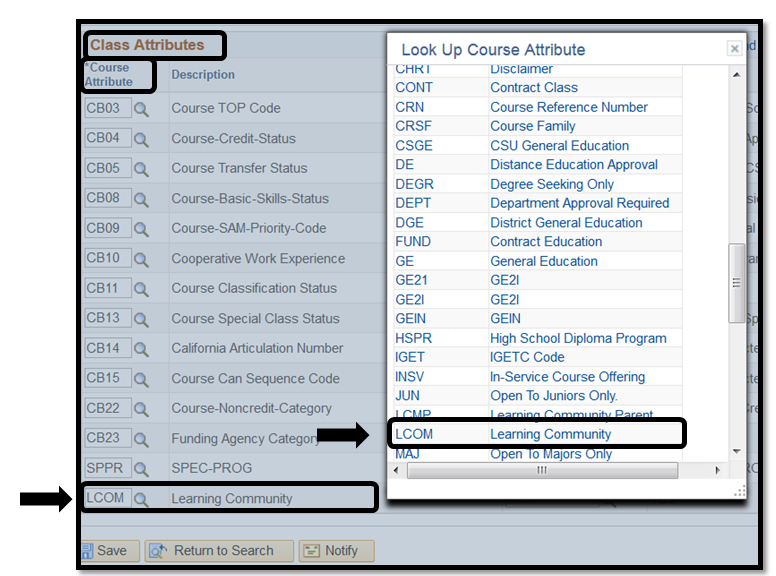
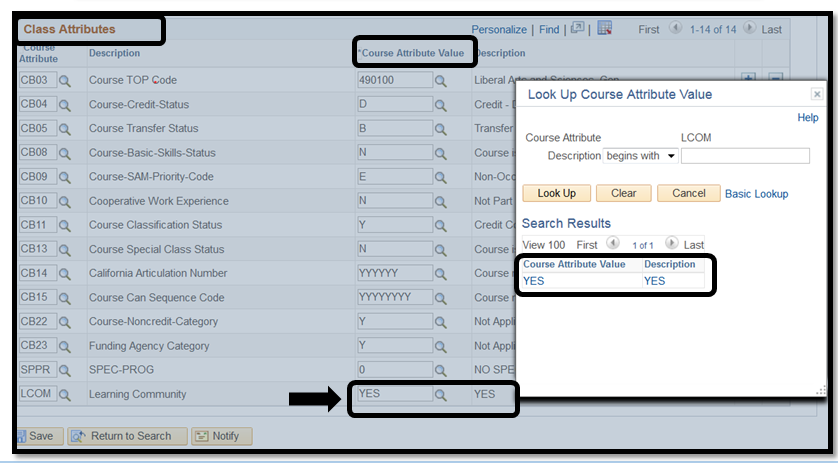
| 5. | Add a Class Attribute by first | clicking the plus sign clicking | SPDG LCOM or click on the magnifying glass to select | Special Designator Learning Community ( | SPDGLCOM) and for the Course Attribute Value enter | CONCURNT YES or click on the magnifying glass to select | Concurrent Class (CONCURNT)YES. |


| Step | Action |
|---|---|
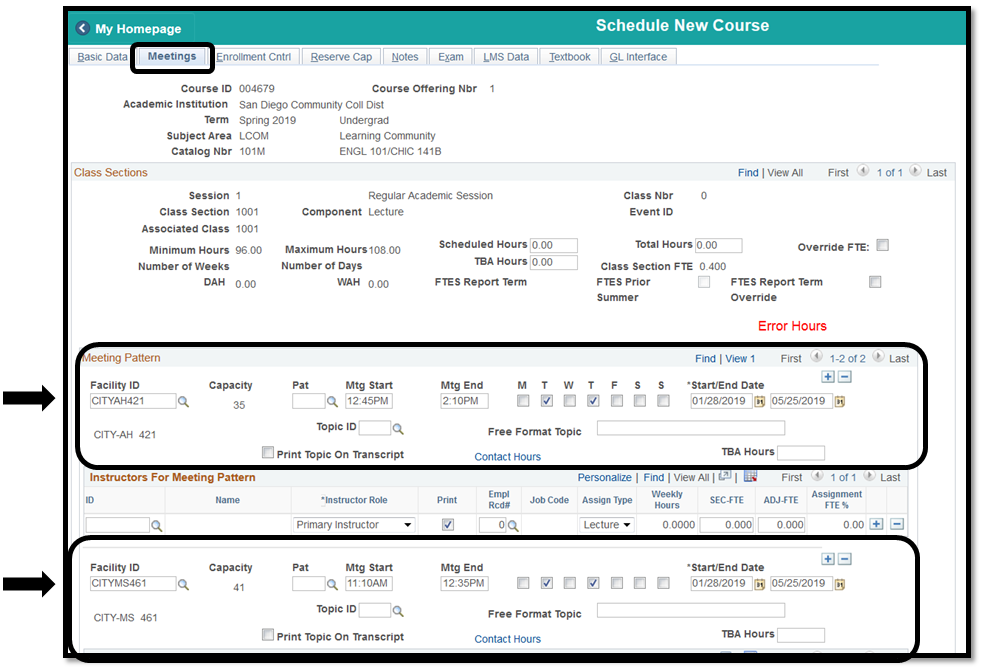
| 56. | On the Meetings tab, enter Meeting Patterns and Instructors for Meeting Pattern |
...
for both of the classes. Note: No instructors can be added to the parent class because this is NOT an actual subject. Instructors will be added to the ‘child’ classes. |
| Step | Action |
|---|---|
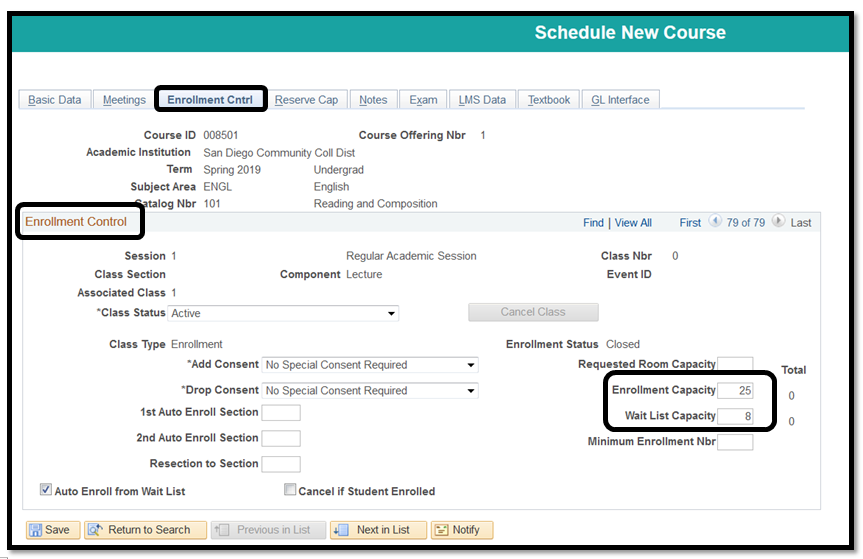
| 67. | On the Enrollment Cntrl tab, add Enrollment Capacity, Wait List Capacity and Instructor Consent Required if program requires restriction. |
...
| Step | Action |
|---|---|
| 78. | On the Notes tab, add class note and Save. Make note of your Class Nbr to add into the Class Notes section of the individual 'child' classes. |
...
It is recommended to add the instructors name and email address in the notes so students are able to contact the instructors for the classes. |
| Step | Action |
|---|---|
| 89. | Click Return to Search to create the individual class sections. |
| 910. | Input the Term, Subject and Catalog Number. Click Search. |
| Step | Action |
|---|---|
| 10.11 | Search Results will generate the courses based on the criteria input. Select the appropriate campus. |

| Step | Action |
|---|---|
| 1112. | On the Basic Data tab, if there are other classes already scheduled click on to add a new section under the Class Sections section. |
| 1213. | Setup Basic Data tab as usual except Class Section, Associated Class and Primary Instr Section numbering will be 1701+ for City, 2701+ for Mesa, and 3701+ for Miramar. This numbering is to help identify Learning Community classes easily among non-Learning Community classes. Uncheck Schedule Print to remove the class from the printed schedule. NOTE: This Job Aid displays an example for a City College Class. |

| Step | Action |
|---|---|
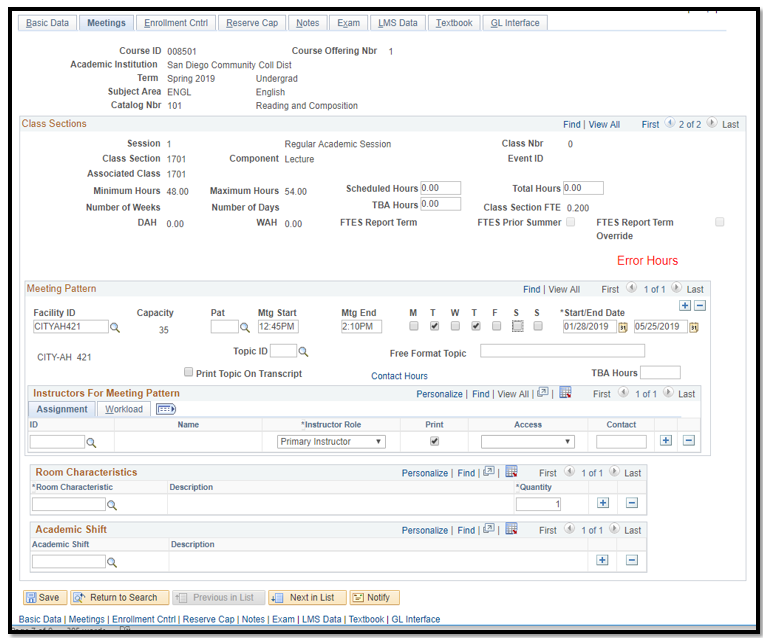
| 1314. | On the Meetings tab, input data as usual. |
| Step | Action |
|---|---|
| 1415. | On the Enrollment Cntrl tab, add Instructor Consent Required,enter Enrollment Capacity, and Wait List Capacity. |
...
Recommended to NOT put ‘Instructor Consent Required’ in the *Add Consent box. Restricting classes make it difficult for Admissions to manually enroll students into the class from the parent class. |
| Step | Action |
|---|---|
| 1516. | On the Notes tab, add class note. Be sure Class Nbrs match for all linked Class Notes. Click Save. Repeat steps 8-15 16 to add the next linked section. |
...