Label | Description |
|---|---|
| Business Process | Integration broker |
| Module | Student Financials |
| Prerequisites | User must be signed in as “SFBATCH”. The “GL Interface Required” box in the “GL Interface” page (tab) for the Item type(s) being interfaced must be check-marked. |
| Description | This Job Aid illustrates how to generate Item Type Accounting Entries and save the data to Excel. |
Instructions:
Step | Action |
|---|---|
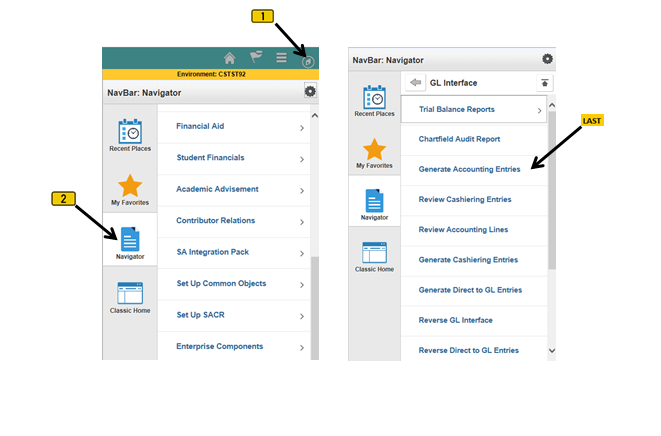
| 1. | Click on [ |


| Step | Action |
|---|---|
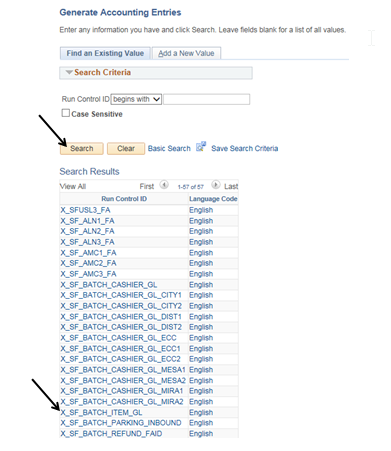
| 2. | Click the “Search” button to display a list of Run Control ID’s. Select “X_SF_BATCH_ITEM_GL”. |
| Step | Action |
|---|---|
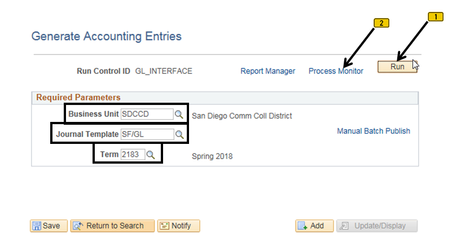
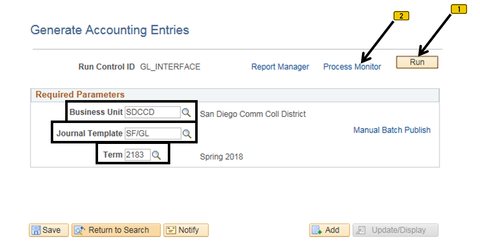
| 3. | Confirm the “Business Unit” field = “SDCCD”, the “Journal Template” field = “SF/GL”, and the “Term” field = the appropriate semester. Click the “Run” button, then the “Process Monitor” link. |
| Step | Action |
|---|---|
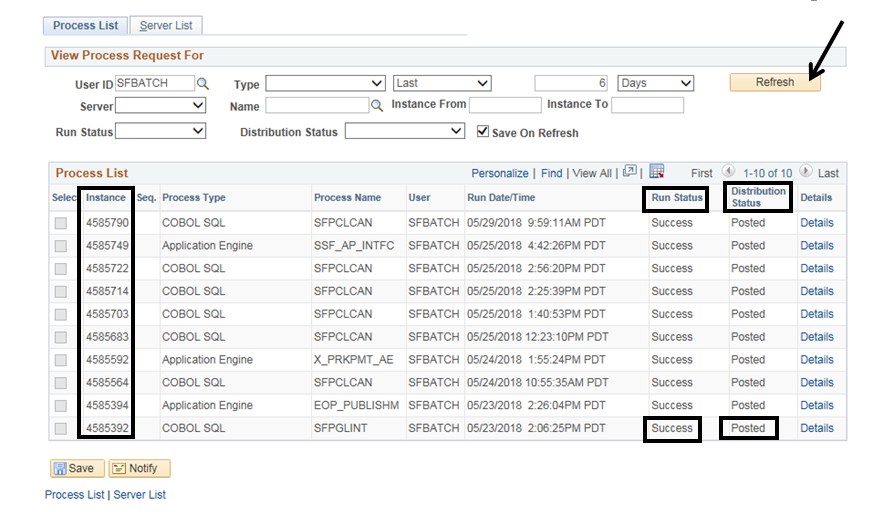
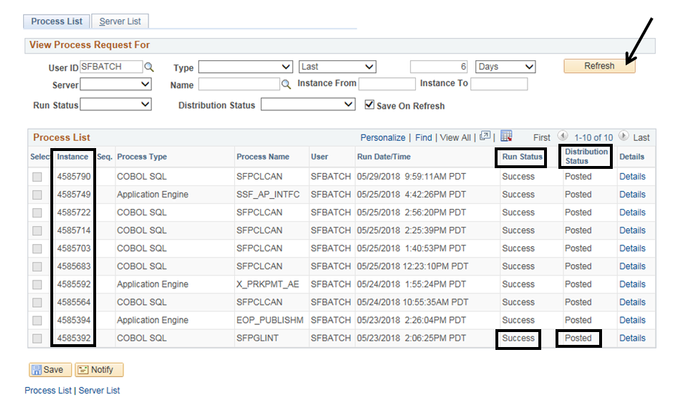
| 4. | Click the “Refresh” button until the “Run Status” column reads “Success” and the “Distribution Status” column reads “Posted”. Note that this is for your instance. |
| Step | Action |
|---|---|
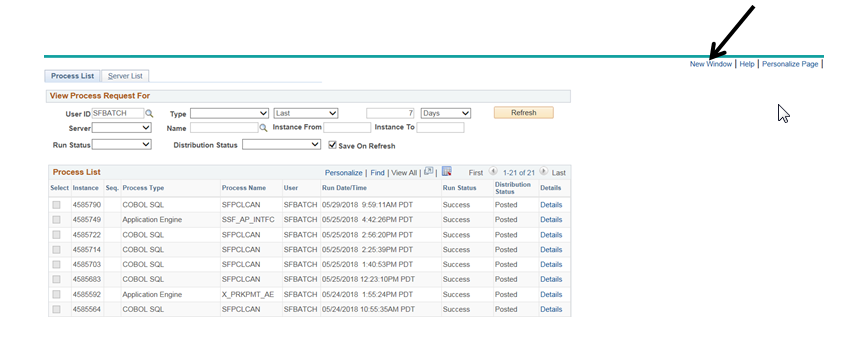
| 5. | Open a new window by clicking the “New Window” link in the top right corner. |

| Step | Action |
|---|---|
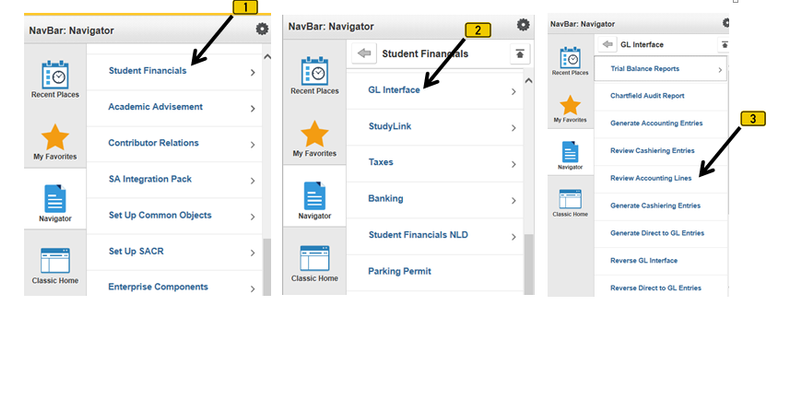
| 6. | In the new window, navigate to Student Financials -> GL Interface -> Review Accounting Lines |
| Step | Action |
|---|---|
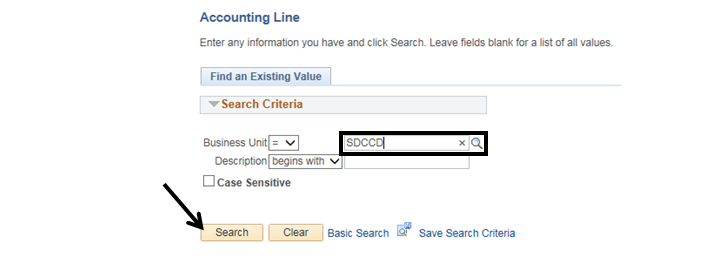
| 7. | Confirm the “Business Unit” field = “SDCCD”. Click the “Search” button. |
| Step | Action |
|---|---|
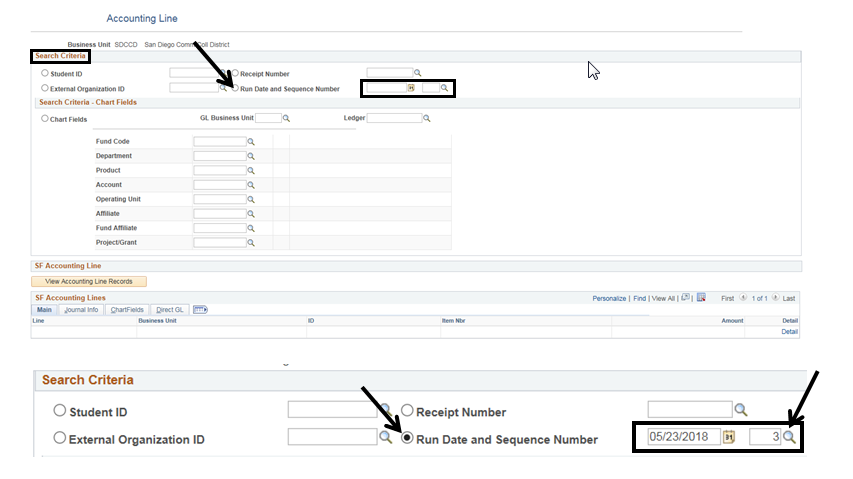
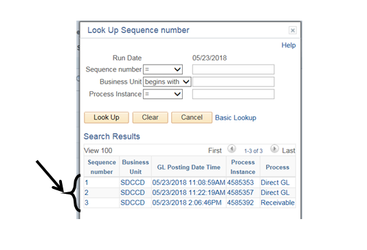
| 8. | In the “Search Criteria” section, click the circle next to “Run Date and Sequence Number” so that a black dot appears in the circle. Select the appropriate Date and Sequence number for the respective fields. You can click the magnifying glass to display the list of sequences and processes for the particular date. |
| Step | Action |
|---|---|
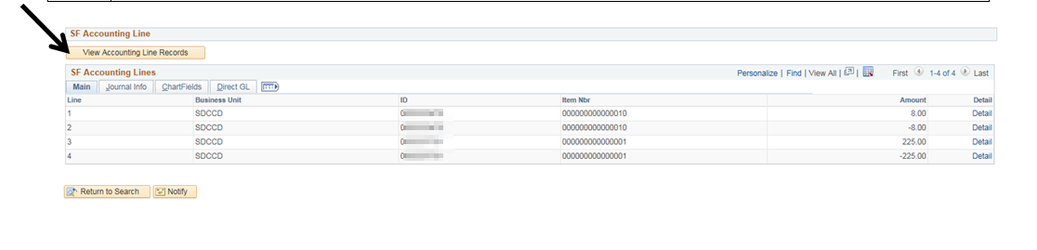
| 9. | Click the “View Accounting Line Records” button (towards the bottom left of the page) to display the accounting lines of the selected process instance. |
| Step | Action |
|---|---|
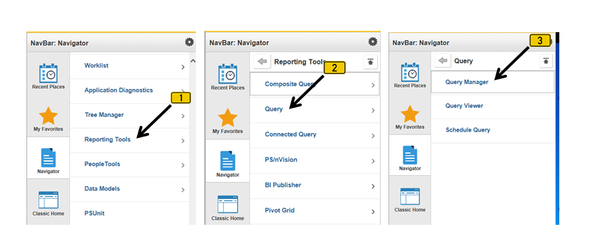
| 10. | Click the “New Window” link at the top right corner to open a new window. Navigate to Reporting Tools -> Query -> Query Manager |
| Step | Action |
|---|---|
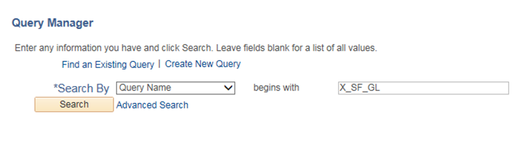
| 11. | Enter “X_SF_GL” into the “begins with” field. Click the “Search” button to display the different Queries that begin with “X_SF_GL” |
| Step | Action |
|---|---|
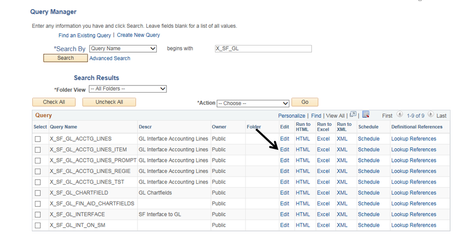
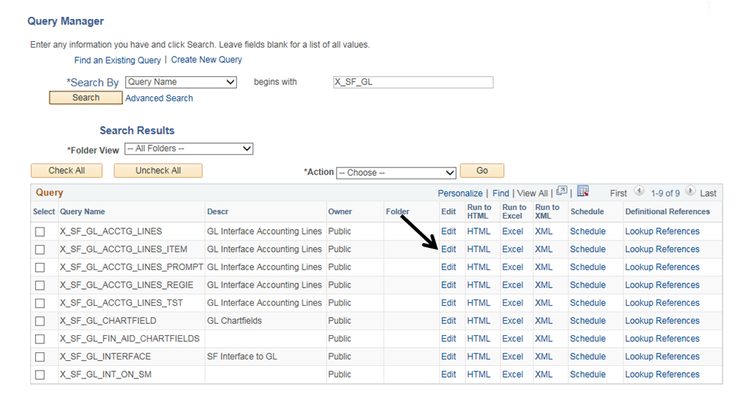
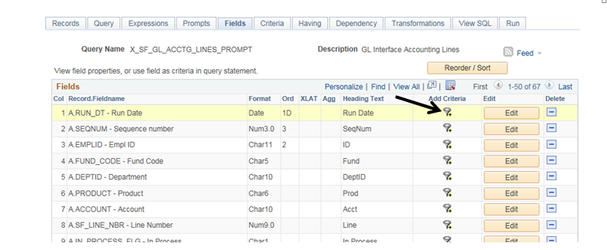
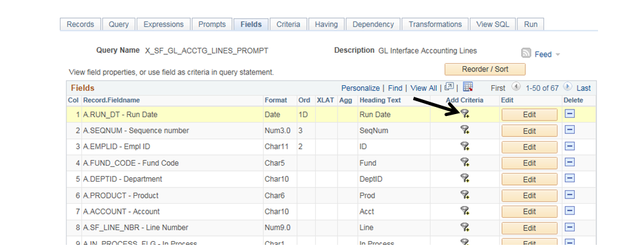
| 12. | For the “X_SF_GL_ACCTG_LINES_PROMPT” Query, select the “Edit” link. |
| Step | Action |
|---|---|
| 13. | On the first row, “RUN_DT – Run Date”, click the funnel in the “Add Criteria” column. |

| Step | Action |
|---|---|
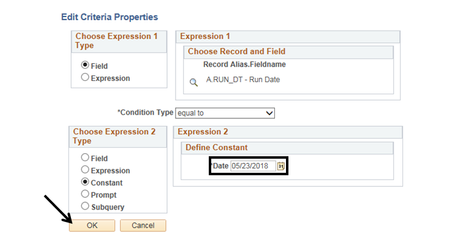
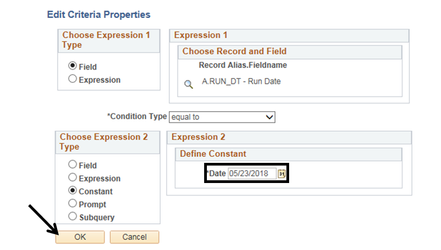
| 14. | In the section “Expression 2, Define Constant” enter the appropriate date in the “Date” field. Click the “OK” button. |
| Step | Action |
|---|---|
| 15. | In line 50, “A.SF_GL_RUN_INSTANCE – Process Instance”, click the funnel |


| Step | Action |
|---|---|
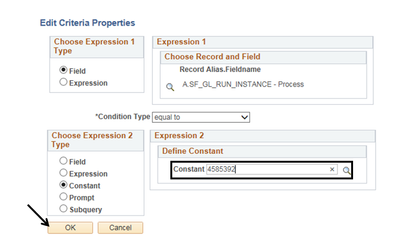
| 16. | In the section “Expression 2, Define Constant”, enter the appropriate process instance number in the “Constant” field. Click the “OK” button. |

| Step | Action |
|---|---|
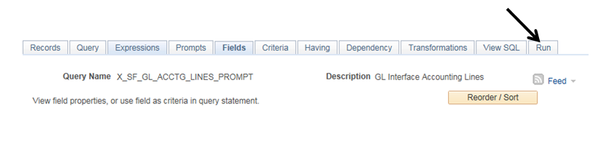
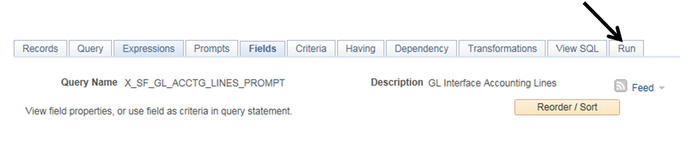
| 17. | Click the “Run” page (tab). |
| Step | Action |
|---|---|
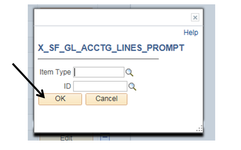
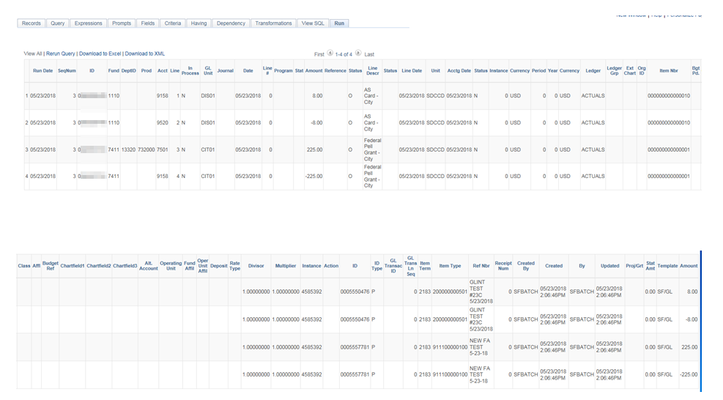
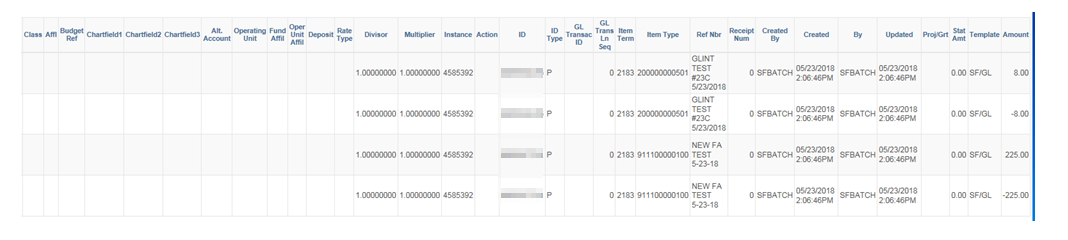
| 18. | Click the “OK” button. A greater detail of the accounting lines will be displayed. |

| Step | Action |
|---|---|
| 19. | Click the “Download to Excel” link to download/save the accounting line data to Excel. |

| Step | Action |
|---|---|
| 20. | End of job aid. |