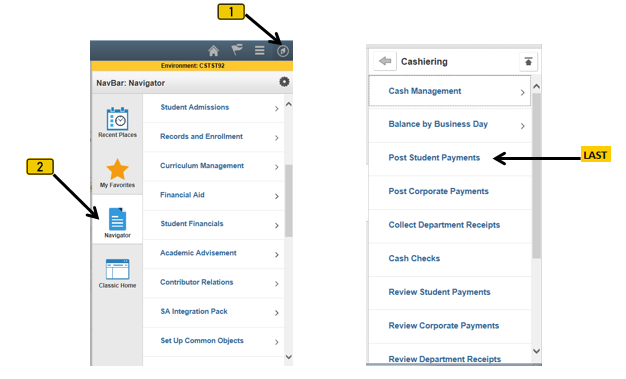
Posting a Student's Payment
Label | Description |
|---|---|
| Business Process | Cashiering |
| Module | Student Financials |
| Prerequisites | Tuition Calculation must have already been performed on student’s account. |
| Description | This Job Aid illustrates how to post a student’s payment. |
Instructions:
Step | Action |
|---|---|
| 1. | Click on [ |


| Step | Action |
|---|---|
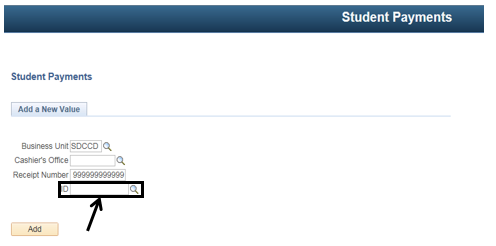
| 2. | Click the “ID” field and enter the student’s ID#. (Do NOT click the magnifying glass [ ] next to the ID field. If you do, it will pull up every student in the system) ] next to the ID field. If you do, it will pull up every student in the system) |
| Step | Action |
|---|---|
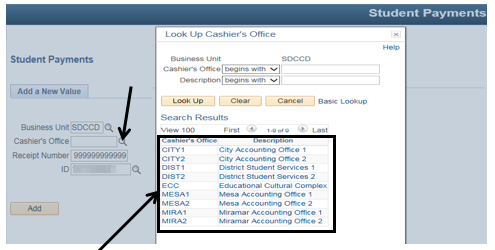
| 3. | Enter the Cashier’s Office. (Option 1): Click on the magnifying glass [ |

| Step | Action |
|---|---|
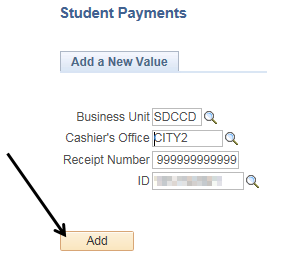
| 4. | Click the Add Button [ |

| Step | Action |
|---|---|
| 5. | 1) Verify the student’s ID & Name to be sure you have the correct student. |

| Step | Action |
|---|---|
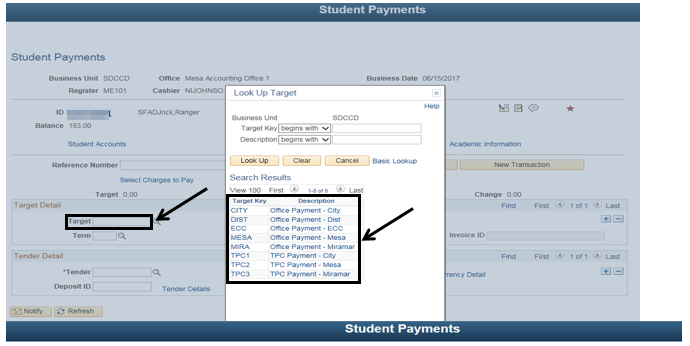
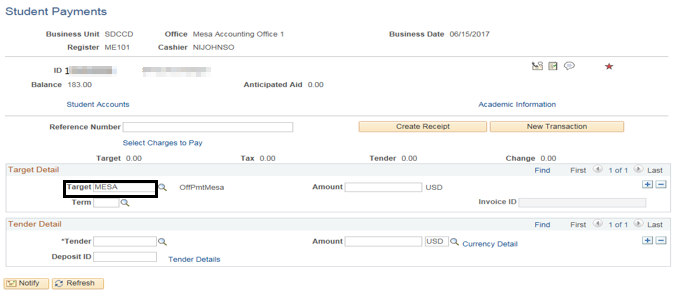
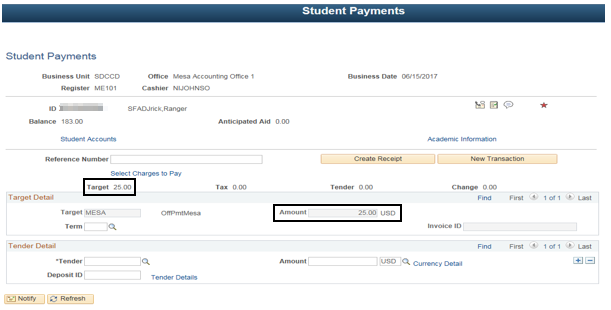
| 6. | In the “Target” field, enter the office where the payment should be applied. (Option 1): Click the magnifying glass [ |

| Step | Action |
|---|---|
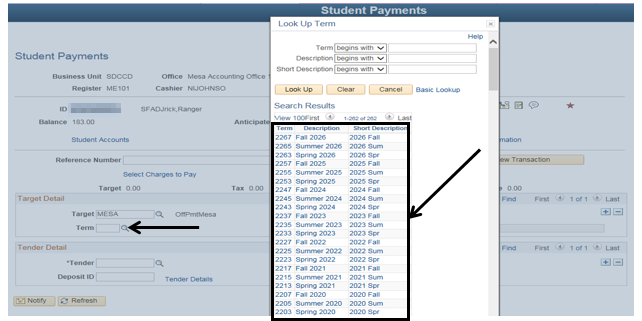
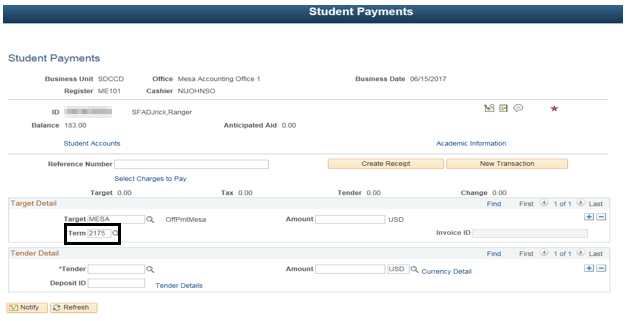
| 7. | Enter the appropriate term in the “Term” field to ensure the payment is applied to the correct semester. (Option 1) Click on the magnifying glass [ |

| Step | Action |
|---|---|
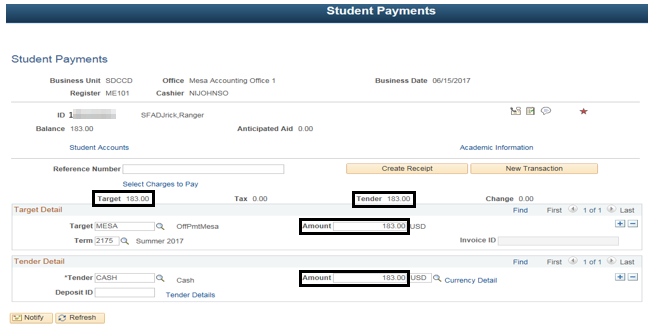
| 8 | In the “Target Detail” section, click in the “Amount” field and enter the charge amount (e.g. “183.00”). |

| Step | Action |
|---|---|
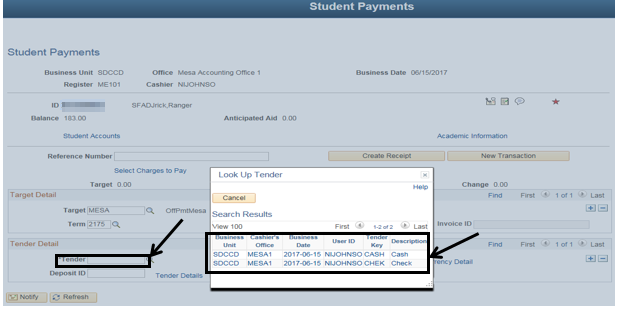
| 9. | Enter the appropriate tender in the “Tender” field. This field identifies the method of payment the student is using (e.g. cash, check, Visa, Mastercard, etc.).
|
| Step | Action |
|---|---|
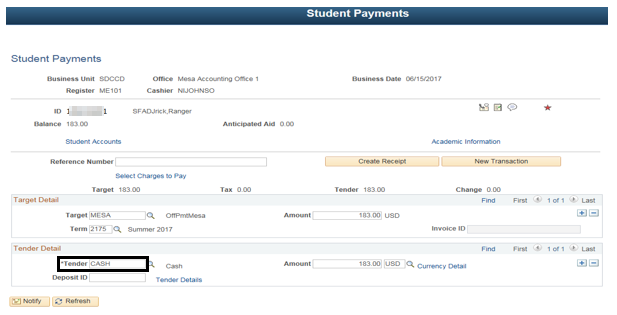
| 10. | In the “Tender Detail” section, click in the “Amount” field. Enter the payment amount for the charge. Or let the system populate this field with a default value based on the amount entered in the “Target Detail” section. The Tender Amount defaults to the Target Amount. |
| Step | Action |
|---|---|
| 11. | If the student is paying in full, skip to step 15 If the student is not paying in full, continue to Step 12. |
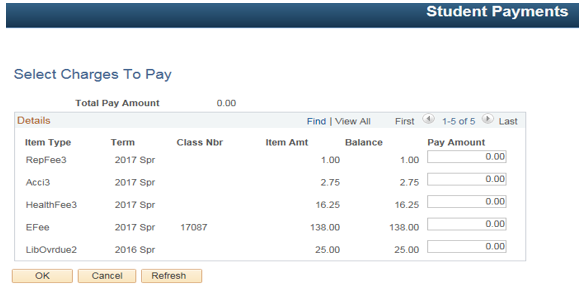
| 12. | It may be necessary to allocate a student’s payment to a specific charge (e.g. a monetary service indicator (HOLD), a parking permit, etc.) Click the “Select Charges to Pay” link [ |


| Result 12 |
|---|
The “Select Charges To Pay” screen will be displayed |
| Step | Action |
|---|---|
| 13. | Click in the appropriate “Pay Amount” field [ |
| 14. | Click the “OK” button [ |


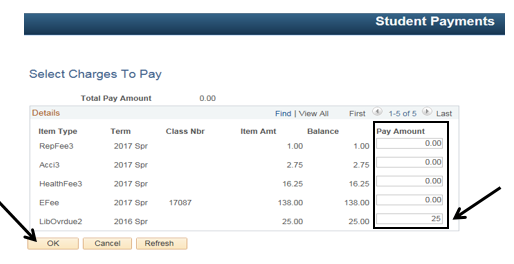
| Result of Step 14 |
|---|
| You will be navigated back to the Student Payment page. The “Target” and “Amount” will update with the selected charge amount (e.g. "25.00"). |
| Step | Action |
|---|---|
| 15. | Click the “Create Receipt” button [ |
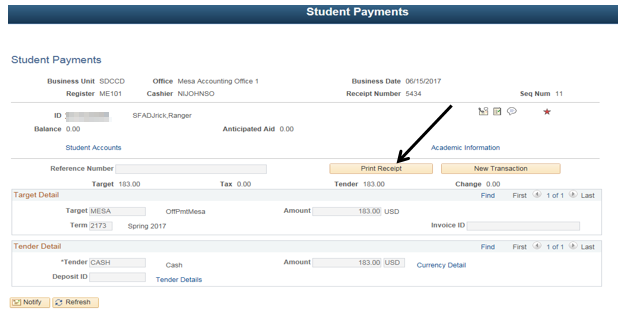
| 16. | If the transaction is successful, the “Create Receipt” button will change to Print Receipt. Click the “Print Receipt” button [ |


| Step | Action |
|---|---|
| 7. | To complete the payment transaction follow steps 7 – 16. |
| 8. | End of job aid. |