...
This Job Aid will go over the process to create a NEW DSPS student record.
| Step | Action |
|---|
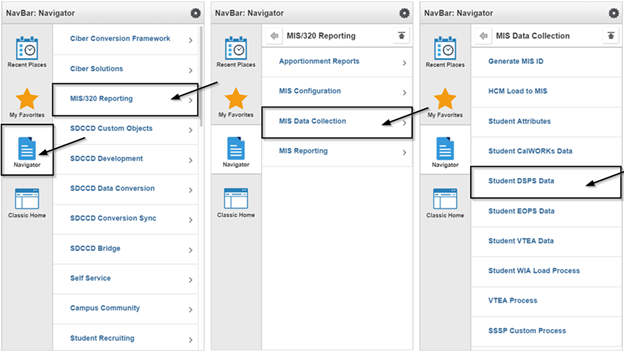
| 1. | Select the compass button  Image Modified and then select the navigator button Image Modified and then select the navigator button  Image Modified to navigate by selecting: Image Modified to navigate by selecting: MIS/320 Reporting -> MIS Data Collection -> Student DSPS Data |
| Step | Action |
|---|
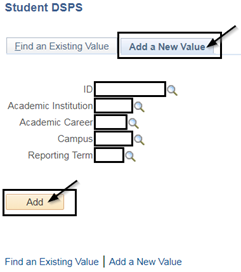
| 2. | IMPORTANT: A new DSPS Student Record must be created and entered when the Campus or Reporting Term is different from previous record to ensure correct funding. To create a new student, select the Add a New Value tab and use the following search criteria: - ·ID: enter ID directly into the field. NOTE: It is NOT recommended to use the magnifying glass icon to search for a student ID as it will take a long time to load.
- ·Academic Institution: enter “SDCCD” directly into the field or click the magnifying glass icon and select “SDCCD” from the generated list if it does not default to “SDCCD”.
- ·Academic Career: enter directly into the field or click the magnifying glass icon and select the appropriate academic career from the generated list.
- UGRD = College Undergraduate
- CE = Continuing Education
- CEHS = Continuing Education High School
- ·Campus: enter directly into the field or click on the magnifying glass icon and select from the generated list.
- ·Reporting Term: enter directly into field or click on the magnifying glass icon and select from the generated list.
If entering the term manually, the four digit Term number should be entered as follows:- “2” for the millennium or “1” for all years prior to 2000 (1901-1999)
- The last two numbers of the year (i.e.: “07” for 2007, “19” for 2019)
- Semester code: “3” for Spring, “5” for Summer, “7” for Fall
Fully Typed Out Term Examples: 2183: Spring 2018 (includes Winter/Intersession) 2185: Summer 2018 2187: Fall 2018 |
| 3. | Select the Add button once all information has been entered. |
| Step | Action |
|---|
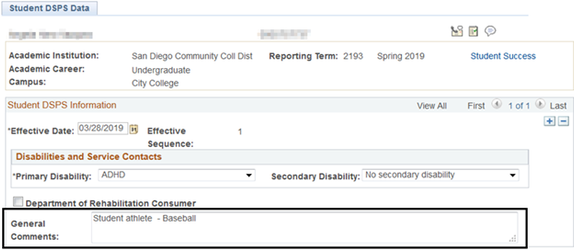
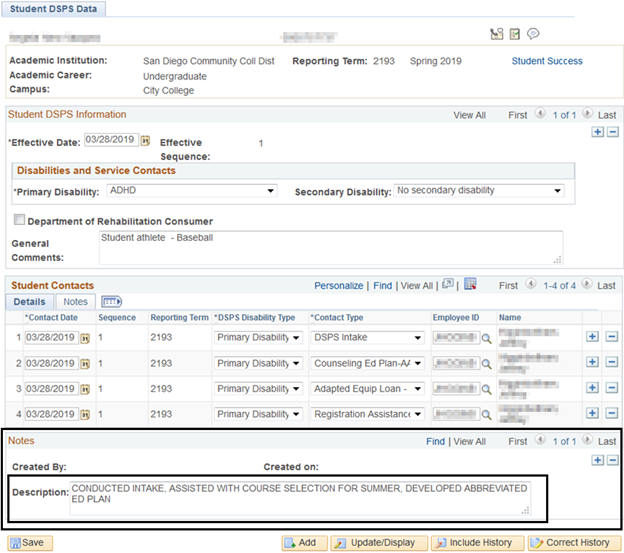
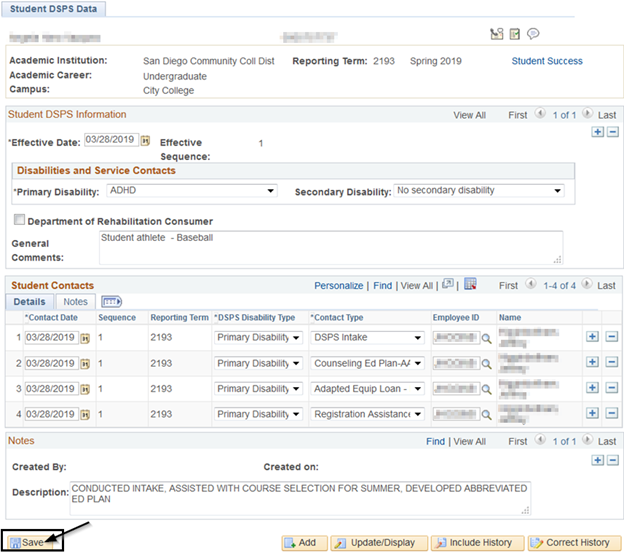
| 4. | After selecting the Add button, the Student DSPS Data page will appear. NOTE: A test student has been created and used for purposes of this job aid only. |
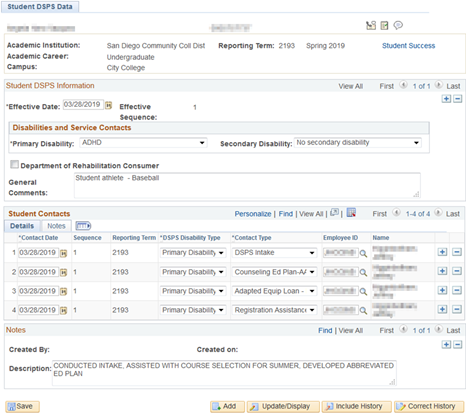 Image Added
| Step | Action |
|---|
| 5. | In the Student DSPS Information section, on the Disabilities and Service Contacts section, *Primary Disability must be selected by using the drop down menu. Primary Disability must be entered for the student record to be recorded. NOTE: Secondary Disability can be entered for internal reports but will not be submitted to MIS until required by CCCO. List will be edited to correspond with updated Title 5 and MIS Data Element descriptions. |
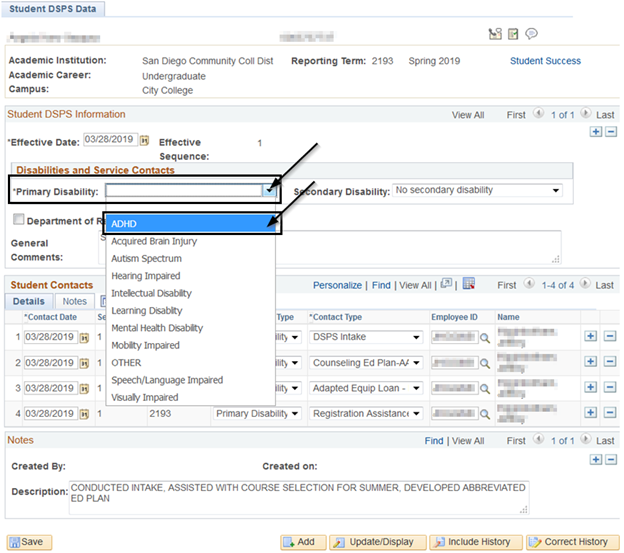 Image Added
| Step | Action |
|---|
| 6. | Also in the Student DSPS Information section, on the Disabilities and Services Contacts section, in the General Comments section, comment can be entered into the field for relevant reasons unique to each student at the discretion of DSPS counselor, coordinator, and department. NOTE: General Comments are seen by DSPS and IT staff only and not reported to MIS. |
| Step | Action |
|---|
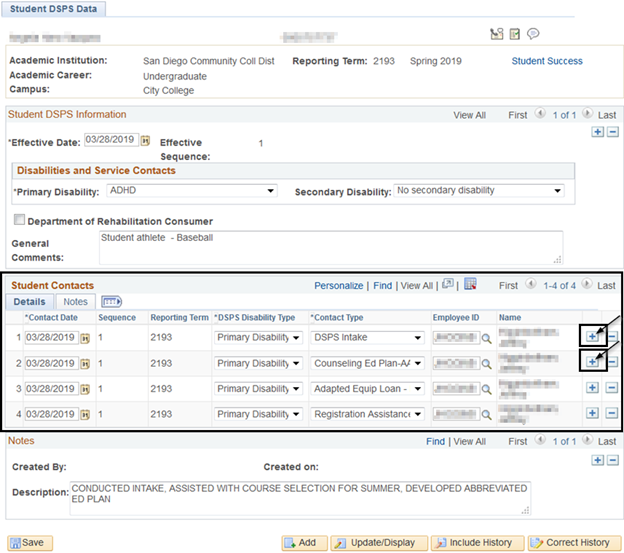
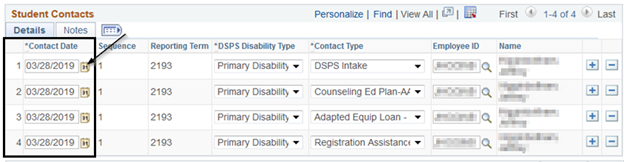
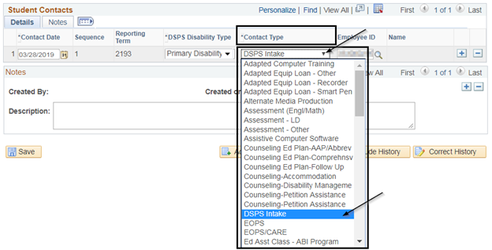
| 7. | In the Student Contacts section, on the Details tab, a Contact Type must be chosen for each service provided. - The first row will already be present; however, if additional Contact Types are needed, more can be added by clicking on the plus icon
 Image Modified at the end of each row. Image Modified at the end of each row. - *Contact Date: defaults to the current date but can be edited for prior date(s). The Contact Date can either be entered directly into the field or by clicking on the calendar icon
 Image Modified and selecting the date. Image Modified and selecting the date. - Sequence and Reporting Term are automatically set by the term being reported and cannot be changed in this section.
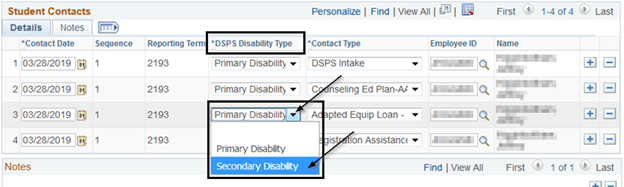
- DSPS Disability Type: use the drop down menu and select the appropriate disability type from the generated list.
- If a secondary disability was listed under the Disabilities and Service Contacts section, then this will relate to the DSPS Disability Type section showing “Primary Disability” and “Secondary Disability”
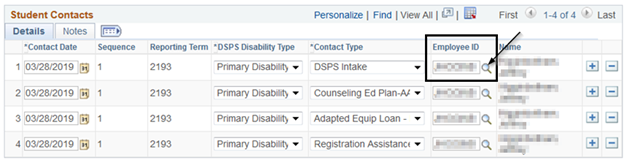
- *Contact Type: use the drop down menu and select the appropriate contact type from the generated list. The Contact Type is the service being provided by the student. The Contact Type is unique to a primary or secondary disability.
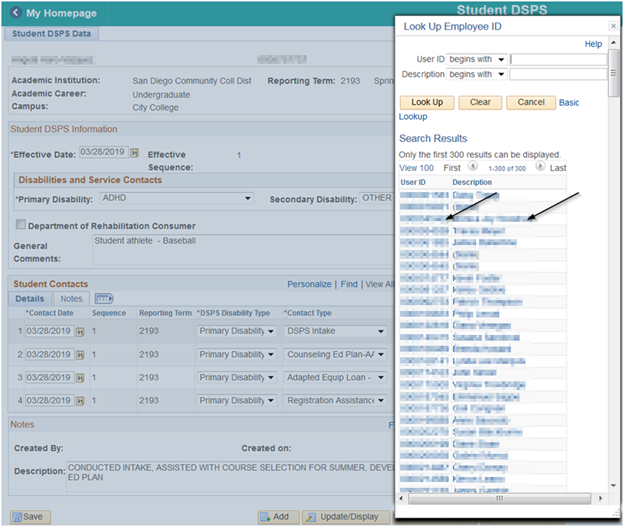
- Employee ID: enter directly into the field or click on the magnifying glass icon
 Image Modified and select from the generated list. Image Modified and select from the generated list.
NOTE: The following examples illustrate four services/contact types added during one meeting. |
| Step | Action |
|---|
| 8. | On the Notes section, case notes can be entered as needed in the Description field. NOTE: The Created By name stamp and the Created On date and time stamp will be reflected once the student record is saved. |
| Step | Action |
|---|
| 9. | Once all DSPS information is entered, select the Save button to save all student record information. |
| Step | Action |
|---|
| 10. | End of job aid. |