...
...
Summary
Label | Description |
|---|---|
| Business Process |
| Registering and Wait-listing for classes | |
| Prerequisites | Students must have an active college application on file, and must be eligible for enrollment. |
| Description | This tutorial will walk students through the steps necessary to |
| register and/or wait-list for classes. |
Instructions:
| Step | Instructions |
|---|---|
| 1 | |
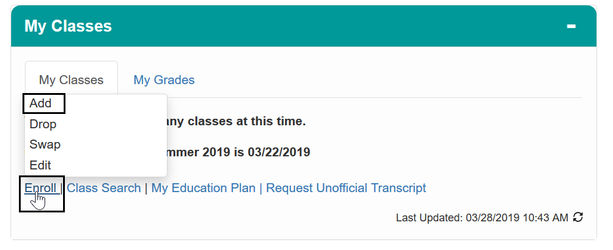
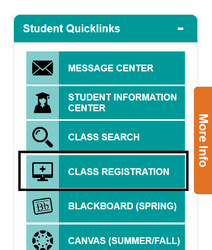
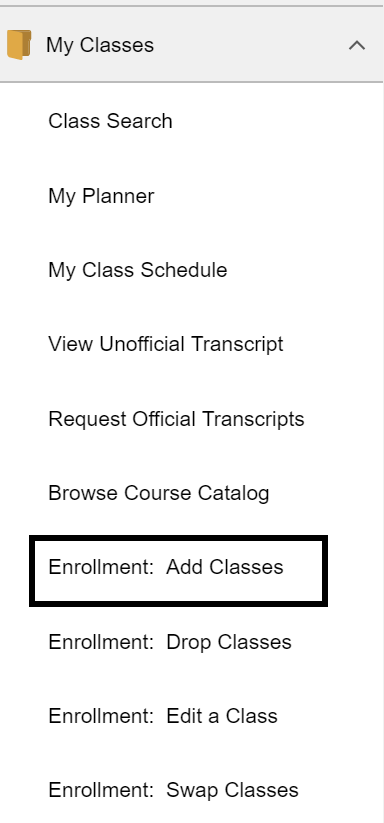
| 2 | You can either click on the "Enroll" link in the "My Classes" pagelet, click on the Enrollment: Add Classes in the side nav, or you can click on "Class Registration" in the Student Quicklinks:
|
|
| 3 |
Select classes to add, students |
have three options to search for classes:
|
|
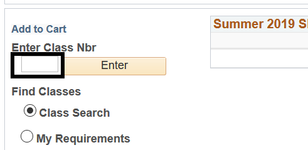
If you already know the Class Nbr (CRN) you can enter it here and click on "enter"
| |
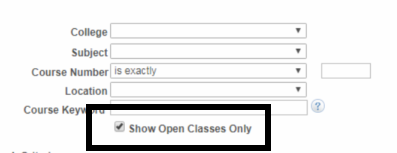
| 4 | If you want to search for all classes, be sure you |
un-check the "Show Open Classes Only" |
option, This will show you classes that have a waitlist as well.
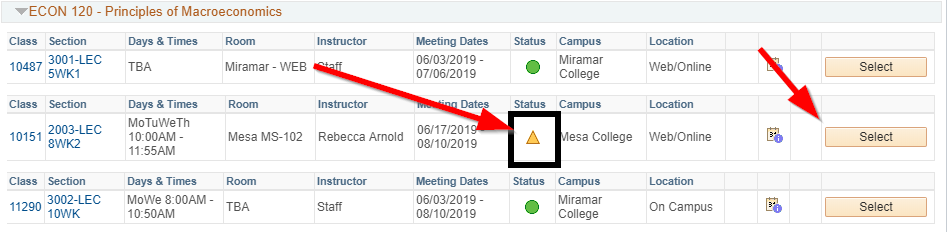
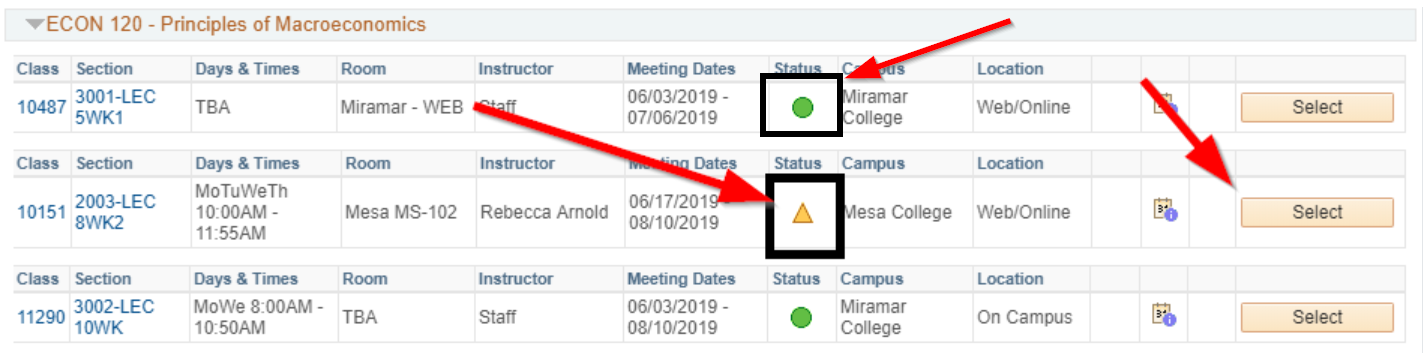
Classes that have open seats will show a green circle in the "Status Column". Classes that are full but have room on a waitlist will show a yellow triangle in the "Status" column. When you find the class you want to register or waitlist for, click on the select button.
| |
| 5 | When you select a class you will see more information about the class, including prerequisites, corequisites, or other limitations on enrollment. Additionally, you will be able to enter your Permission Nbr (Add Code) if you received one, or select |
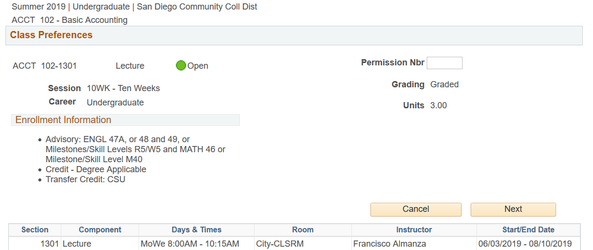
agrading option: Graded = (A-F) or Pass/No-Pass (P/NP) |
| |
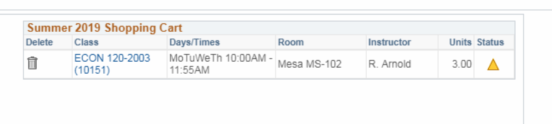
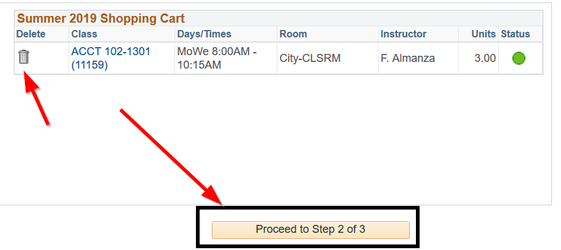
| 6 | You should see a message indicating it was added to your shopping cart towards the top: and you should see it in your semester shopping cart: |


 You can click on the trash can icon to remove a class from your shopping cart.
Once you are satisfied with your choices, click on "Proceed to Step 2 of 3" |
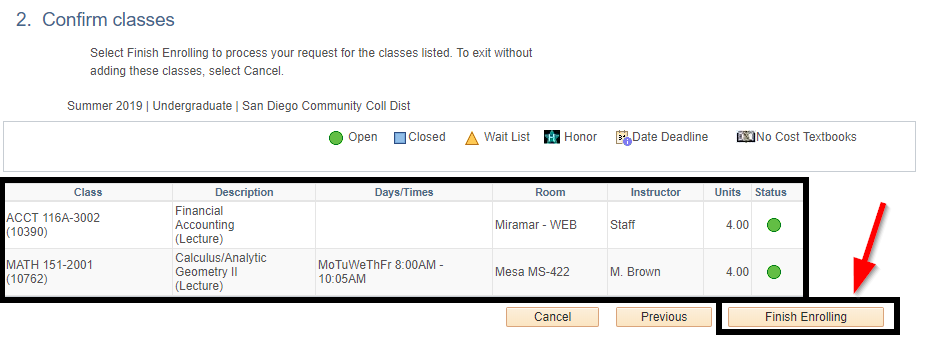
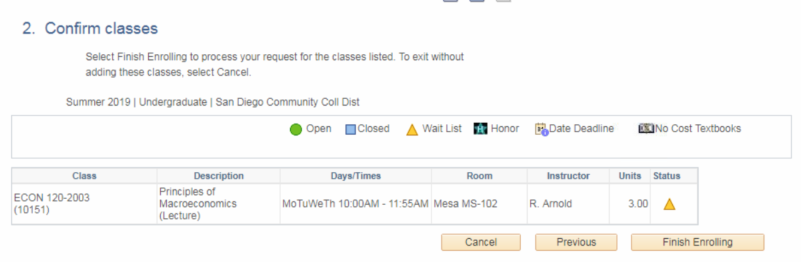
| 7 | You'll be taken to the confirmation page, this is where you will verify these are the correct classes you wish to register or waitlist for. If you are satisfied, click on "Finish Enrolling" |
| |
| 8 | The system will now determine if you're eligible to register or wait-list for the class. You should see a success or error message next to each |
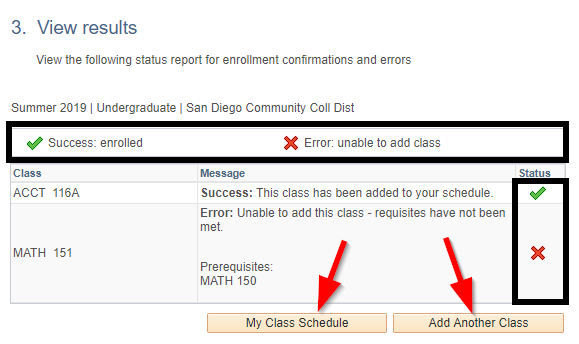
If you want to add another class, click on "Add Another Class" if you want to view your class schedule to confirm, click on "My Class Schedule"
class |
. |