Purchase Items - AS Membership
Label | Description |
|---|---|
| Business Process | Maintain Term Based Configuration |
| Module | Student Financials |
| Prerequisites | Term must exist in the term table |
| Description | This Job Aid illustrates how to add new Purchase Items in Self-Service for AS Memberships for each campus. |
Instructions:
Step | Action |
|---|---|
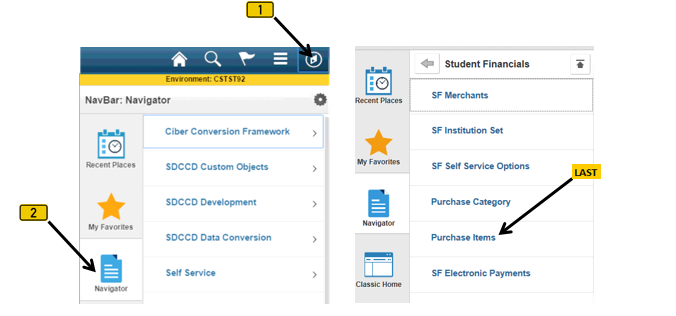
| 1. | Click on [ |


| Step | Action |
|---|---|
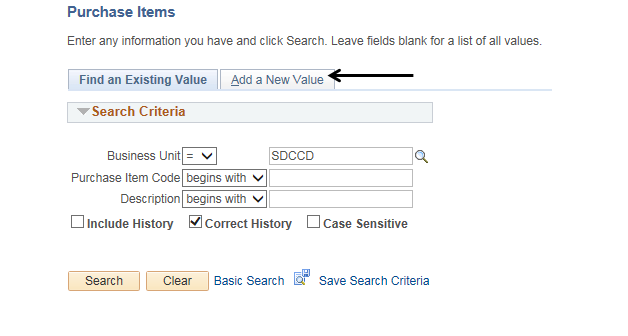
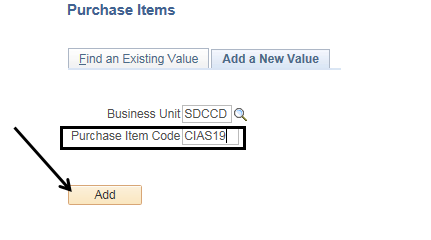
| 2. | Click the “Add a New Value” page (tab). |
| Step | Action |
|---|---|
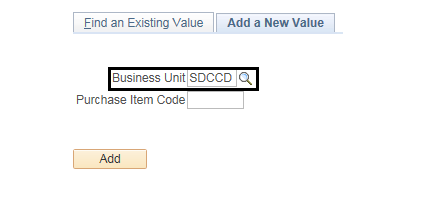
| 3. | Verify that the “Business Unit” field = “SDCCD”. |
| Step | Action |
|---|---|
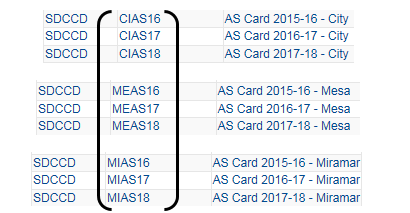
| 4. | In the “Purchase Item Code” field, enter the Purchase Item Code. The Purchase Item Code consists of 6 characters:
Samples
Click the “Add” button. |
| Step | Action |
|---|---|
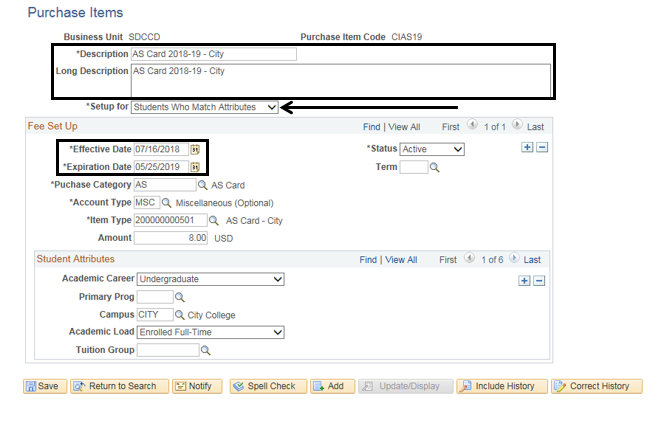
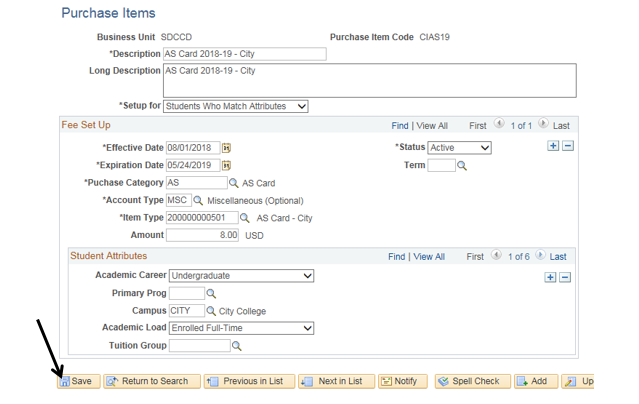
| 5. | Enter the description in the “*Description” field. Enter the long description in the “Long Description” field. For the “*Setup for” field, select “Students Who Match Attributes”. Change the effective date in the “*Effective Date” field. The Effective Date is the first date a student can purchase the AS Membership. Enter the expiration date in the “*Expiration Date” field. The Expiration Date is the last day a student can purchase the AS Membership + 1. |
| Step | Action |
|---|---|
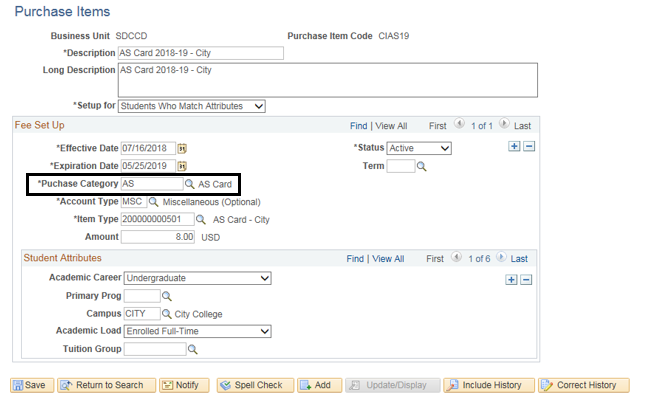
| 6. | In the “*Purchase Category” field, enter “AS” as the Purchase Category. |
| Step | Action |
|---|---|
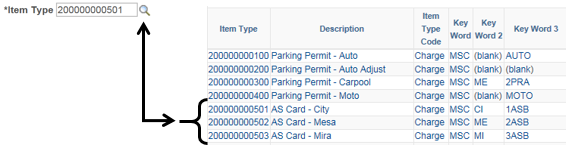
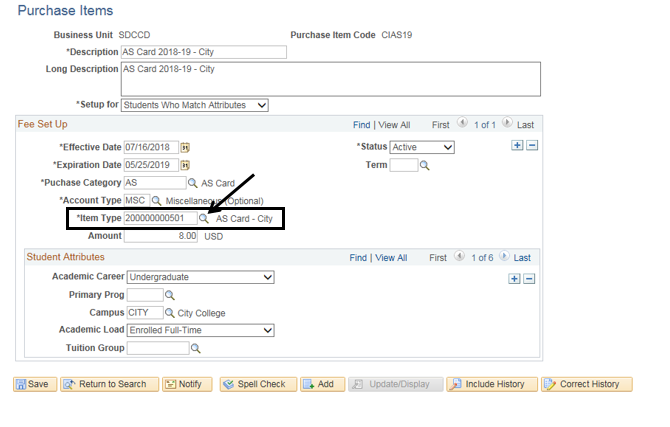
| 7. | In the “*Item Type” field, enter the Item Type for the AS Membership for the appropriate campus. You can also click the magnifying glass next to the “*Item Type” field to display the list of Item Types. |
| Step | Action |
|---|---|
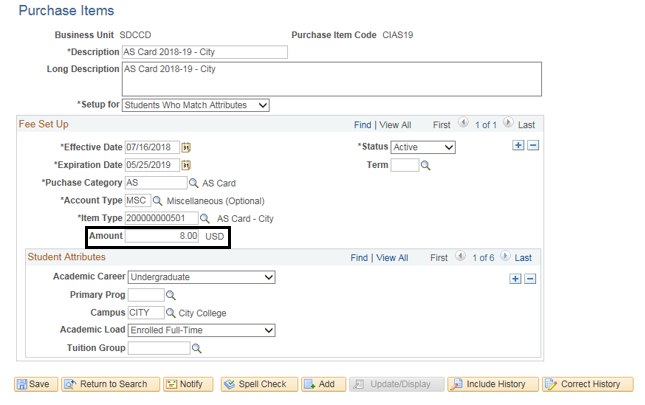
| 8. | In the “Amount” field, enter the appropriate amount. |
| Step | Action |
|---|---|
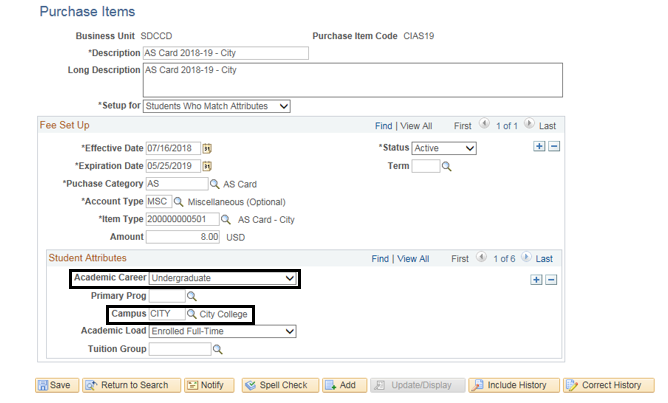
| 9. | In the “Academic Career” field select “Undergraduate”. In the “Campus” field, enter the appropriate campus: “CITY”, “MESA”, or “MIRA”. |
| Step | Action |
|---|---|
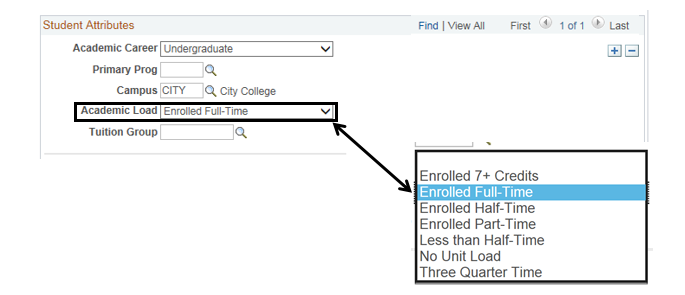
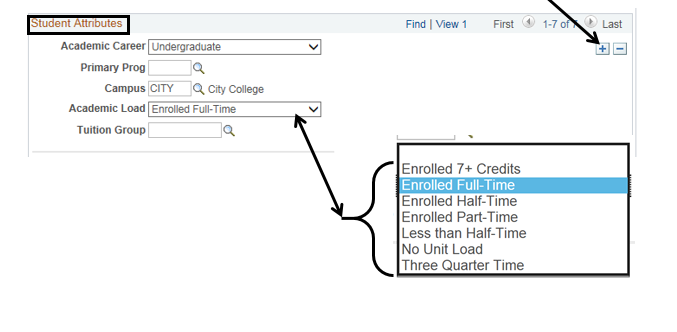
| 10. | For the “Academic Load” field, select “Enrolled Full-Time” |
| Step | Action |
|---|---|
| 11. | Click the “plus” sign in the “Student Attributes” section to add a new Student Attribute. For the “Academic Load” field, there are 6 settings to add (you have already added “Enrolled Full-Time”: · Enrolled Full-Time · Enrolled Half-Time · Less than Half-Time · Enrolled Part-Time · Enrolled 7+ Credits · Three Quarter Time |

| Step | Action |
|---|---|
| 12. | Repeat step #11 until you have separately added new sections and populated the “Academic Load” field with the remaining Academic Loads. |
| 13. | Click the "Save" button |
| Step | Action |
|---|---|
| 14. | End of job aid. |