Posting An Org Payment
| Label | Description | ||
|---|---|---|---|
| Business Process | Cashiering | ||
| Module | Student Financials | ||
| BP ID | SF 016 | ||
| Prerequisites | Org must be set up. Students need to be assigned to the 3rd Party Org before a payment can be processed. | ||
| Description | This Job Aid illustrates how to process an Org payment.
| Comments | N/A |
Instructions
| Step | Action |
|---|---|
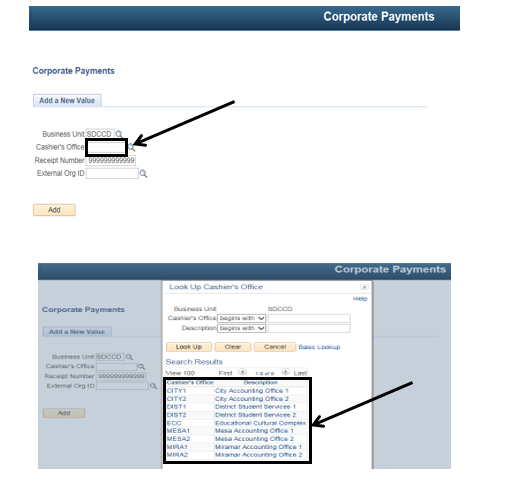
| 1. | Click on [ |


...
| Step | Action |
|---|---|
| 2. | Enter the appropriate Cashier’s Office code in the “Cashier’s Office” field. (Option 1) Click on the magnifying glass [] next to the “Cashier’s Office” field to search for your Cashier’s Office. Click on the appropriate Cashier’s Office. (Option 2) If you already know your Cashier's Office code (e.g. "MESA1"), you can enter it into the "Cashier's Office" field rather than using the search function. |

| Step | Action |
|---|---|
| 3. | Enter the External Org ID. (Option 1) Click in the External Org ID field and enter the External Org ID (e.g. “5000041831”). External Org ID’s are 10 digits. (Option 2) If you don't know the External Org ID, you can click the magnifying glass [ |

...
| Step | Action |
|---|---|
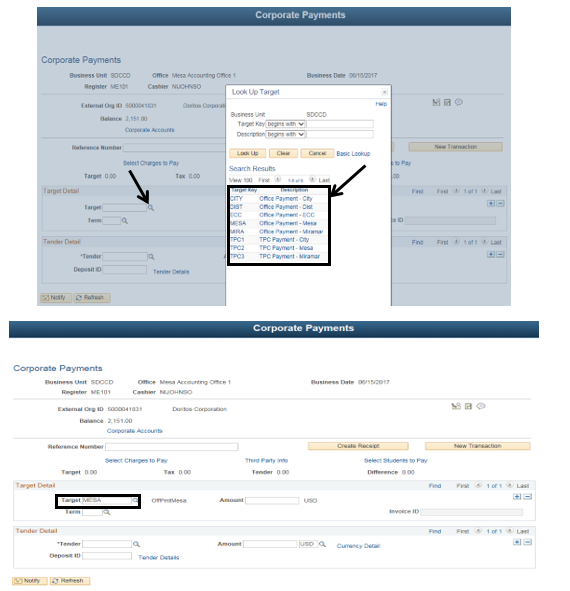
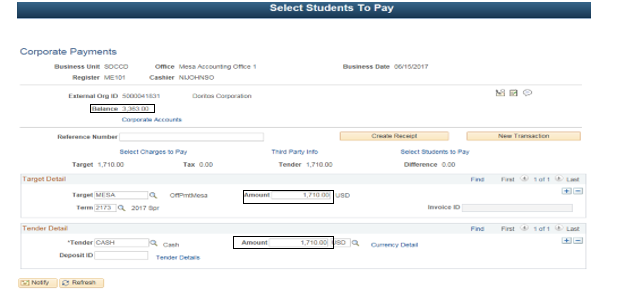
| 9. | In the “Target” field (in the “Target Detail” section), enter the office where the payment should be applied. (Option 1) Click on the magnifying glass [ |


| Step | Action |
|---|---|
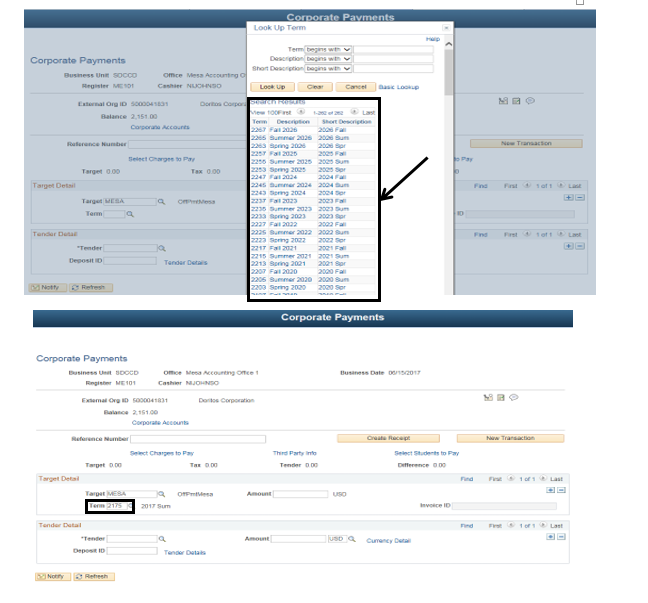
| 10. | Enter the appropriate term (semester) into the “Term” field. (Option 1) Click on the magnifying glass [] next to the Term” field to display a list of Terms. Click the appropriate Term. The term you click will populate into the “Term” field. |

| Step | Action |
|---|---|
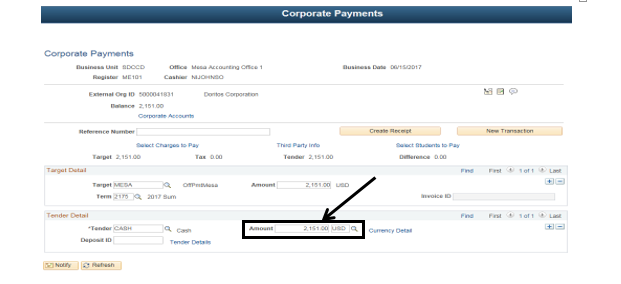
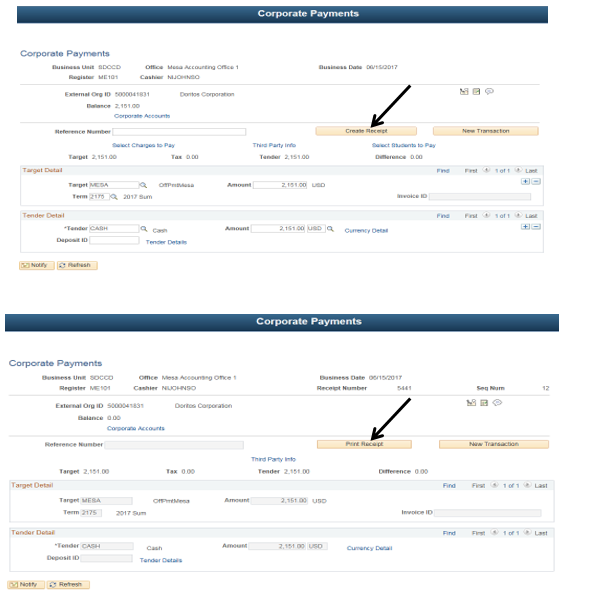
| 11. | Click in the “Amount” field in the “Target Detail” section. Enter the payment amount (e.g. 2151.00). |

| Step | Action |
|---|---|
| 12. | The “Tender” field in the “Tender Detail” section identifies the method of payment the Org is using. (Option 1) Click on the magnifying glass [ |


| Step | Action |
|---|---|
| 13. | In the “Tender Detail” section, click in the “Amount” field. Enter the payment amount. Note: You can enter the amount of the payment for this charge in the “Amount” field or let the system populate this field with a default value. Tender Amount defaults to Target Amount. |

| Step | Action |
|---|---|
| 14. | Click the “Create Receipt” button [
If the transaction is successful, the “Create Receipt” button will change to “Print Receipt”. |
| 15. | Click the Print Receipt button [ |


| Step | Action |
|---|---|
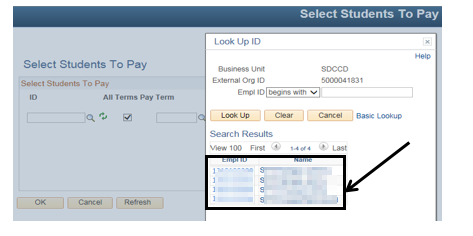
| 16. | Click the “Select Students to Pay” link [ |

...
| Step | Action |
|---|---|
| 18. | Click on the student that the Org is paying for. |

| Step | Action |
|---|---|
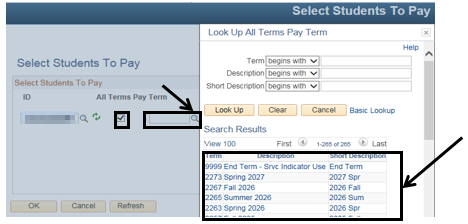
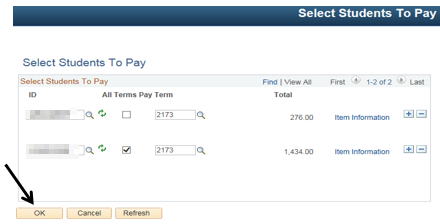
| 19. | Use the “Term” field to select the term associated with the payment. If the payment is for multiple terms for one student, leave the “All Terms Pay” box checked and it will select all the terms that have an outstanding balance for that specific student. (Option 1) Click on the magnifying glass [] next to the “Term” field to display a list of terms. Click the appropriate Term. |

| Result of Step 19 |
|---|
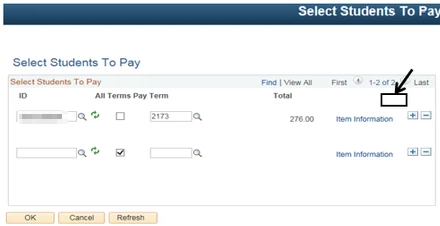
| The amount under the Total column will automatically update with the student’s specific charges. |


| Step | Action |
|---|---|
| 20. | If an Org is paying for multiple students, click on the plus sign [ |


| Step | Action |
|---|---|
| 21. | After completing your list of student(s) that the Org is paying for, click the “OK” Button [ ]. ]. |

| Step | Action |
|---|---|
| 22. | To complete the payment transaction, follow steps 8 – 15. |

| Step | Action |
|---|---|
| 23. | End of job aid. |
...