Parking Permits - Assigning & Payment By Credit Card
Label | Description |
|---|---|
| Business Process | Accounts Receivable |
| Module | Student Financials |
...
| Prerequisites | Student must be enrolled in a class before a parking permit can be assigned and purchased. |
| Description | This Job Aid illustrates how to assign an auto parking permit to a student’s account (Steps 1 through 5). Steps 6 through 8 illustrate how to assign a motorcycle permit to a student’s account. Steps 9 through 21 illustrate how to accept a credit card payment for the permit. |
...
Instructions:
Step | Action |
|---|---|
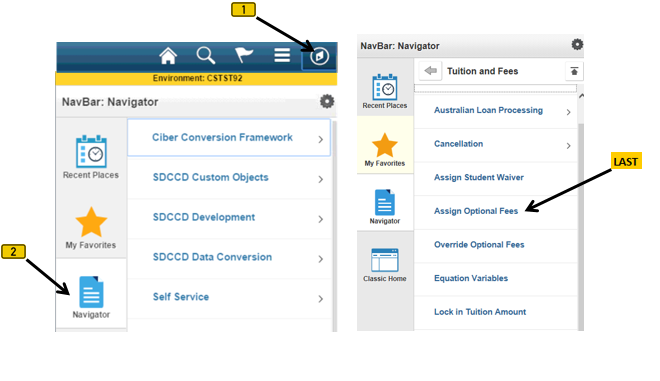
| 1. | Click on [ |


| Step | Action |
|---|---|
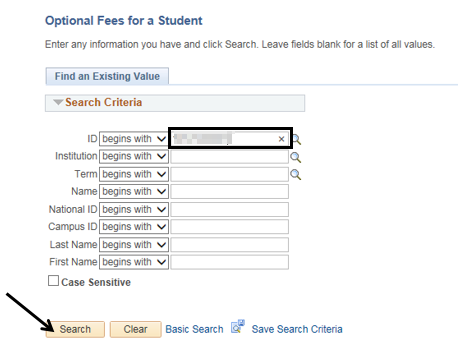
| 2. | Click in the “ID” field and enter the student’s ID#. [If you don’t know the student’s ID, please see Step 2A]  ]. Note: If the student has attended more than one term (semester), the same student will be listed multiple times based on the term. Click/select the appropriate line based on the term. ]. Note: If the student has attended more than one term (semester), the same student will be listed multiple times based on the term. Click/select the appropriate line based on the term. |

| Step | Action |
|---|---|
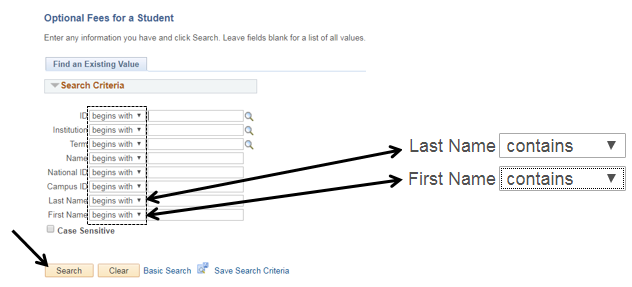
| 2A. | VARIATION(S) ON LOCATING A STUDENT If you do not know the student’s ID#, enter the student’s last name and first name into the “Last Name” and “First Name” fields. Suggestion: Entering the student’s ID# and the Term will call up only that Term as opposed to all terms. Suggestion: You can widen the search parameters by clicking the pull-down triangles [ |

| Step | Action |
|---|---|
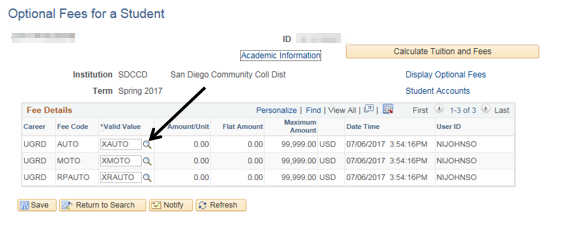
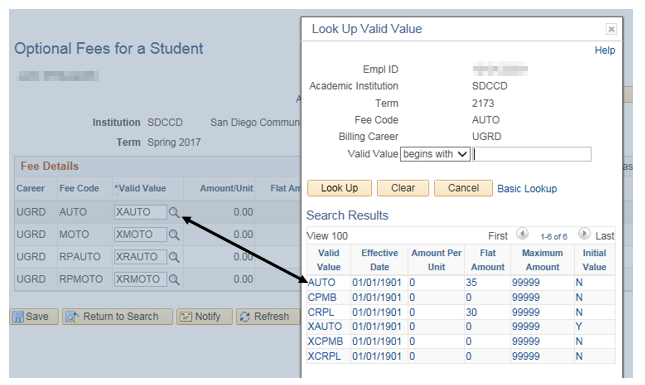
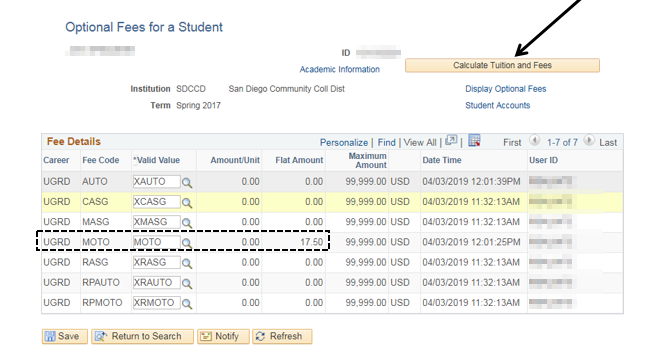
| 3. | ADDING AN “AUTO” PARKING PERMIT Click the magnifying glass [] in the “AUTO” row under the “*Valid Value” column to view the options for Parking Permits. |
ADDITIONAL INFORMATION Although this Job Aid illustrates the steps to assign a Parking Permit, there are other options available at this step: “AUTO” = Adds an Auto Parking Permit “CRPL” = Adds a Carpool Parking Permit “RPAUTO” = Adds a Replacement Parking Permit “FAUTO” = Adds the Financial Aid discounted Parking Permit “XAUTO” = Removes an Auto Permit “XCRPL” = Removes a Carpool Permit “XRAUTO” = Removes a Replacement Parking Permit (To add a Motorcycle Parking Permit, skip to Step 6)
“MOTO” = Adds a Motorcycle Parking Permit “XMOTO” = Removes a Motorcycle Parking Permit |
| Step | Action |
|---|---|
| 4. | Click the [ |

| Step | Action |
|---|---|
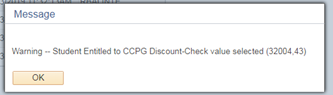
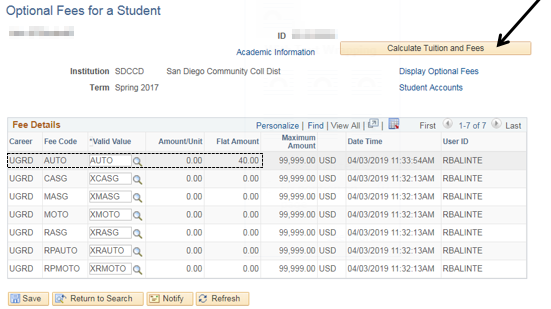
| 5. | The box in the “*Valid Value” column changes to “AUTO” and the “Flat Amount” changes to “40.00”. NOTE: If the student has a CCPG Financial Aid Award (formerly BOGW fee waiver) on their account and is entitled to a discounted parking permit, the following warning will appear: In this case, select “FAUTO” for the Financial Aid discounted parking permit ($25.00).
Click the “Calculate Tuition and Fees” button [  ] button. This will NOT apply the fees to the student’s account. You must “Calculate Tuition and Fees”. ] button. This will NOT apply the fees to the student’s account. You must “Calculate Tuition and Fees”. |

| Result |
|---|
| An AUTO Parking Permit has been added to the student’s account. |
| Step | Action |
|---|---|
| 6. | ADDING A MOTORCYCLE (MOTO) PARKING PERMIT Click the magnifying glass [ |

| Step | Action |
|---|---|
| 7. | Click the [ |


| Step | Action |
|---|---|
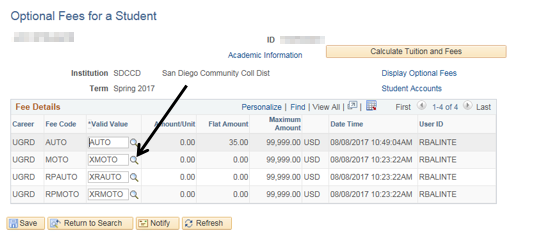
| 8. | The box in the “*Valid Value” column changes to “MOTO” and the Flat Amount populates with the cost: “17.50”. Click the “Calculate Tuition and Fees” button [] to apply the fees towards the student’s account. If this button is not clicked, the fees will NOT apply to the student’s account.  ] button. This will NOT apply the fees to the student’s account. You must “Calculate Tuition and Fees”.) ] button. This will NOT apply the fees to the student’s account. You must “Calculate Tuition and Fees”.) |
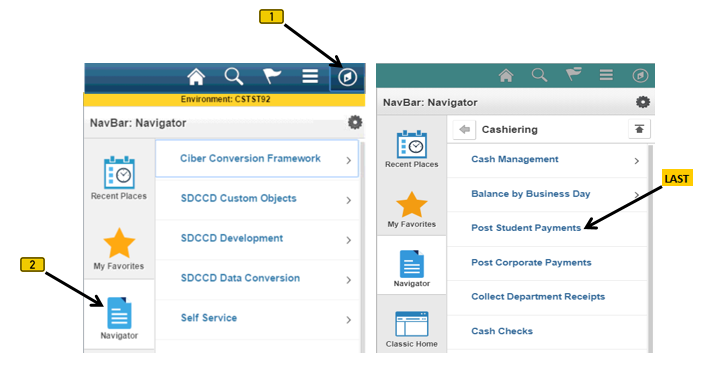
Steps 9-21 illustrate how to pay for a parking permit via credit card
|


| Step | Action |
|---|---|
| 10. | Enter the Cashier’s Office.
|

| Step | Action |
|---|---|
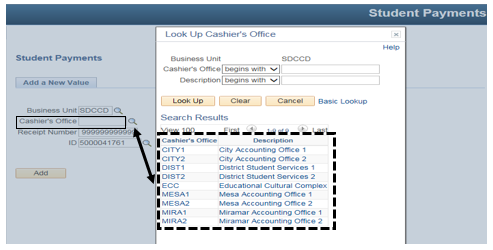
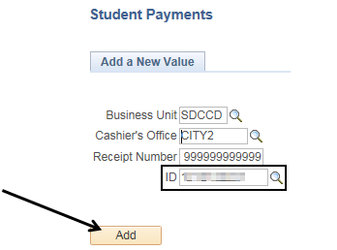
| 11. | Click in the “ID” field and enter the student’s ID#. Click the “Add” button [ |

| Step | Action |
|---|---|
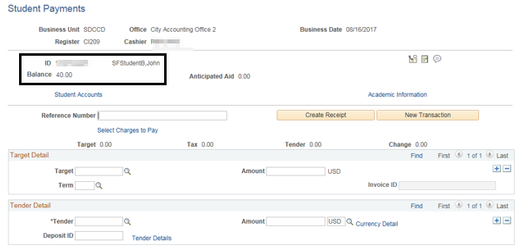
| 12. | 1) Verify the student’s ID & Name to be sure you have the correct student. |
| Step | Action |
|---|---|
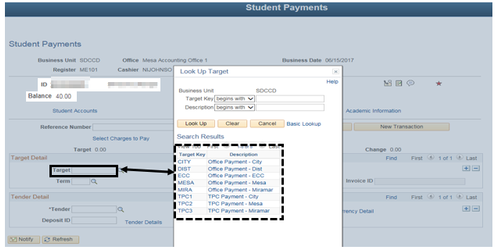
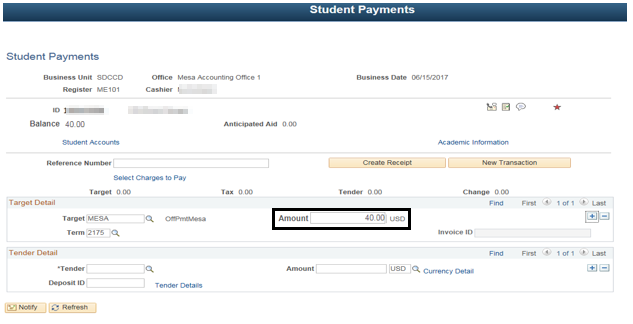
| 13. | In the “Target” field, enter the office where the payment should be applied.
|

| Step | Action |
|---|---|
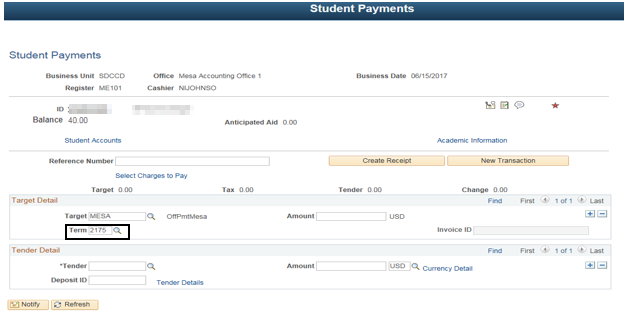
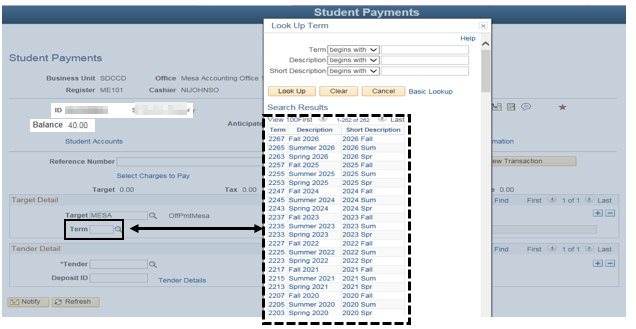
| 14. | Enter the appropriate term in the “Term” field to ensure the payment is applied to the correct semester.
|

| Step | Action |
|---|---|
| 15. | In the “Target Detail” section, click in the “Amount” field and enter the charge amount (e.g. “40.00”). |
| Step | Action |
|---|---|
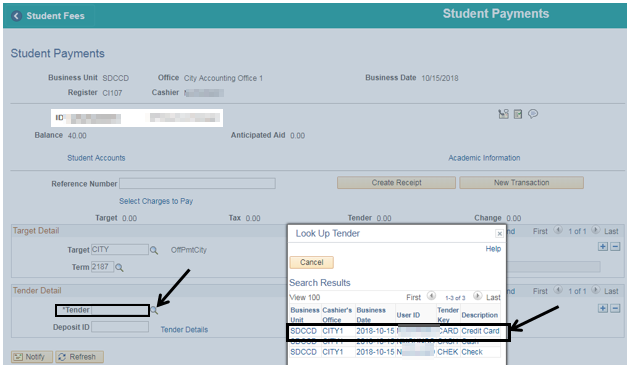
| 16. | Enter the appropriate tender in the “Tender” field. This field identifies the method of payment the student is using (e.g. CARD)
|

| Step | Action |
|---|---|
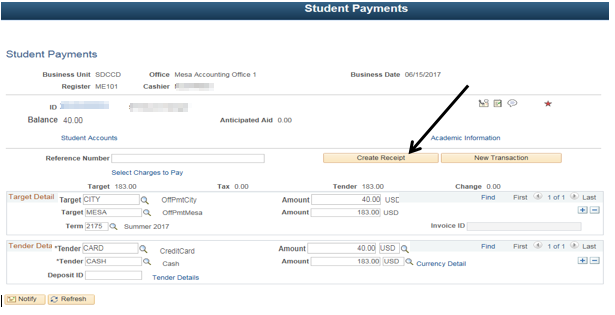
| 17) | Click the “Create Receipt” button [ |

| Step | Action |
|---|---|
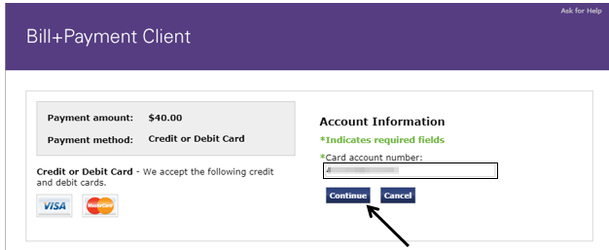
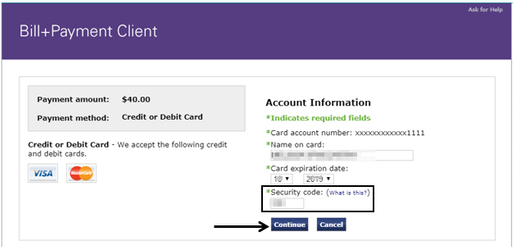
| 18. | Enter the credit card number into the “Card account number:” field then click the “Continue” [ |

| Step | Action |
|---|---|
| 19. | Enter the 3 digit Security code from the back of the card into the “*Security code:” field, then click the “Continue” [ |

| Step | Action |
|---|---|
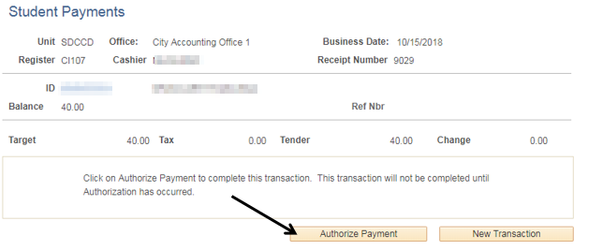
| 20. | Click the “Authorize Payment” button [ |

| Step | Action |
|---|---|
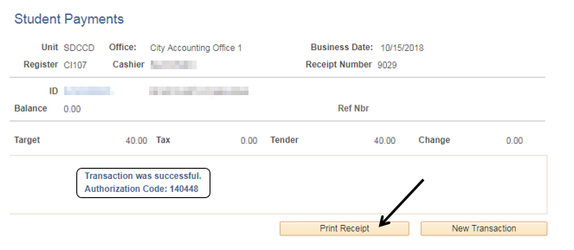
| 21. | Click the “Print Receipt” button [ |

| Step | Action |
|---|---|
| 22. | End of job aid. |