Generating What-If Report
Business Process: Generating What If Report
Module: Academic Advisement
Instructions:
This Job Aid will go over the process necessary to generate a What-If report.
| Step | Action |
|---|---|
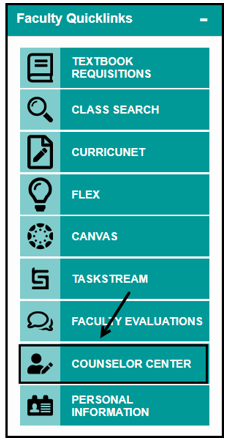
| 1. | From the Faculty Portal, under the Faculty Quicklinks, click on the Counselor Center tab. The Student Success search page will appear. |
| Step | Action |
|---|---|
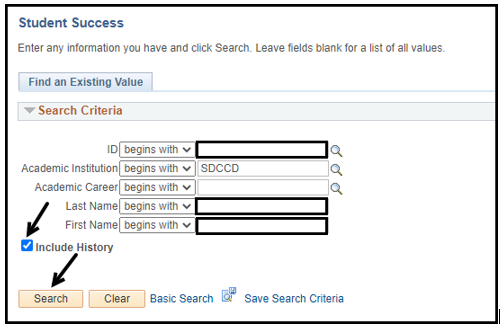
| 2. | On the Student Success search page, enter the Student ID number. Click Search. NOTE: If you do not know the Student’s ID, you can search using the first and last name fields. Include History box should default as checked. If it is not, make sure to check the box. |
| Step | Action |
|---|---|
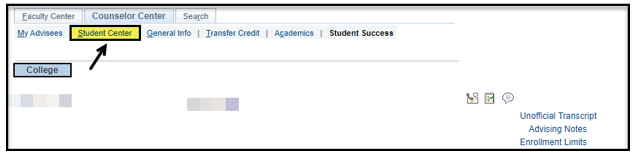
| 3. | Click on the Student Center tab. |
| Step | Action |
|---|---|
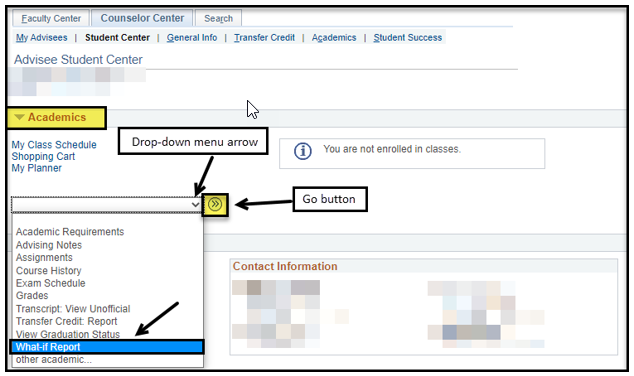
| 4. | Under the Academics section, click on the drop-down menu arrow and select What-If Report. Click the Go button. |
| Step | |
|---|---|
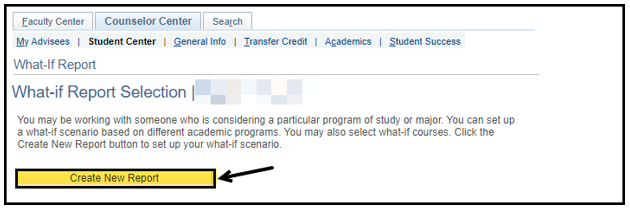
| 5. | Click on the Create New Report button. |
| Step | Action |
|---|---|
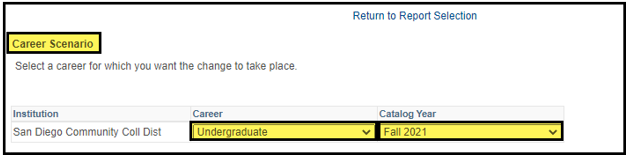
| 6. | Leave the Career Scenario defaults as is. |
| Step | Action |
|---|---|
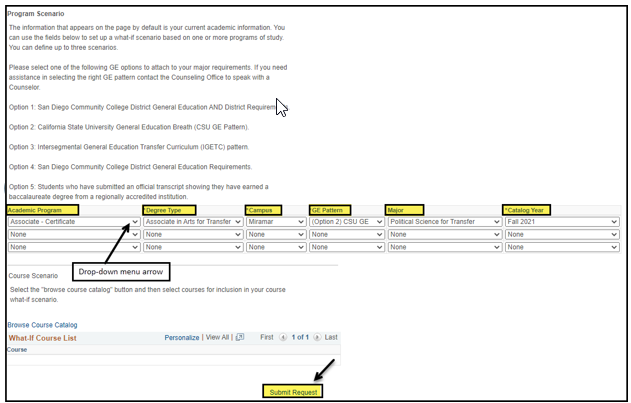
| 7. | Select the appropriate defaults for each highlighted column shown below, using the drop-down menu to populate the field. Line one is information populated from the student’s Program/Plan Stack. Use this line to make changes for the What If report. Up to three What If reports can be added at one time. Click Submit Request to run the What If report. |
| Step | Action |
|---|---|
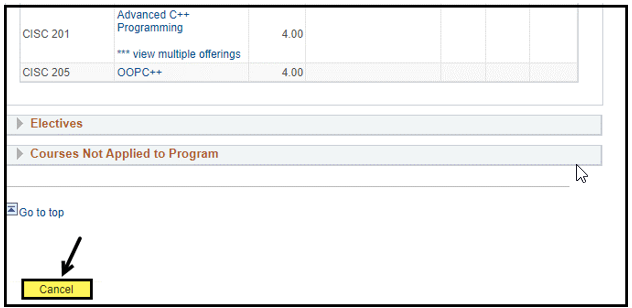
| 8. | To return to the Student Center, click Cancel at the bottom of the What If report. To generate a new What If report, return to Step 5. NOTE: What If reports are not saved. |
| Step | Action |
|---|---|
| 9. | End of Procedure. |