Cashiering - Assigning A Cashier To Tenders Via Setup SACR
Assigning A Cashier To Tenders Via Setup SACR
Label | Description |
|---|---|
| Business Process | Cashiering Configuration |
| Module | Student Financials |
| Prerequisites | The cashier must be activated in PeopleSoft. |
| Description | This Job Aid illustrates how to assign tenders to a cashier via Set Up SACR. Tenders are the various forms of payment (e.g. cash, checks, Visa, Mastercard, etc.). NOTE: This is a configuration process and is different from assigning tenders to a cashier after a Cashier’s office has been opened. |
Instructions:
Step | Action |
|---|---|
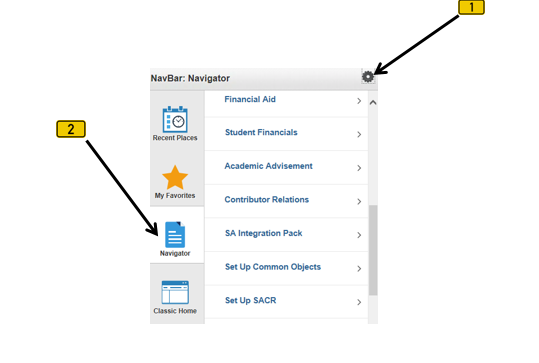
| 1. | Click on [ |


| Step | Action |
|---|---|
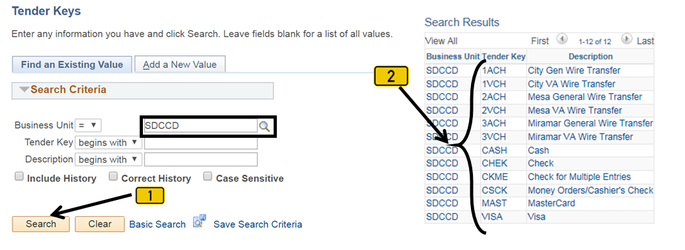
| 2. | Verify that the Business Unit field = “SDCCD”. Click the “Search” button to display a list of “Tender Keys” |
| 3. | Click on the Tender to be assigned to the Cashier (e.g. CASH). |
| Step | Action |
|---|---|
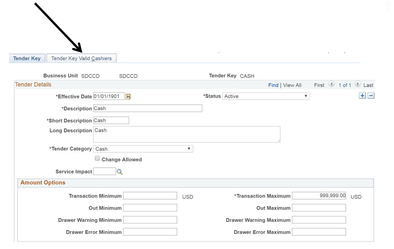
| 4. | Click on the “Tender Key Valid Cashiers” page (tab). |
| Step | Action |
|---|---|
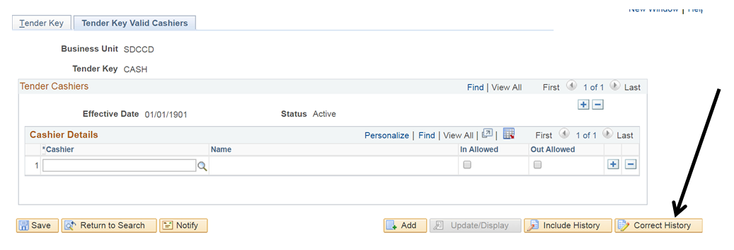
| 5. | Click the “Correct History” button. |
| Step | Action |
|---|---|
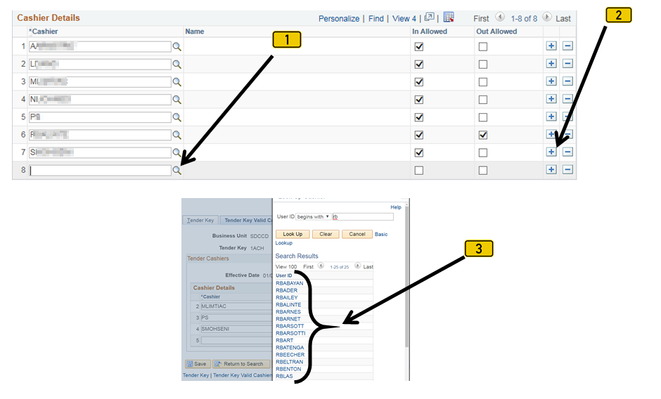
| 6. | Add a new Cashier by clicking the plus sign [ |


| Step | Action |
|---|---|
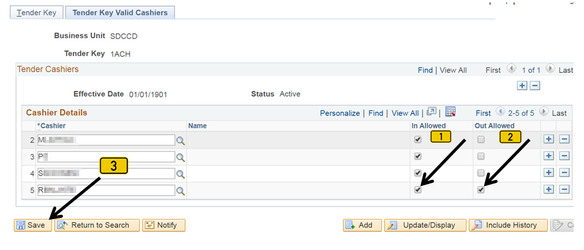
| 7. | Click the boxes in the “In Allowed” and “Out Allowed” columns so they are check-marked. Click the Save [ |

| Result of Step 7 |
|---|
| The Cashier can now accept CASH transactions. Follow steps 2-7 to assign more tenders (e.g. CHEK, VISA, MAST) to Cashiers. |
| Step | Action |
|---|---|
| 8. | End of job aid. |