Customer's Account Summary
Viewing Customer's Account Summary
Label | Description |
|---|---|
| Business Process | Accounts Receivable |
| Module | Student Financials |
| Prerequisites | Student must be Tuition Calculated to view in Customer Accounts. |
| Description | This Job Aid illustrates how to view a customer’s account. |
Instructions:
Step | Action |
|---|---|
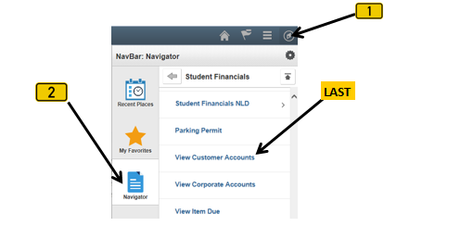
| 1. | Click on [ |


| Step | Action |
|---|---|
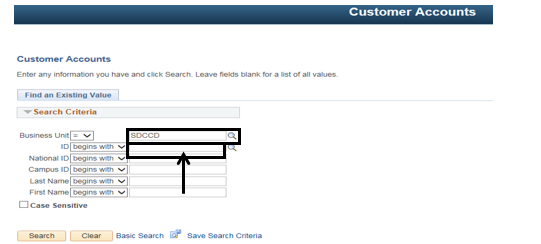
| 2. | Verify that the “Business Unit” field = “SDCCD” Click in the “ID” field and enter the student’s ID. (Do NOT click the magnifying glass [ ] next to the “ID” field on this step, or it will pull up every student in the system) ] next to the “ID” field on this step, or it will pull up every student in the system) |
| Step | Action |
|---|---|
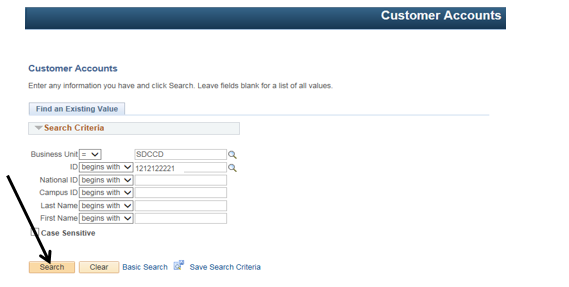
| 3. | Click the “Search” button [ |

| Step | Action |
|---|---|
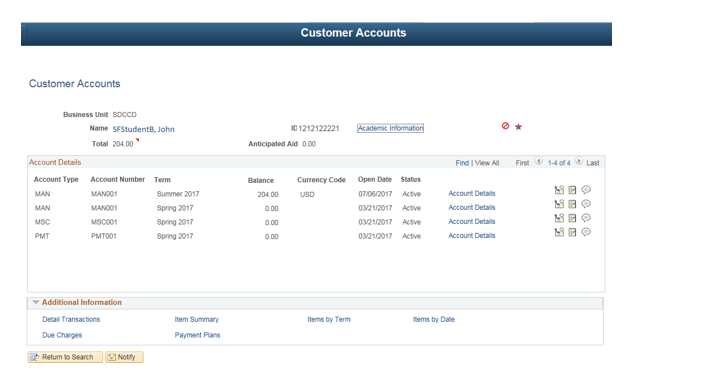
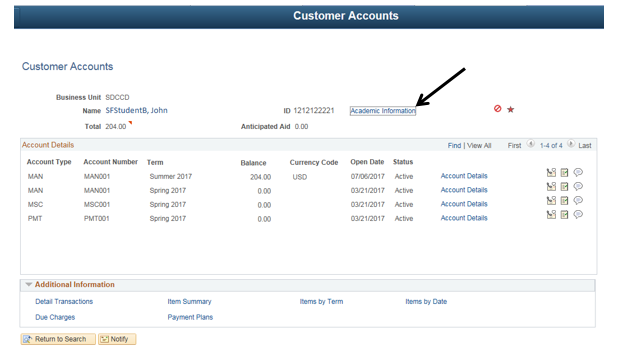
| 4. | Click on the “Academic Information” link to view a student’s Academic Plan and Enrollment for each Term. |
| Step | Action |
|---|---|
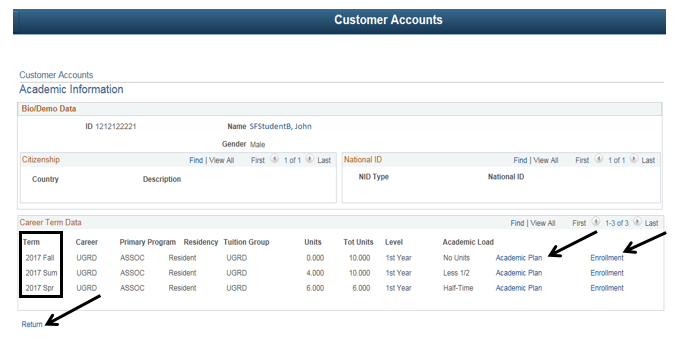
| 5. | Click on any one of the “Academic Plan” links to view the student’s Academic Plan for a specific Term. The specific Terms are located in the left most column of the “Career Term Data” section. Click on any one of the “Enrollment” links to view the student’s Enrollment for a specific Term. Click the “Return” link to go back to the Customer Accounts main page. |
| Step | Action |
|---|---|
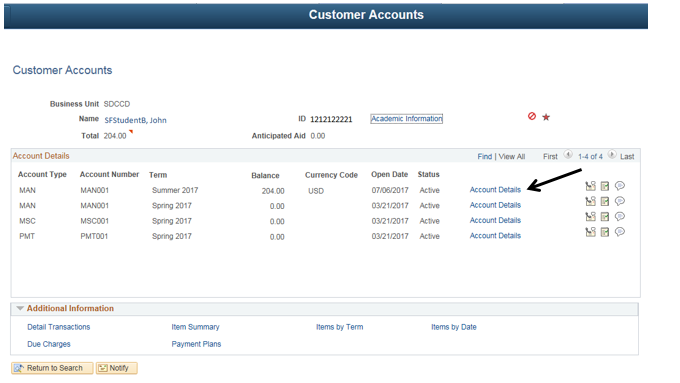
| 6. | Click on any one of the “Account Details” links to view the payment details for the specific Term and Account Type (e.g. MAN, MSC, PMT) |
| Step | Action |
|---|---|
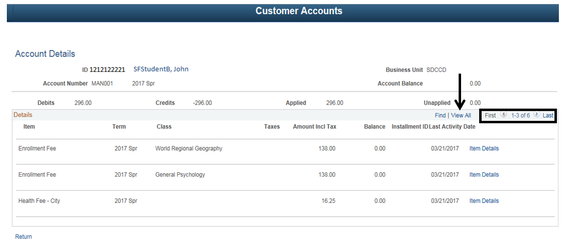
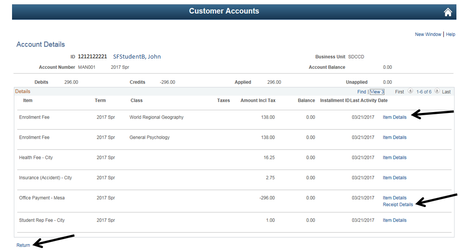
| 7. | PeopleSoft initially shows only three lines of charges and payments. To see how many records there really are, look towards the top right. In the sample screenshot below, there are a total of six records (i.e. 1-3 of 6. PeopleSoft is displaying the first three records and records 4-6 are not being displayed.) Click the “View All” link to see all the charges and payments at once (i.e. 1- 6 of 6). |
| Step | Action |
|---|---|
| 8. | In the sample screenshot below, the Enrollment Fees, Health Fee, Insurance Fee, Rep Fee & Office Payment are broken down by individual line items with the initial charge and the “0.00” Balance, meaning they are paid. If there was still a balance due, the Balance column would match the initial charge column to the left of it. Click any one of the “Item Details” links to get more information. Click the “Receipt Details” link to view the details of that specific payment. (Note: in order to print a copy of that receipt you need to copy the receipt number and navigate |

| Step | Action |
|---|---|
| 9. | End of job aid. |