Third Party Contract - Creating A Course List
Creating A Course List - Third Party Contracts
Label | Description |
|---|---|
| Business Process | Third Party Contracts |
| Module | Student Financials |
| Prerequisites | There must be a Third Party Contract that requires the use of a Course List. |
| Description | This Job Aid illustrates how to create a Course List for a Third Party Contract and how it will affect the Third Party Contract. |
Instructions:
Step | Action |
|---|---|
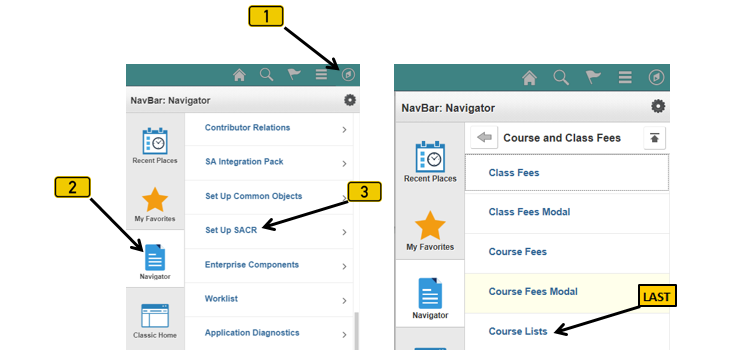
| 1. | Click on [ |


| Step | Action |
|---|---|
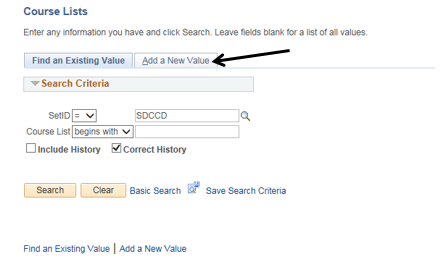
| 2. | Click the “Add a New Value” page (tab). |
| Step | Action |
|---|---|
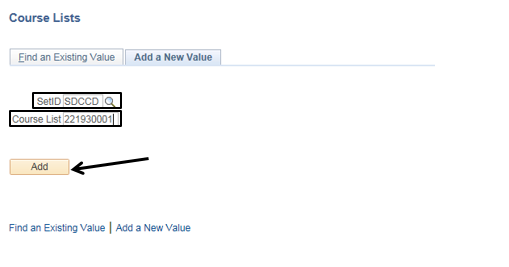
| 3. | Confirm that the “SetID” field = “SDCCD”
The name of a Course List consists of nine numbers (e.g. “221930001”). The naming convention for a Course List is as follows:
So, “221930001” = Mesa, for the Spring 2019 term (semester), and it is the first Course List for the term. |
| Step | Action |
|---|---|
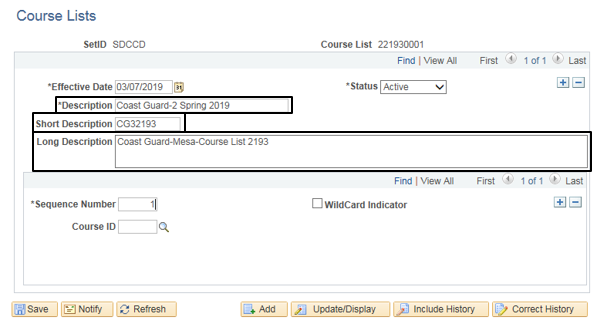
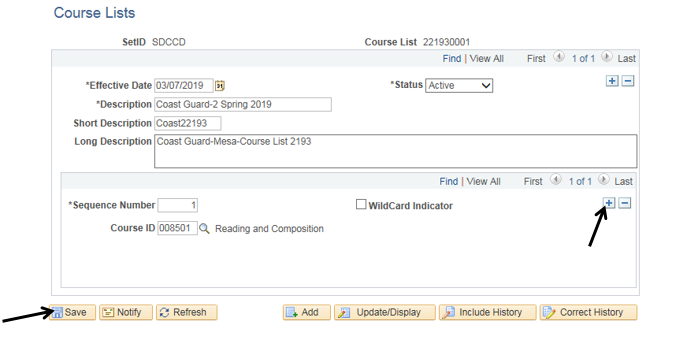
| 4. | Enter the “*Description”, “Short Description” and “Long Description” for the Course List. |
| Step | Action |
|---|---|
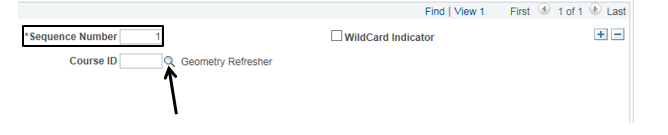
| 5. | Enter a “1” into the “*Sequence Number” field for the first class you want your Course List to cover. Then click the magnifying glass [ |

| Step | Action |
|---|---|
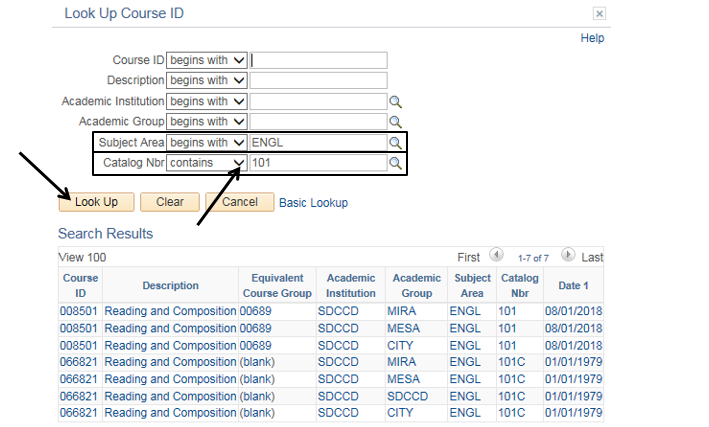
| 6. | In the “Subject Area” field, enter the appropriate Subject Abbreviation (e.g. “ENGL” for English). In the “Catalog Nbr” section, click [ |

| Step | Action |
|---|---|
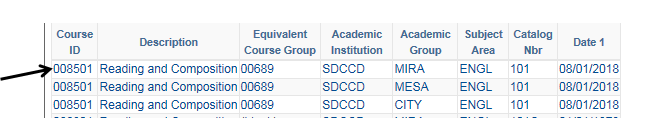
| 7. | Select the appropriate “Course ID”. Note: There are multiple Classes under each Course ID. If a student drops and adds a class that has the same Course ID but is at a different time or location, the Contract will still pay for the course. |
| Step | Action |
|---|---|
| 8. | Click “Save”. Click the “plus sign” [  ] to add any additional classes covered by the Course List. Follow steps 5 – 8 until all classes have added. Keep in mind that the “*Sequence Number” field should be filled out sequentially (e.g. 1, 2, 3, 4, etc.) as classes are added. ] to add any additional classes covered by the Course List. Follow steps 5 – 8 until all classes have added. Keep in mind that the “*Sequence Number” field should be filled out sequentially (e.g. 1, 2, 3, 4, etc.) as classes are added. |
| Step | Action |
|---|---|
| 9. | End of job aid. |