Assigning A Service Indicator
Assigning A Service Indicator
Label | Description |
|---|---|
| Business Process | Service Indicators |
| Module | Student Financials |
| Prerequisites | Student must exist in PeopleSoft |
| Description | This Job Aid illustrates how to assign a Service Indicator to a student. |
Instructions:
Step | Action |
|---|---|
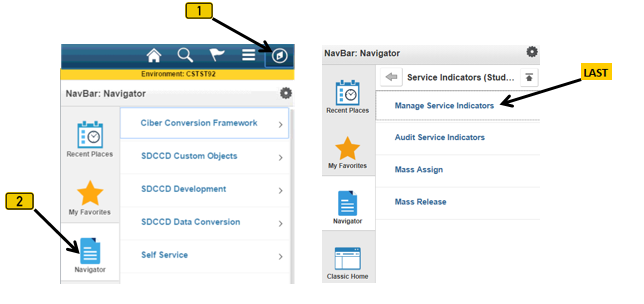
| 1. | Click on [ |


| Step | Action |
|---|---|
| 2. | Enter the student’s ID into the “ID” field then click the “Search” button. |

| Step | Action |
|---|---|
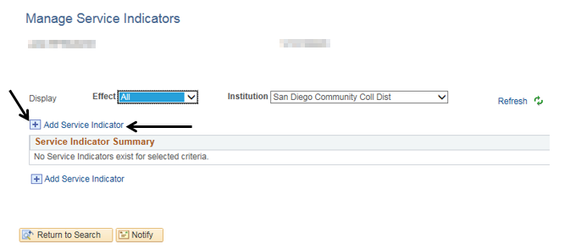
| 3. | Click the “plus” sign or the “Add Service Indicator” link [ |

| Step | Action |
|---|---|
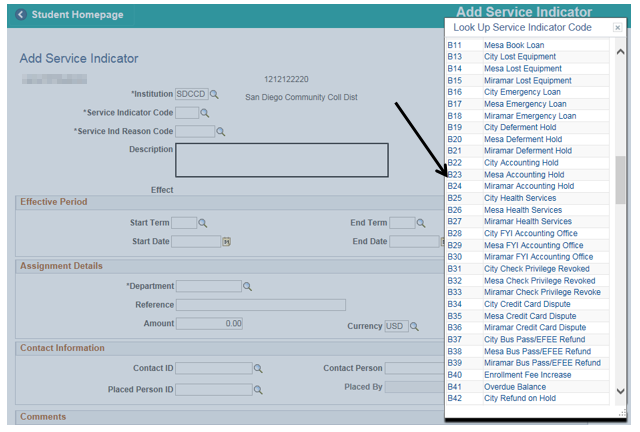
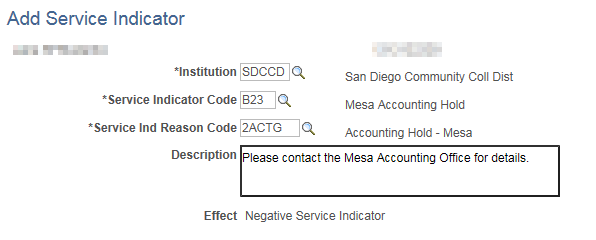
| 4. | Click on the magnifying glass next to the “Service Indicator Code” field [ |

| Step | Action |
|---|---|
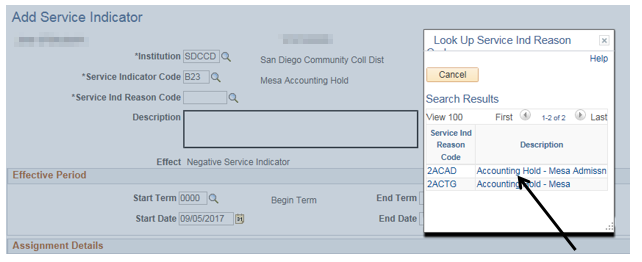
| 5. | Click the magnifying glass next to the “Service Ind Reason Code” field [] to display a list of “Service Indicator Reasons”. Select the appropriate reason (e.g. Accounting - Hold Mesa) |
| Result of Step 5 |
|---|
| Your selection will populate into the “Service Ind Reason Code” field and a preset description will populate the “Description” field. |
| Step | Action |
|---|---|
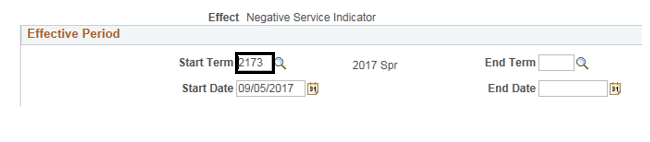
| 6. | Enter the appropriate semester into the “Start Term” field (e.g. 2173 for the Spring 2017 semester). |
| Step | Action |
|---|---|
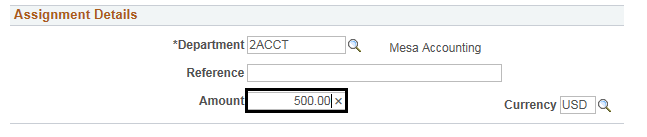
| 7. | If there is a monetary value associated with the Service Indicator, enter it into the “Amount” field in the “Assignment Details” section. |
| Step | Action |
|---|---|
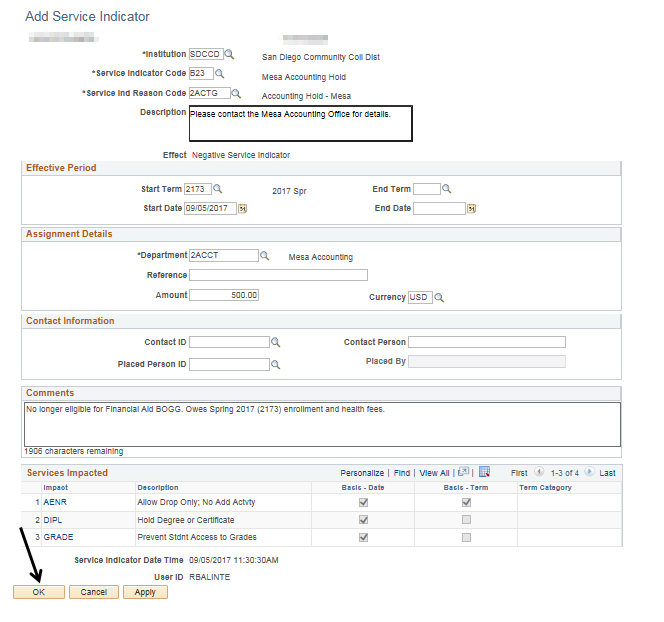
| 8. | Use the “Comments” field to add additional information regarding the Service Indicator (limit 2,000 characters). |

| Additional Information |
|---|
| At the bottom of the “Add Service Indicator” page is the “Services Impacted” section, which, based on the type of Service Indicator, details how the Service Indicator affects the student. |

| Step | Action |
|---|---|
| 9. | Click the “OK” button at the bottom left corner. You will be returned to the first page of the “Manage Service Indicators” process. |
| Step | Action |
|---|---|
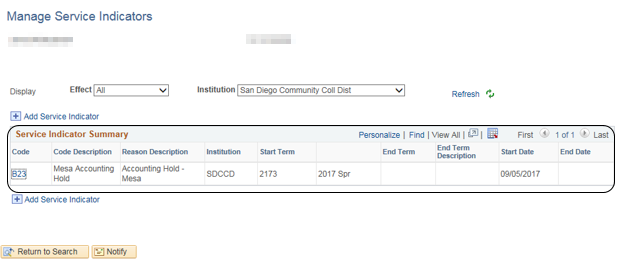
| 10. | Follow steps 3 thru 9 to add more Service Indicators to the same student. Note that the Student Indicator that was just placed is now summarized. |
| Step | Action |
|---|---|
| 11. | End of job aid. |