Summary
Label | Description |
|---|---|
| Prerequisites |
|
| Description | This Job Aid illustrates how the Accounting Cashier enters a payment for a student’s Payment Plan (Cashier’s POV). |
Instructions:
| Step | Instructions |
|---|---|
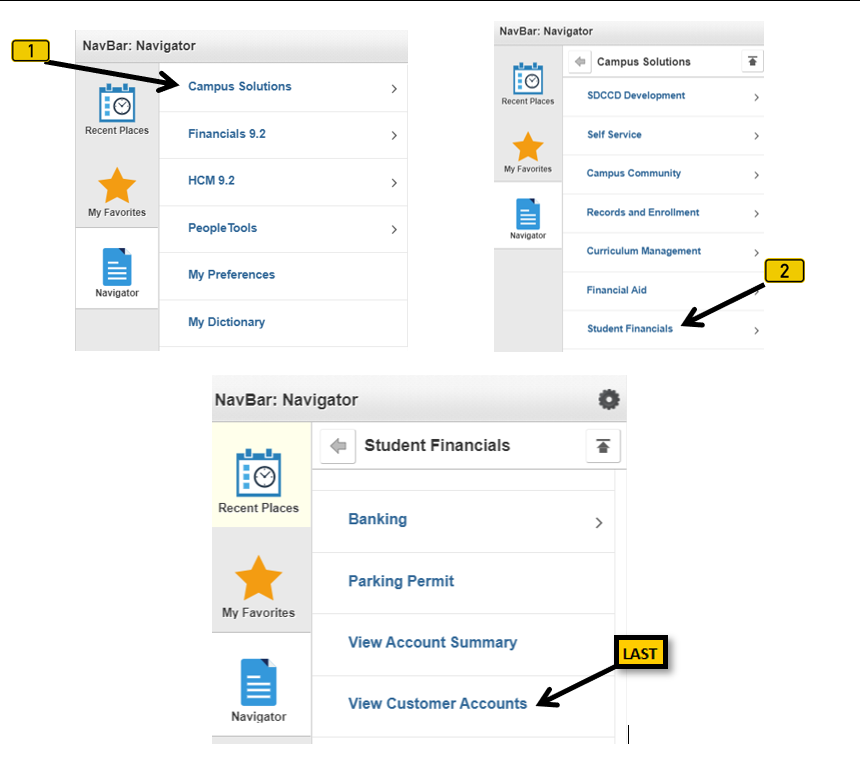
| 1 | Navigate to Campus Solutions > Student Financials > View Customer Accounts
|
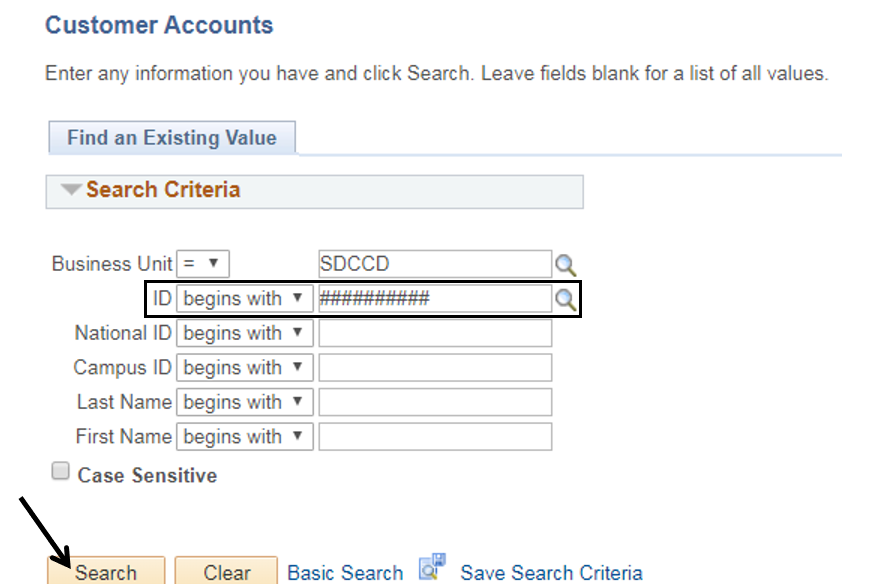
| 2 | Enter the Student’s ID# into the “ID” field. Click “Search”.
|
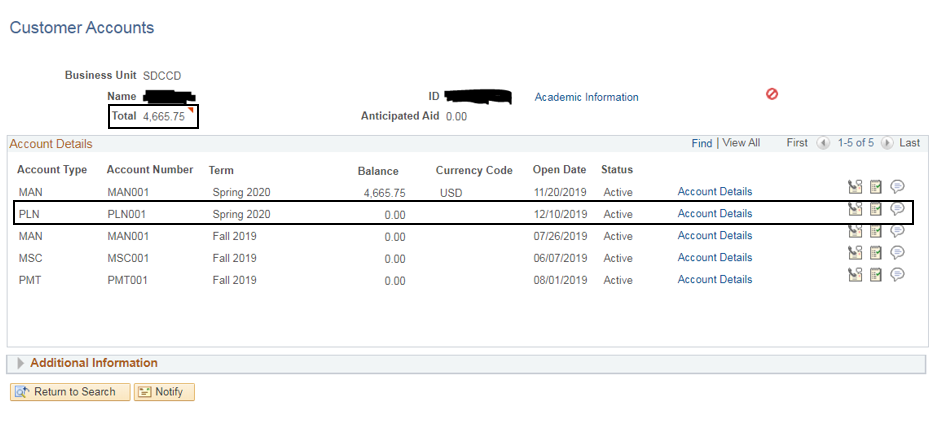
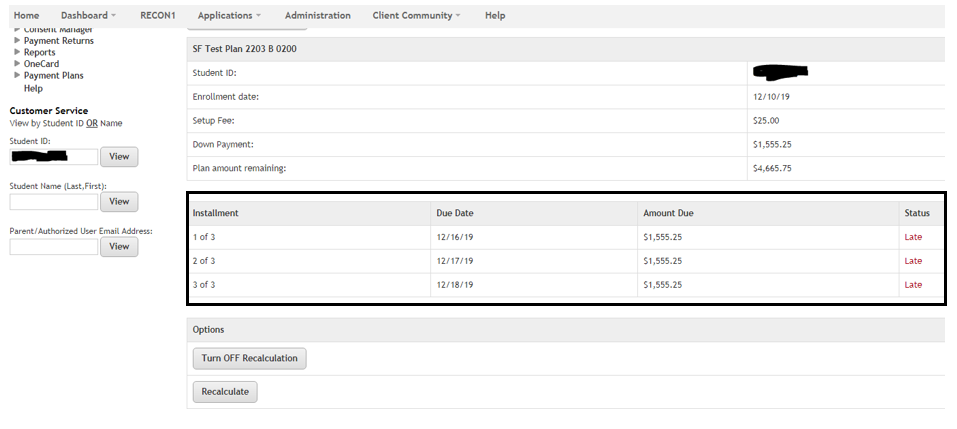
| 3 | Confirm student is enrolled in a Payment Plan and has a balance due. Look for “PLN” in the Account Type column. |
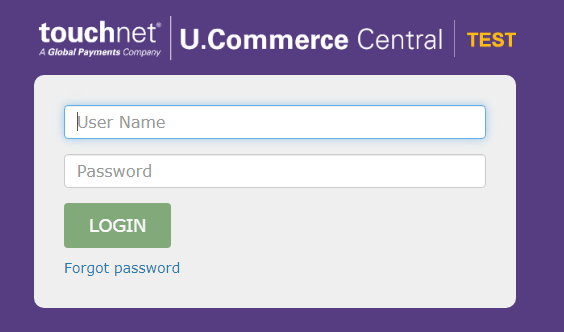
| 4 | Login to TouchNet to see the details of the student’s Payment Plan
|
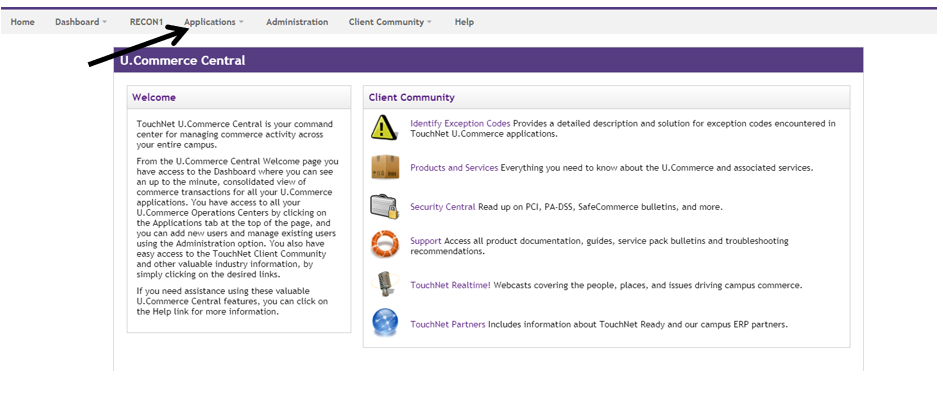
| 5 | Click Applications |
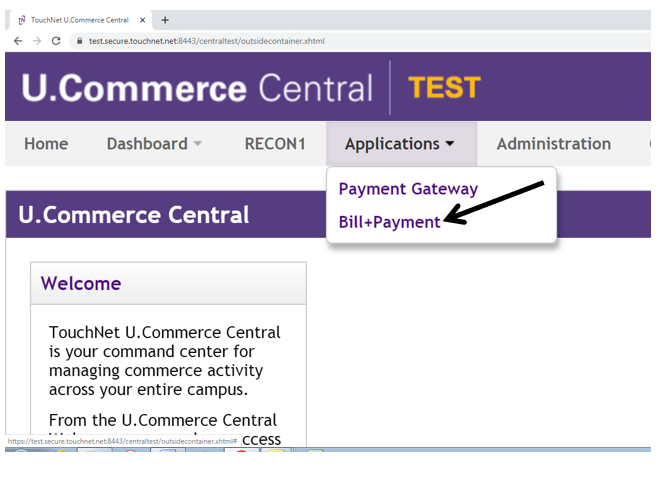
| 6 | Click “Bill+Payment” |
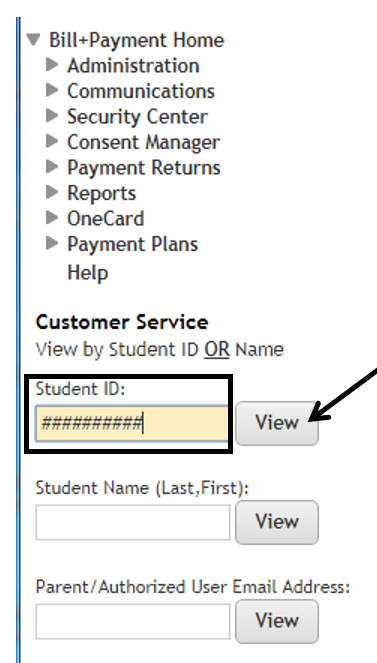
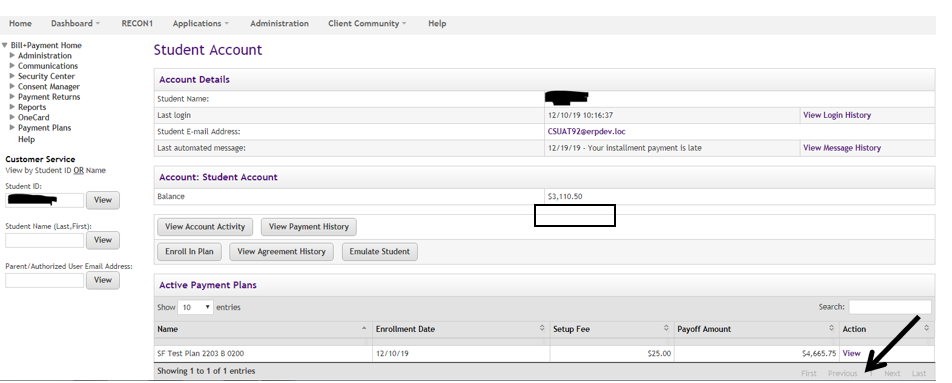
| 7 | On the left side of the screen, enter the Student’s ID into the “Student ID” field, then click “View” |
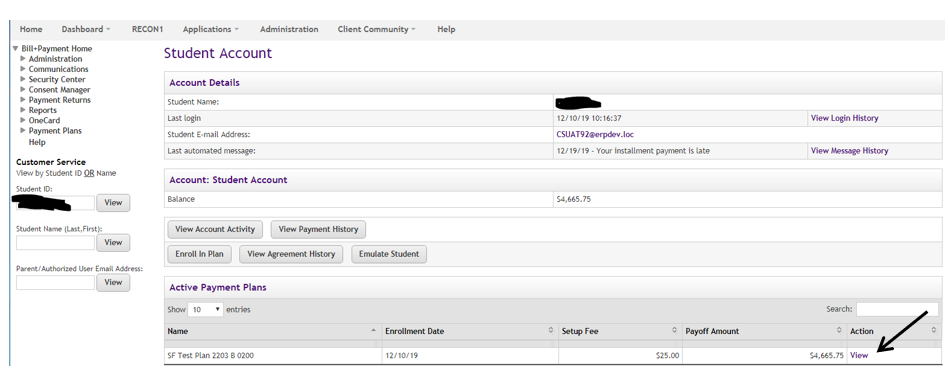
| 8 | Click the “View” link in the “Action” column to see a breakdown of the student’s due payments. |
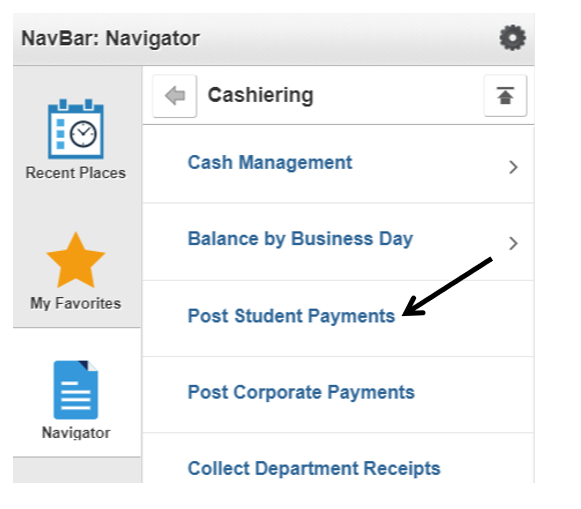
| 9 | To enter a student’s payment, go back to Campus Solutions in PeopleSoft and navigate to Campus Solutions > Student Financials > Cashiering > Post Student Payments |
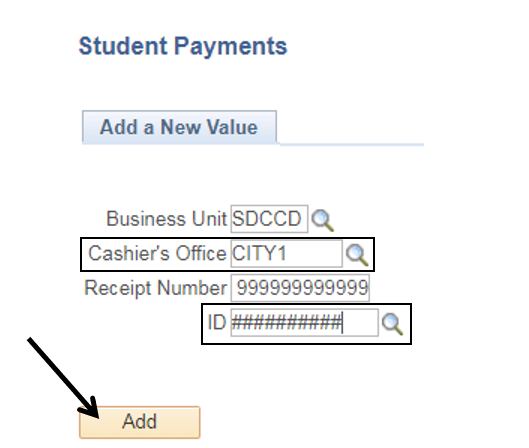
| 10 | Enter the appropriate “Cashier’s Office” and “Student’s ID#”, and then click “Add”. |
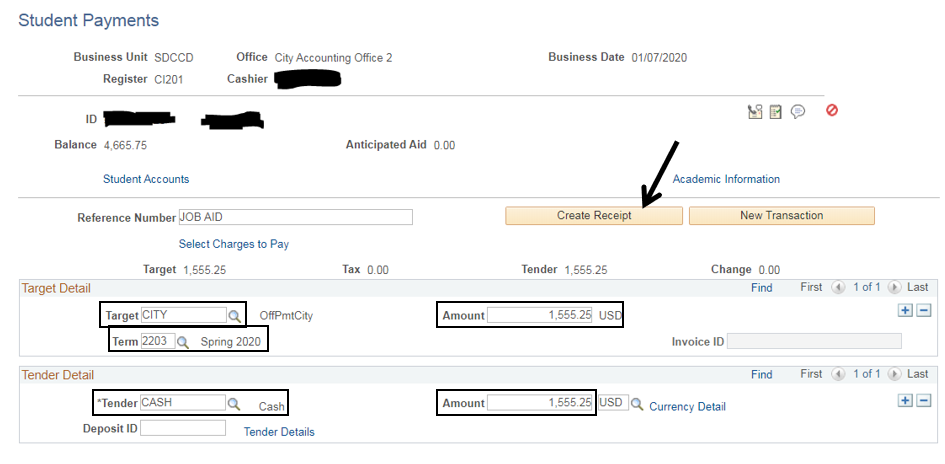
| 11 | In the “Target Detail” section, enter the appropriate information in the “Target”, “Amount”, and “Term” fields. In the “Tender Detail” section, enter the appropriate information in the “*Tender” and “Amount” fields. Click “Create Receipt”. |
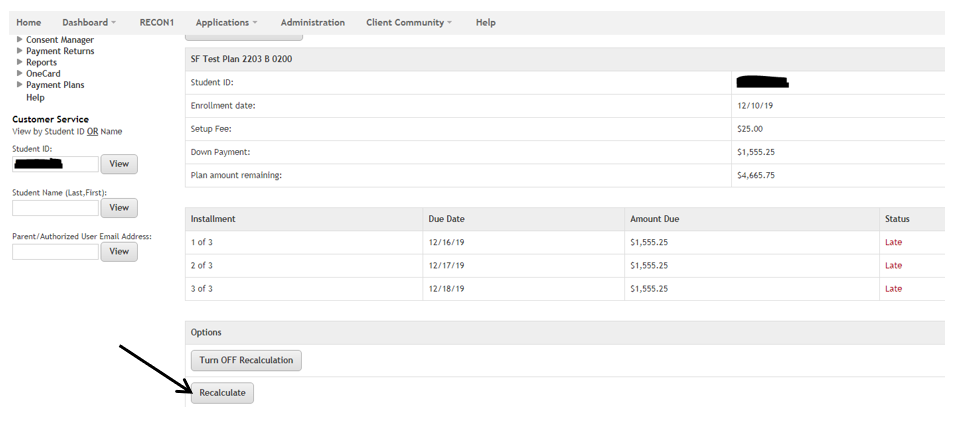
| 12 | Return to TouchNet to confirm the payment has gone through and to recalculate the student’s Payment Plan. In the “Active Payment Plans” section, click the “View” link. |
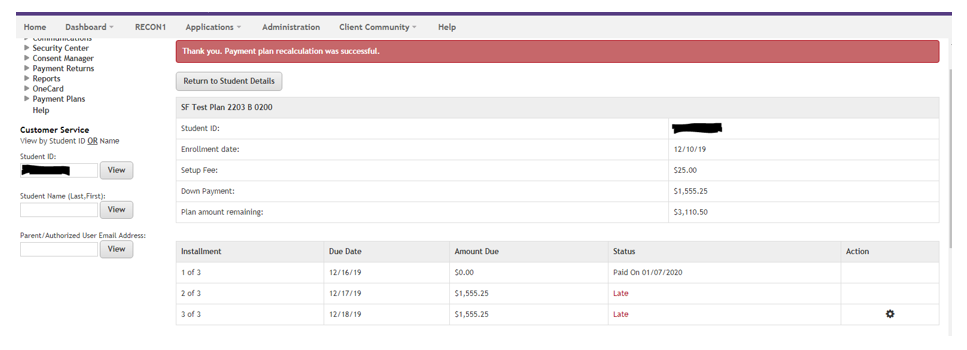
| 13 | Click “Recalculate” to recalculate the Payment Plan. |